The holiday season is here, and with it comes the delightful opportunity to express your style with xmas nails. As decorations fill the streets and the scent of gingerbread wafts through the air, it’s hard not to get swept up in the festive spirit. Whether you’re joining in on a family holiday party or simply enjoying cozy nights at home, what better way to celebrate than by adorning your nails with cheerful designs? I created this post because I know how much joy festive nail art can bring, especially for kids excited to embrace the holiday cheer.
If you’re a parent looking for fun and creative holiday nail designs for your little ones, you’re in the right place! This collection of cute Christmas nails is perfect for kids who want to join in the festivities. Together, you can create lasting memories while getting crafty with a variety of nail art ideas that are both adorable and easy to apply. From whimsical Santas to twinkling Christmas lights, there’s something here for everyone to enjoy.
In this guide, you’ll discover 18 festive nail art ideas that are cute, glam, and sure to spread holiday cheer. Each design is crafted for fun and creativity, making it easy for you and your kids to express your holiday spirit. Get ready for a merry manicure adventure that will light up your holiday season!
Key Takeaways
– Explore 18 creative xmas nails ideas tailored specifically for kids, ensuring they can celebrate the holiday in style.
– Find a mix of festive nail art designs that are easy to apply, making it fun for both parents and children.
– Each nail design includes classic holiday themes, from Santa and reindeer to glittery Christmas trees, offering something for every child’s taste.
– Discover tips on how to make the nail art process enjoyable and engaging, strengthening bonds through creativity.
– Get inspired by current seasonal nail trends that are perfect for creating memorable holiday moments with your loved ones.
1. Glittery Red and Green Combo
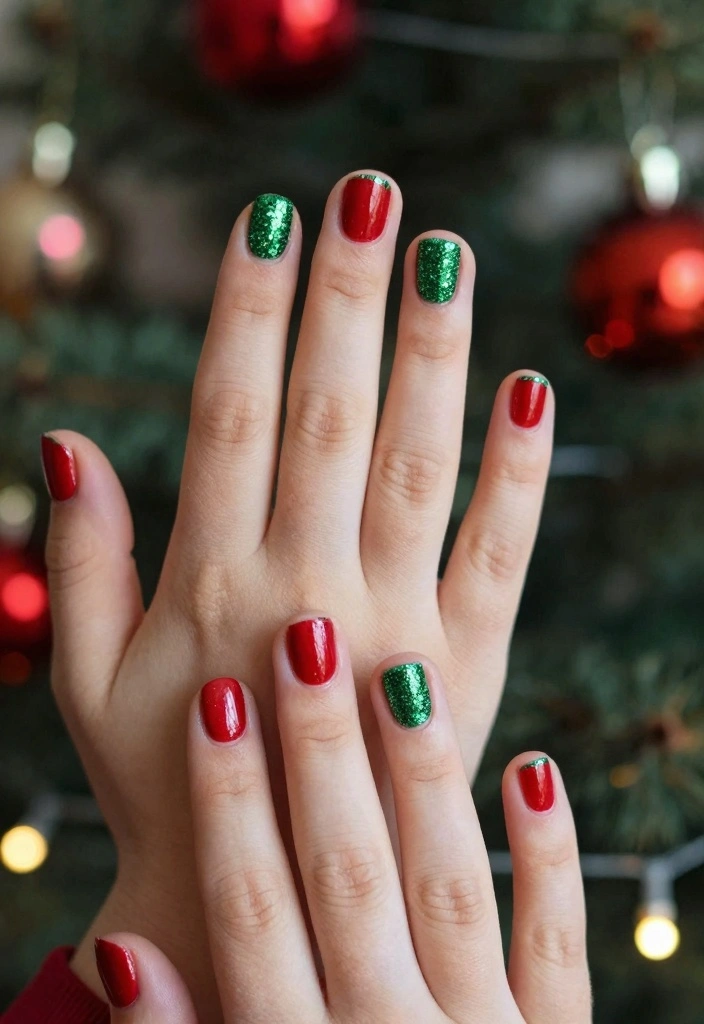
If you’re looking for a festive nail design that truly captures the spirit of Christmas, the classic red and green combo is perfect! Picture bright red nails with sparkling green tips that shimmer in the light. This design is not only eye-catching but also playful, making it ideal for kids who want to celebrate the season in style.
To achieve this fun look, start with a protective base coat to keep nails healthy. Apply two even coats of vibrant red polish, ensuring each layer dries completely. For the festive touch, carefully add green glitter to the tips using a fine brush or glitter polish, creating a delightful contrast.
Tips:
– Clean up any excess polish around cuticles for a neat finish.
– Seal with a top coat for extra shine and longevity.
Ingredients:
– Red nail polish (2 coats)
– Green glitter polish or loose glitter
– Base coat
– Top coat
Frequently Asked Questions:
1. What if my child has sensitive skin?
Choose kid-friendly, non-toxic nail polishes.
2. How long will this design last?
With a good top coat, expect it to last about a week.
This charming design showcases the joy of the season and is perfect for little ones eager to shine bright!
2. Santa and Reindeer Nails
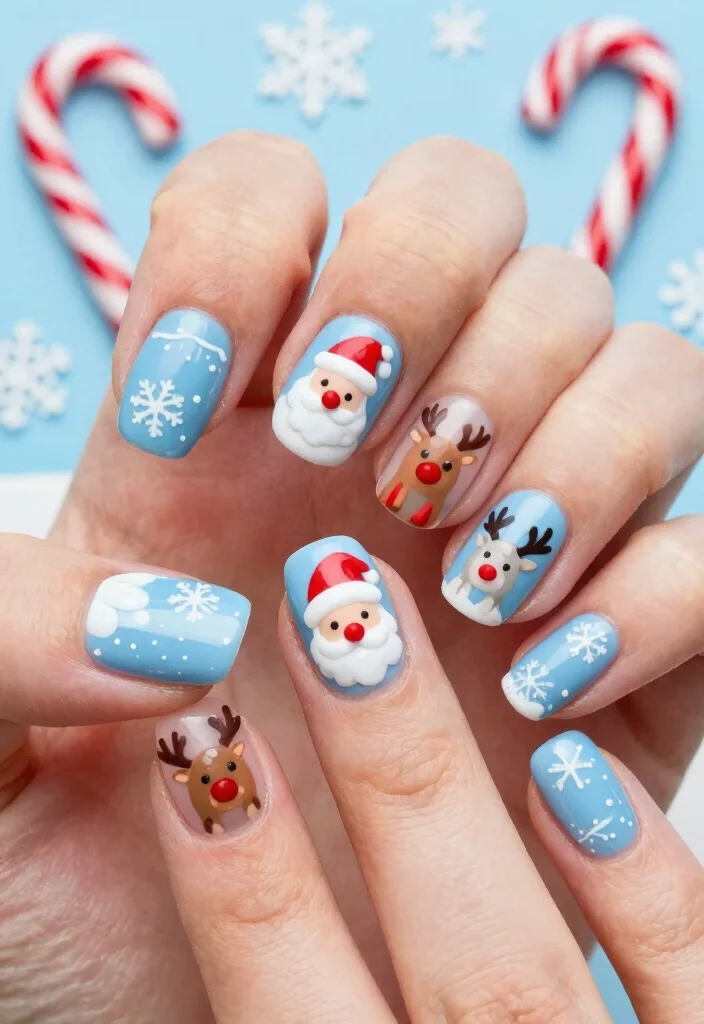
Transform your child’s nails into a delightful holiday scene featuring Santa and his reindeer! This whimsical design encourages creativity and spreads festive cheer, making it a fantastic choice for kids who enjoy storytelling.
Begin by applying a soft blue polish for a winter sky effect. On a couple of accent nails, paint a cheerful Santa face, while others can showcase a cute reindeer with a bright red nose. Use red and white for Santa’s hat and brown for the reindeer’s body—this design can be a fun family activity too!
Ingredients:
– Light blue nail polish (base)
– White and red polish (Santa’s hat)
– Brown polish (for the reindeer)
– Black and white polishes (for details)
Step-by-Step Instructions:
1. Apply the light blue base coat and let dry.
2. Use a fine brush to paint Santa’s face and hat on the accent nails.
3. Create the reindeer design using brown polish and add a red nose.
4. Seal with a top coat for a polished finish!
FAQs:
1. Can I use stickers instead?
Yes, festive stickers can simplify the design!
2. How do I remove nail polish safely?
Opt for a gentle nail polish remover suitable for kids.
This design is perfect for imaginative kids who love the magic of the holiday season!


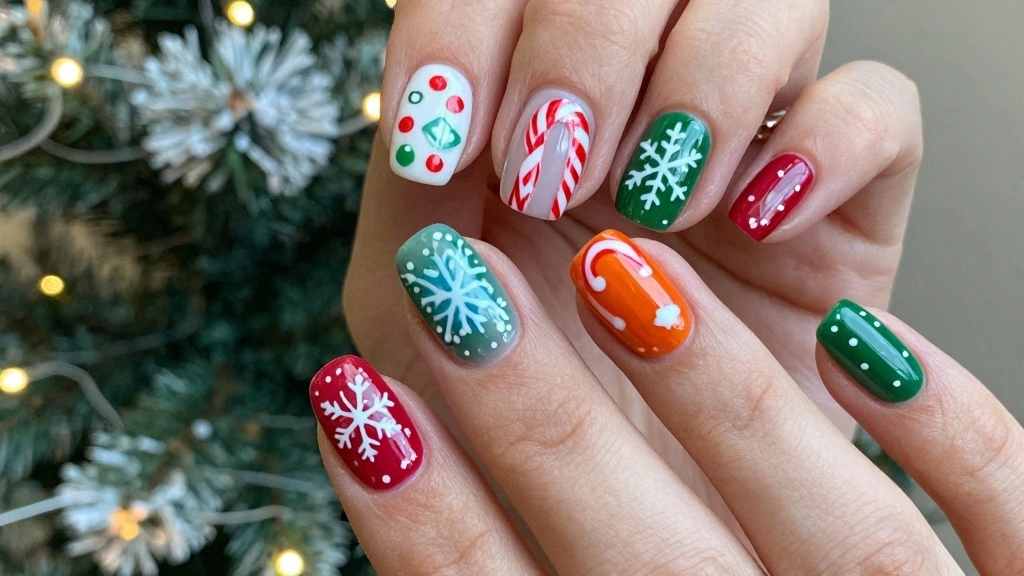
3. Snowflake Delight
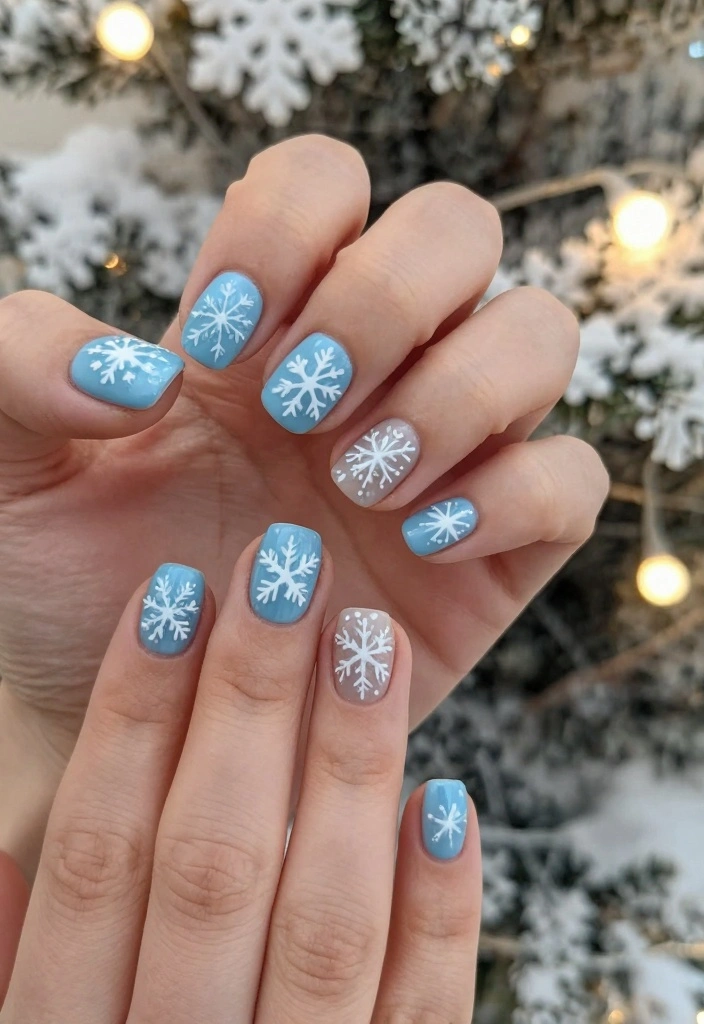
Capture the beauty of winter with a charming snowflake design on your nails! This delightful idea features white snowflakes against a soft pastel background, perfectly embodying the spirit of a snowy Christmas.
Start by applying a pastel polish as your base. Once it’s dry, use a fine brush or nail art pen to create unique snowflake designs on each nail. Since no two snowflakes are alike, this is a fun and creative project for kids to express their artistic flair!
Ingredients:
– Pastel nail polish (blue or lavender)
– White nail polish or nail art pen (for snowflakes)
– Top coat to finish
Instructions:
1. Apply the pastel polish as a base and let dry.
2. Create unique snowflake patterns on each nail with white polish or pen.
3. Finish with a top coat for durability.
This design shines in its simplicity, making it a lovely choice for the holiday season!
4. Candy Cane Chic
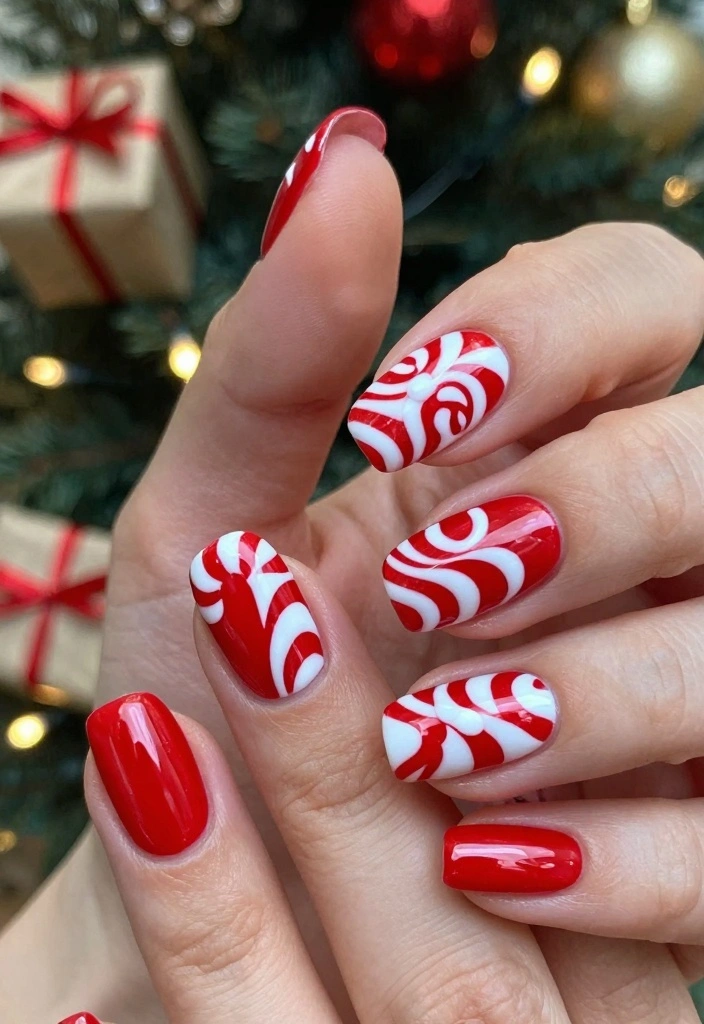
Celebrate the sweetness of the season with a candy cane design! This fun nail art features the iconic red and white striped pattern that brings festive cheer to your child’s fingertips.
Begin by applying a bright red polish as the base color. Once it dries, use a thin nail art brush to create diagonal white stripes across the nails. For a playful twist, add cute candy cane accents on a couple of nails for a delightful mix!
Ingredients:
– Bright red nail polish (base)
– White nail polish (for stripes)
– Top coat for finishing
Instructions:
1. Paint the nails with red polish and let dry completely.
2. Use the thin brush to add diagonal stripes with white polish on one or two nails.
3. Apply a top coat for extra shine and to protect the design.
Tips:
– Ensure that each layer dries completely to avoid smudging.
– Use nail tape for cleaner lines if needed.
This design brings a sweet touch to holiday celebrations!
5. Festive Penguin Pals
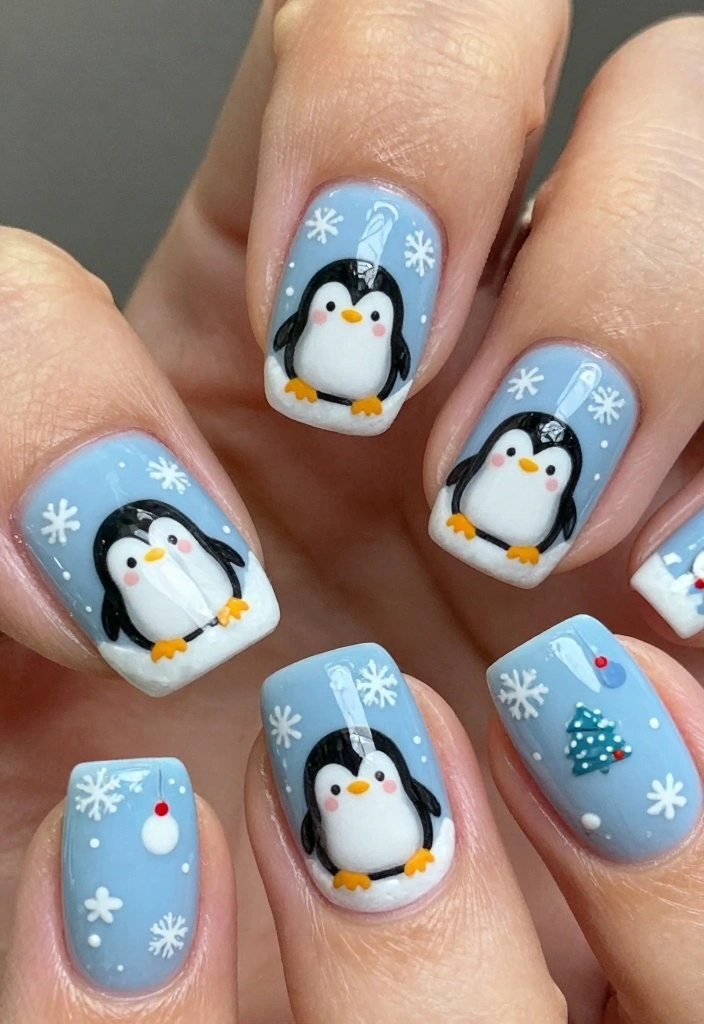
Who can resist the charm of penguins during the holidays? This adorable nail art idea features playful penguins set against a snowy blue background!
Start with a pastel blue polish as the base color. Once dry, use black and white polishes to paint tiny penguin faces on a couple of accent nails, complete with bright orange beaks. Feel free to add tiny snowflakes or hearts for extra flair. This design is not just festive; it’s full of character!
Ingredients:
– Pastel blue nail polish
– Black, white, and orange nail polishes
– Top coat for protection
Instructions:
1. Apply the pastel blue polish and let it dry completely.
2. Paint small penguin faces on two accent nails using black and white polishes.
3. Add orange beaks and additional details like snowflakes.
4. Finish with a top coat for durability.
Make this design a fun bonding activity by letting kids create their own penguins!
6. Christmas Tree Sparkle
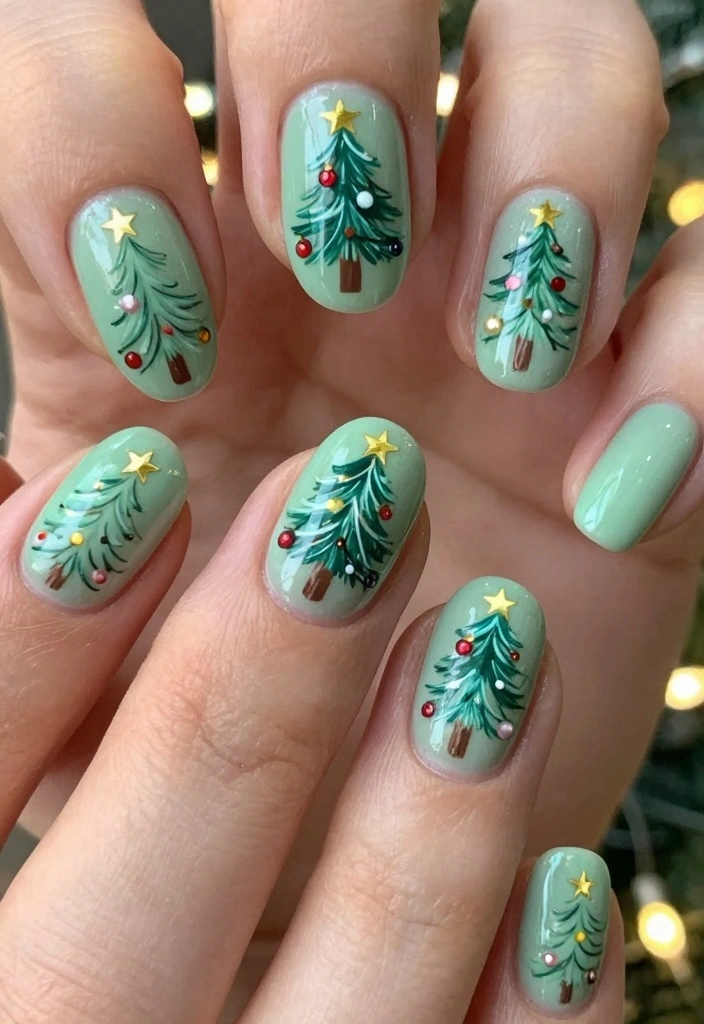
Bring the festive spirit to life with a charming Christmas tree design! This delightful nail art features tiny decorated trees that your little ones will adore!
Begin with a light green polish as the base for a fresh holiday look. Use a darker green polish to paint small triangle shapes that resemble trees. Decorate these trees with colorful dots for ornaments, and don’t forget to add a star on top! For an extra touch, sprinkle on some glitter for sparkle!
Ingredients:
– Light green polish (base)
– Dark green polish (for trees)
– Various colors for ornaments
– Glitter nail polish (optional)
– Top coat
Instructions:
1. Paint the nails with light green polish and allow to dry.
2. Add dark green triangle shapes for the trees.
3. Decorate with colorful dots for ornaments and a star on top.
4. Finish with a top coat for a festive shine.
Let your kids unleash their creativity with their own unique designs!
How To Choose The Right Xmas Nails for Kids
When it comes to selecting the perfect Xmas nails for kids, there are several factors to consider. You want them to be festive, cute, and safe. Here are some key points to help you make the best choice for a holiday-themed nail art that your child will love.
1. Nail Design
The design is the first thing to consider. Look for cute Christmas nails featuring fun themes like Santa, snowmen, or reindeer. Kids often enjoy seeing their favorite characters or symbols of the season. Think about what your child enjoys and choose designs that reflect their interests. You can find a wide variety of holiday nail designs that are both cute and festive.
2. Safety and Non-Toxicity
Safety is crucial when selecting nail products for kids. Always opt for non-toxic nail polishes that are free from harmful chemicals like formaldehyde and toluene. These safer options not only protect your child’s health but also make for easier clean-up and removal. Brands that offer kid-friendly nail products often have special formulations that are gentle on young nails.
3. Ease of Application
Look for nail art kits that come with user-friendly application tools. Stickers and decals can be a great choice since they require no drying time and are easy for kids to apply. You might also consider peel-off nail polish, which allows for a fun experience with easy removal. Make sure your child can easily use the products without much assistance, promoting their creativity and independence.
4. Color Selection
Colors play a big role in nail art. Festive shades like red, green, gold, and silver are always popular for Xmas nails. Encourage your child to pick their favorite colors that match their personality. Mix and match different shades for a more vibrant look. Consider a combination of glitters and shimmers to add extra holiday cheer.
5. Longevity and Durability
Kids are active, so you want to choose nail products that can withstand wear and tear. Look for chip-resistant formulas or designs that can last a couple of weeks without significant fading. Glitter and gel polishes tend to hold up better than regular nail polish. Check reviews or product descriptions to find the best options for durability.
6. Seasonal Trends
Stay updated on seasonal nail trends to find the perfect style for your child. Popular ideas for this Christmas include candy canes, snowflakes, or even little elves. You can also find inspiration from social media or nail art blogs that focus on holiday-themed nail designs. This can help in selecting something trendy that your child will be excited about.
Pro Tip: Ensure to set aside time for a fun nail art session. Gather all your supplies, play some Christmas music, and make it a festive bonding experience! Kids will love the process just as much as the final look. Enjoy the creativity, and let your child express their personality through their nail art!
7. Shiny Gold Stars
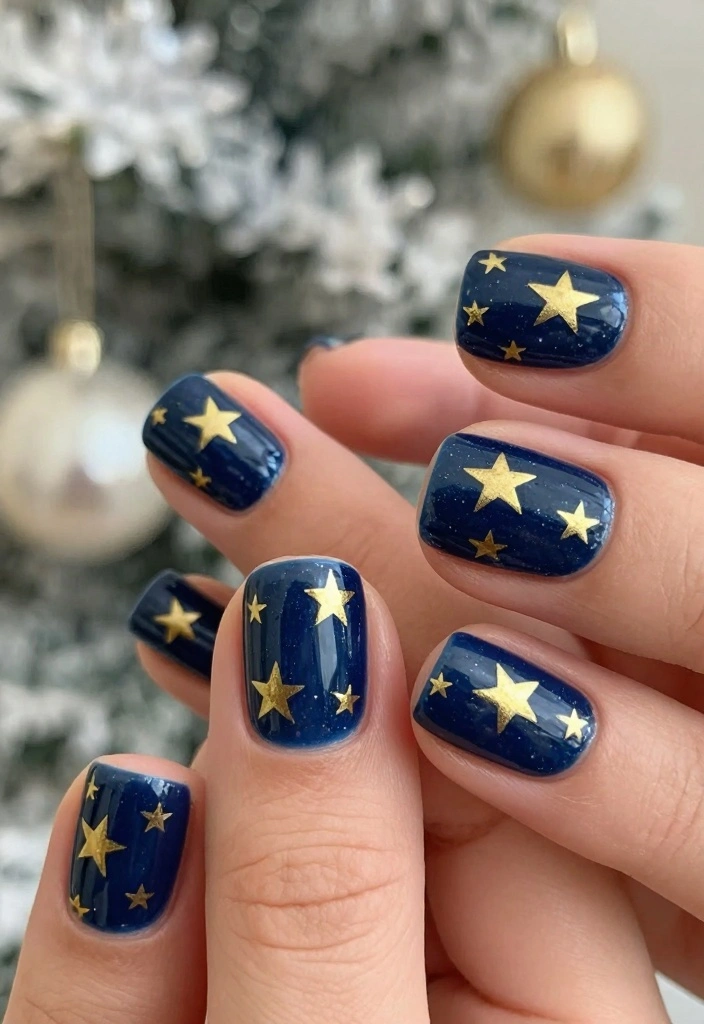
Glistening gold stars are a classic holiday symbol and make for a chic yet simple nail art design! This idea is perfect for special occasions during the festive season.
Select a deep navy blue or classic red as your base color. Once dry, use gold polish to create star shapes on a few accent nails, adding a touch of shimmer to the overall look. Pair with a top coat for a protective finish that enhances the glam!
Ingredients:
– Deep navy blue or red nail polish
– Gold nail polish (for stars)
– Top coat
Instructions:
1. Apply your chosen base color and let dry.
2. Use a fine brush or nail art pen to create star shapes on accent nails.
3. Finish with a top coat to protect the design and enhance the shine.
This design is perfect for holiday parties or family gatherings, adding an elegant touch!
8. Rudolph the Red-Nosed Reindeer
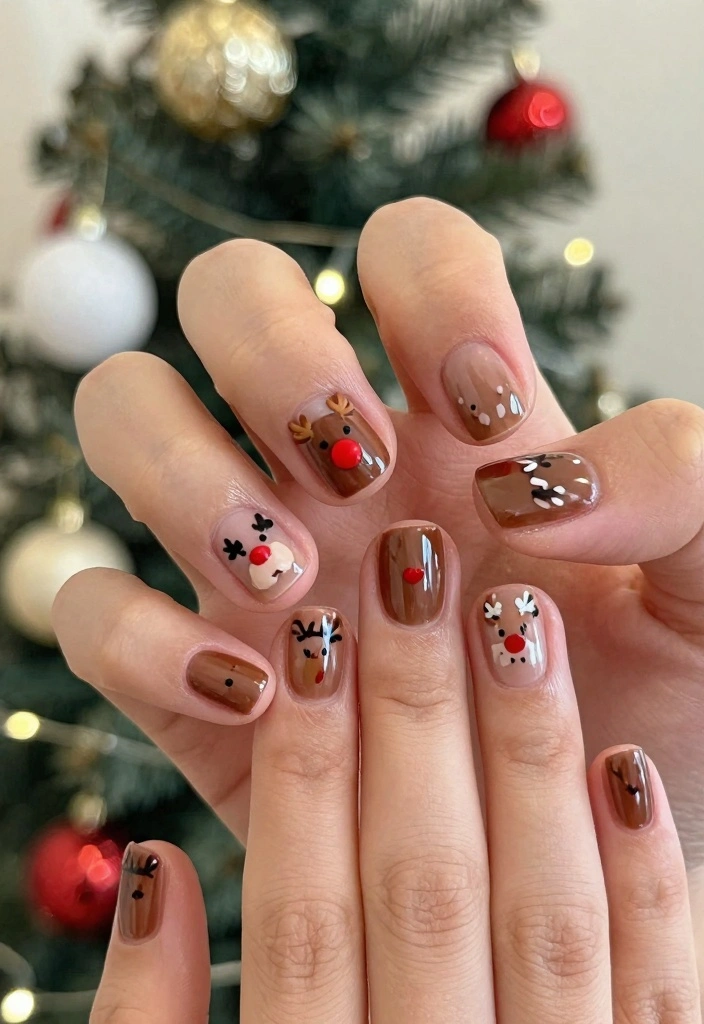
Celebrate the joy of Christmas with a playful Rudolph design! This cheeky little reindeer can be painted on a few accent nails for a fun twist.
Start with a soft brown polish as your base. For Rudolph, use dark brown polish for his body and bright red for his nose. Add little antlers using a thin brush or stamping technique. Complete the look with a glossy top coat for a polished finish!
Ingredients:
– Soft brown polish (base)
– Dark brown polish (for Rudolph)
– Red nail polish (for the nose)
– Top coat
Instructions:
1. Apply the soft brown base coat and let it dry.
2. Using dark brown polish, paint Rudolph on accent nails.
3. Add a red nose and antlers.
4. Finish with a top coat for a shiny finish!
This design is a delightful way to embrace the holiday spirit and is sure to be a hit among kids!
9. Gingerbread Man Delight
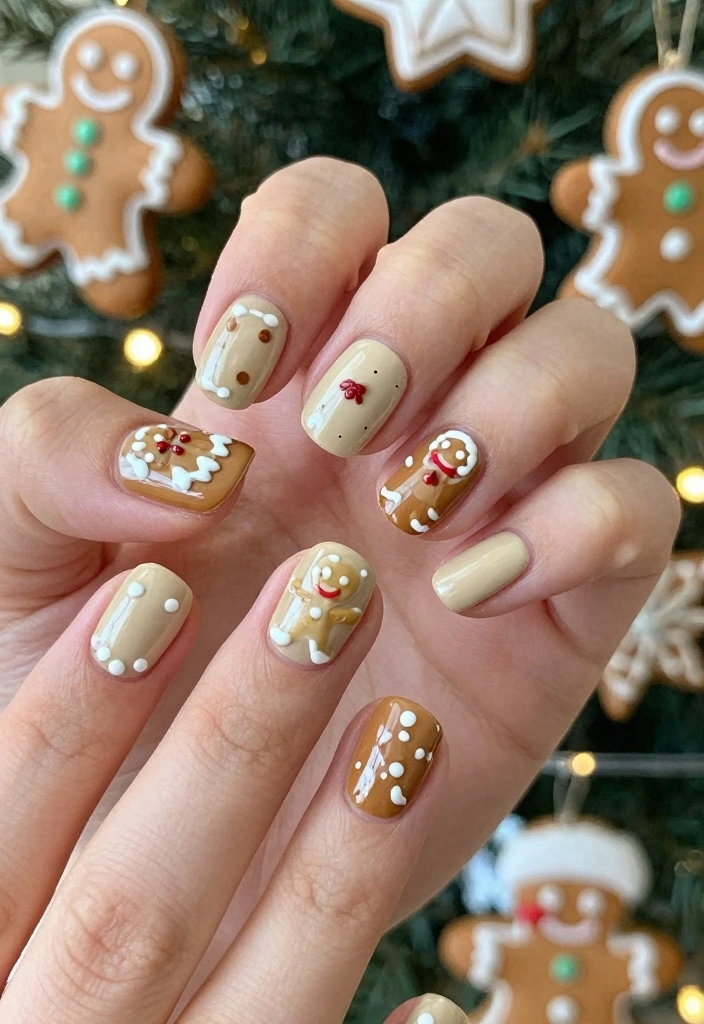
Infuse your child’s nails with the sweet spirit of the season through a gingerbread man design! This delightful nail art brings a touch of sweetness to festive fun.
Use a warm beige polish for the base color. On a couple of accent nails, paint a cute gingerbread man with white icing details. A fine brush is perfect for adding intricate designs, like buttons and a little scarf!
Ingredients:
– Warm beige nail polish (base)
– Brown nail polish (for the gingerbread man)
– White polish (for icing details)
– Top coat for finishing
Instructions:
1. Apply the warm beige nail polish as the base and let dry.
2. Paint the gingerbread man on the accent nails using brown polish and add white icing details.
3. Seal the design with a top coat for durability.
This design not only looks adorable but also makes celebrating the season extra fun!
10. Holiday Lights
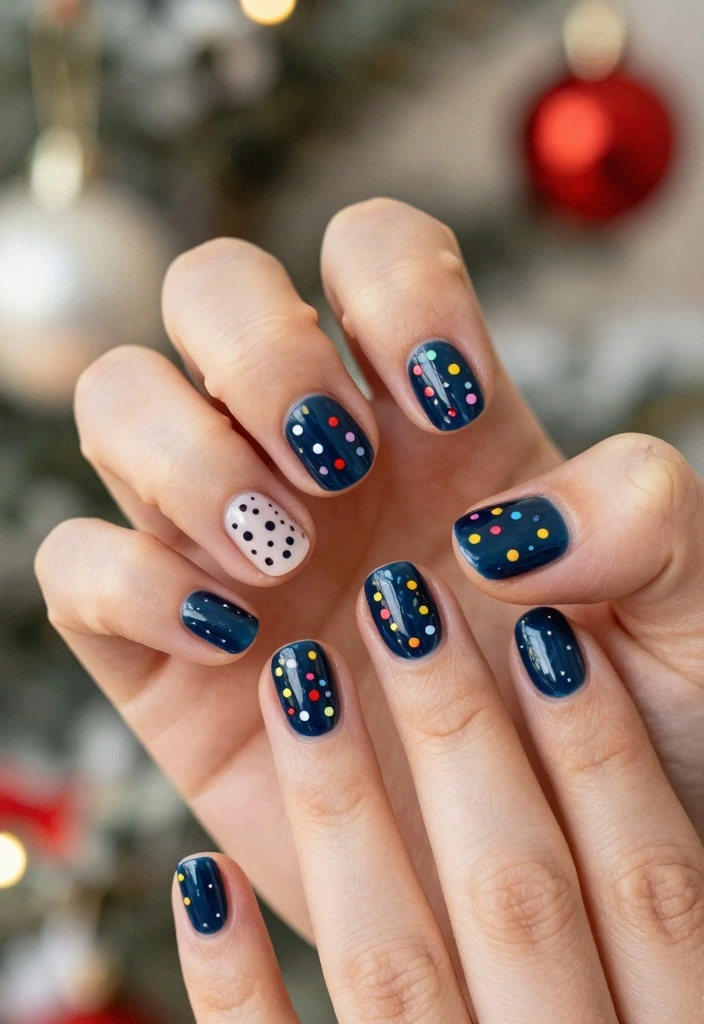
Brighten your holiday season with a festive lights design! This nail art mimics the twinkling lights you’ll see everywhere during this joyous time.
Select a dark base color like navy, then paint colorful dots resembling holiday lights on the tips of the nails. Use a thin brush or dotting tool to create the lights, and don’t hesitate to use a variety of colors for a lively effect!
Ingredients:
– Dark navy nail polish (base)
– Various colors for lights (red, green, yellow, blue)
– Top coat for shine
Instructions:
1. Apply the dark base coat and let it dry thoroughly.
2. Use a dotting tool to create colorful dots along the tips of the nails.
3. Finish with a top coat for a glossy finish.
This design is a fun way to replicate the excitement of holiday lights on your nails!
Fun fact: Using navy as a base makes 5–7 tiny lights per nail pop, and a thin dotting tool helps you place 3-4 dots quickly. Stick to a few bright colors for a lively xmas nails look.
11. Frosty the Snowman
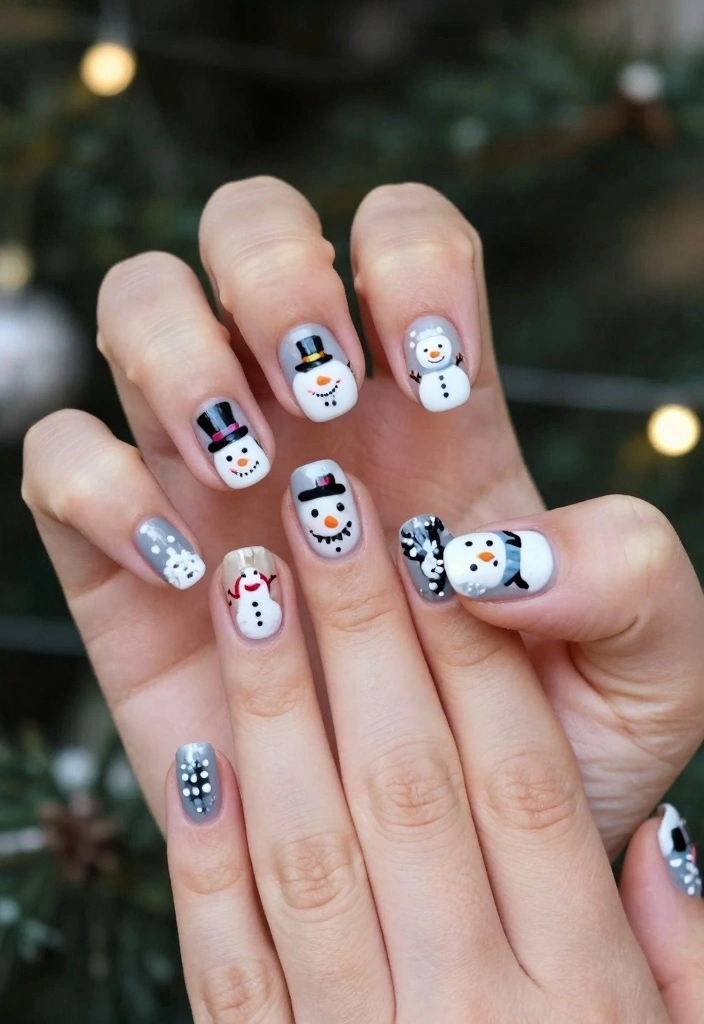
Capture the joy of winter with a cute Frosty the Snowman design! This nail art is perfect for embodying the spirit of the holiday season.
Start with a white base coat for a fresh snow effect. Once dry, use a small brush to create Frosty, adding colors for his top hat, nose, and scarf. Use black polish for his eyes and buttons to bring him to life!
Ingredients:
– White nail polish (base)
– Black, orange, and any colored polish (for details)
– Top coat
Instructions:
1. Apply the white polish for a snowy base and allow it to dry.
2. Paint Frosty on a couple of accent nails, adding all the fun details.
3. Seal the design with a top coat for lasting wear.
This design is sure to bring smiles and embodies the fun of winter!
❝ Some days, your xmas nails say it all: cozy, creative, and totally worth sharing. Start with white for snow, add Frosty’s hat and scarf, and finish with a quick top coat—holiday glam without the fuss. ❞
12. Soft Pink Christmas Vibe
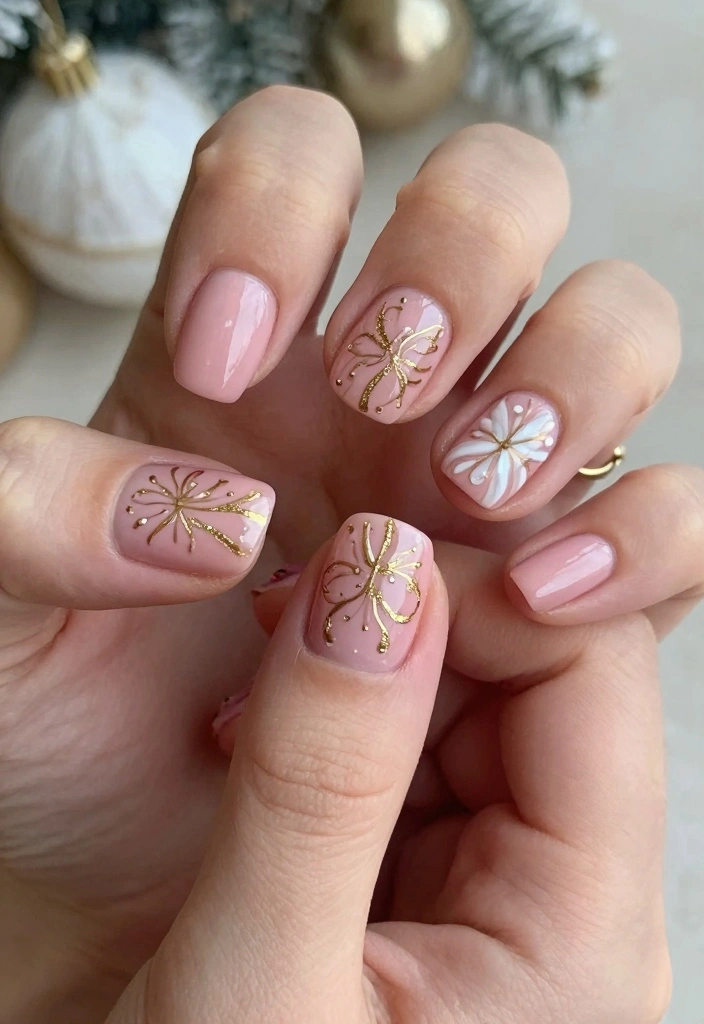
For a softer holiday touch, consider a delicate soft pink design! This elegant manicure can include tiny gold accents and snowflakes for a lovely finish.
Begin with a soft pink polish as your base. Once dry, add tiny white snowflakes or gold dots to create a chic look. This design is perfect for parents wanting a more subtle festive vibe for their kids.
Ingredients:
– Soft pink nail polish (base)
– White and gold nail polish (for designs)
– Top coat for protection
Instructions:
1. Apply the soft pink base coat and let dry.
2. Use a fine brush to add delicate snowflakes or gold dots.
3. Finish with a top coat for durability.
This design is effortlessly beautiful and perfect for family gatherings!
13. Christmas Sweater Patterns
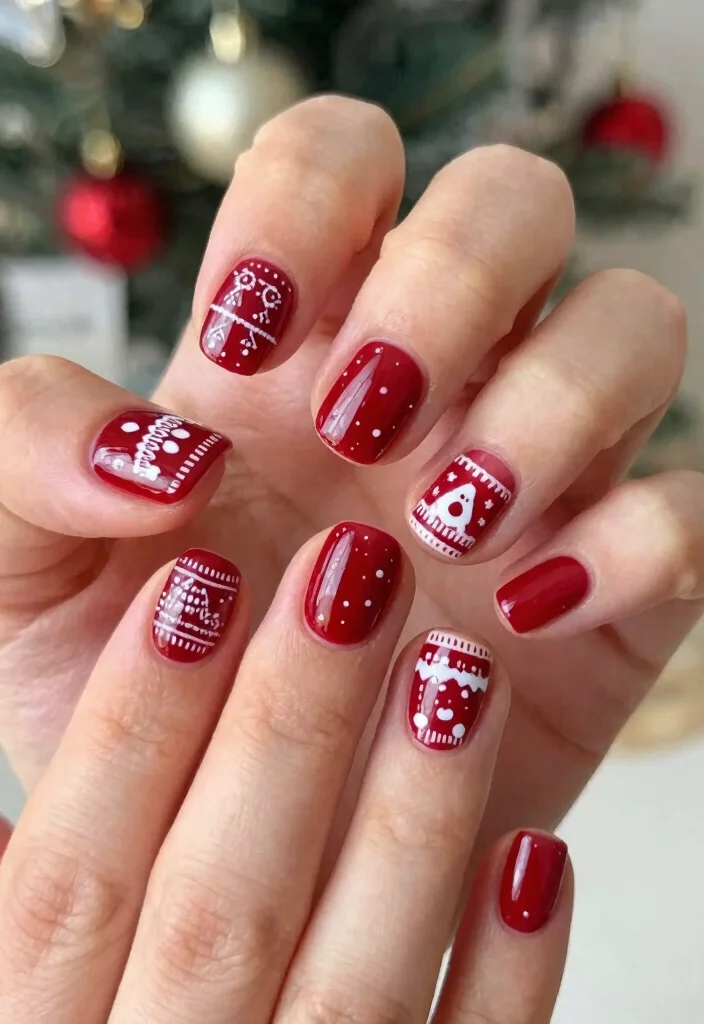
Bring cozy vibes to your nails with a Christmas sweater design! This fun and intricate nail art mimics the patterns found on festive holiday sweaters.
Start with a base of deep red or green nail polish. Using white polish, create sweater patterns like snowflakes, reindeer, or geometric shapes on every nail. This design is intricate but makes for a fun family nail art night!
Ingredients:
– Deep red or green nail polish (base)
– White nail polish (for designs)
– Top coat for shine
Instructions:
1. Apply the base coat and let it dry.
2. Paint sweater patterns using white polish.
3. Finish with a top coat for protection and shine.
This design adds a festive and cozy touch to any holiday outfit!
14. Nutcracker Magic
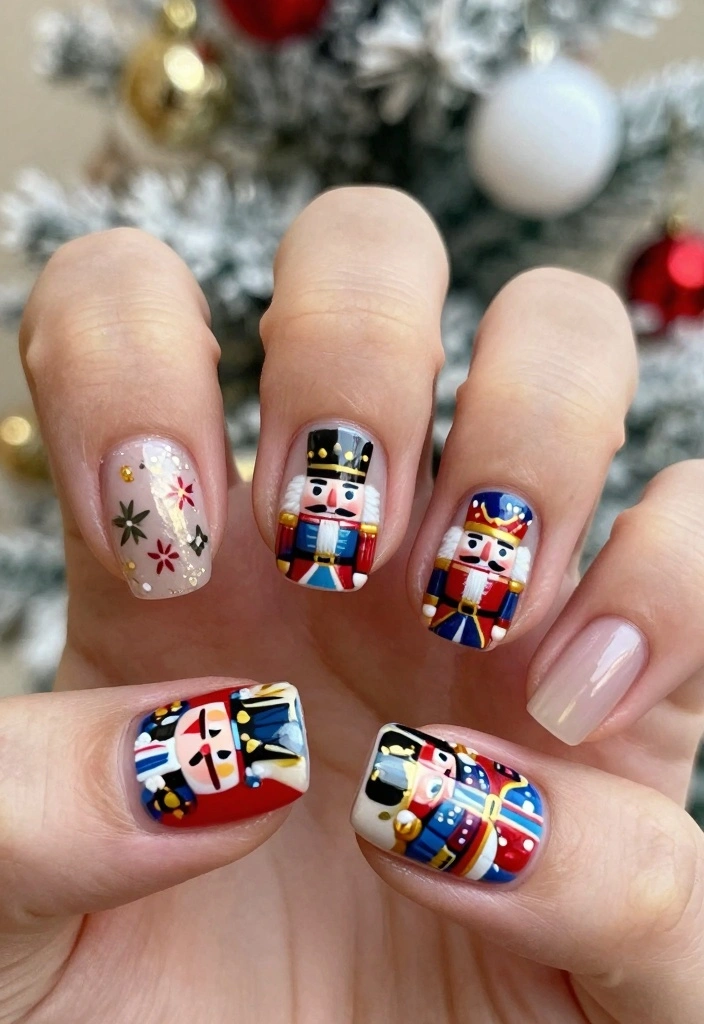
Celebrate the spirit of the season with a Nutcracker design! This charming nail art is fun and brings festive cheer to your child’s nails!
Begin with a light beige or pink base. Paint a cute Nutcracker on a couple of accent nails, using vibrant colors for his uniform. You can also add twinkling stars or candy canes to complement the look.
Ingredients:
– Light beige or pink nail polish (base)
– Various colors for Nutcracker details
– Top coat for finishing
Instructions:
1. Apply the base coat and let dry.
2. Draw a Nutcracker on the accent nails with vibrant colors.
3. Add stars or candies and seal with a top coat.
The Nutcracker design is perfect for dancing through the festive season!
15. Ornaments Galore

Embrace the joy of holiday decorations with a nail design featuring colorful ornaments! This playful and vibrant nail art is perfect for the festive spirit.
Select a light blue or white base for a snowy effect. Paint colorful ornament shapes on a few accent nails, using bright colors and glitter for sparkle. This design showcases creativity and makes for a fun family activity!
Ingredients:
– Light blue or white nail polish (base)
– Various colors for ornaments
– Glitter nail polish (optional)
– Top coat for protection
Instructions:
1. Apply the base coat and allow it to dry.
2. Create colorful ornaments on accent nails using various colors.
3. Add glitter for sparkle and finish with a top coat!
This design captures the excitement of the holiday season!
16. Little Elf Nails

Celebrate the holiday spirit with an adorable little elf design on your child’s nails! This fun nail art is ideal for those who love the magic of Christmas.
Start with a festive green or red polish as the base. Paint tiny elf faces on a couple of accent nails, complete with hats and cheerful smiles. You can use bright colors for added cheer and detail!
Ingredients:
– Green or red nail polish (base)
– Various colors for elf details
– Top coat for finishing
Instructions:
1. Apply the base coat and let dry.
2. Create elf faces on accent nails with colorful details.
3. Seal with a top coat for durability.
This design is perfect for kids who enjoy the playful aspects of the holidays!
17. Twinkling Christmas Lights

Capture the magic of holiday lights with a twinkling design! Kids will love the bright and shiny colors that mimic the lights they see around them.
Choose a dark base, such as black or navy. Create colorful dots representing the lights and use a thin brush to add string lines connecting them. This design is vibrant and encapsulates the excitement of the season!
Ingredients:
– Dark nail polish (navy or black)
– Various colors for lights
– Top coat for protection
Instructions:
1. Apply the dark nail polish and let it dry.
2. Paint bright dots to create the lights and add strings connecting them.
3. Seal with a top coat for extra durability.
This nail art idea is perfect for celebrating the joy of festive lights!
Xmas Nails bring instant holiday sparkle. Start with a navy or black base, sprinkle colorful dots for lights, and draw thin connecting lines. It’s quick, kid-friendly, and photo-ready—perfect for twinkling nights and festive fun.
18. Classic Christmas Red
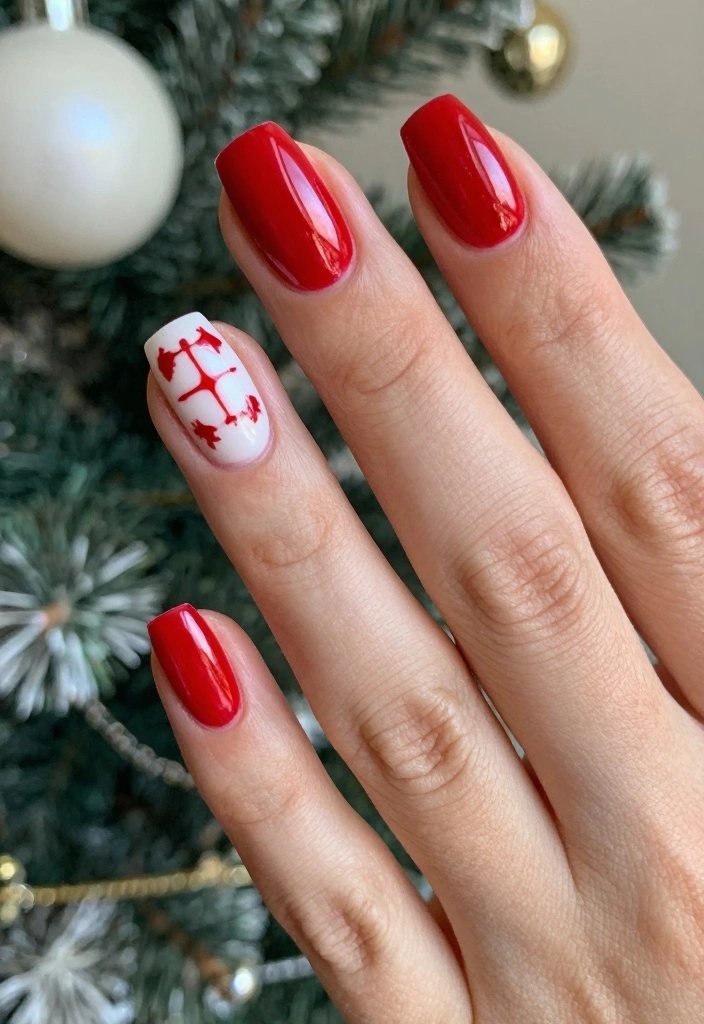
For a timeless holiday look, opt for a classic Christmas red! This design is elegant, simple, and perfect for any festive occasion.
Choose a rich, bold red polish for a striking finish. This design can be enhanced with a glossy top coat for a shine that captures the holiday spirit. It’s perfect for anyone who loves a traditional festive look!
Ingredients:
– Bold red nail polish (base)
– Top coat for shine
Instructions:
1. Apply the bold red nail polish and allow it to dry.
2. Finish with a shiny top coat for a classic look.
This design is easy to achieve and radiates festive cheer, making it a must-have for every holiday celebration!
Conclusion
With these 18 festive xmas nails ideas, your little ones can express their creativity and get into the holiday spirit! From adorable penguins to sparkling ornaments, there’s something for every child to enjoy. Get together for a fun nail art session and let their imaginations run wild. This holiday season, why not make memories that sparkle just as brightly as their nails?
Happy nail painting!
Frequently Asked Questions
What are the best Xmas nails ideas for kids that are cute and glam?
For kids, start with safe, non-toxic polishes and a quick-dry top coat. Try looks that mix cute Christmas nails with a touch of festive nail art, like simple candy cane stripes or snowflakes on a couple of nails. Use 2-3 colors (red, green, white) and keep designs small to stay comfortable for little hands. Add kid-friendly stickers or decals to cut down on painting time, then seal everything with a fast-drying top coat. Finish with a gentle drying routine and avoid heavy layers—the goal is a cute, kid-friendly Xmas nails look that’s easy to wear during holiday fun.
How can I create festive nail art at home for kids without professional tools?
You can nail a glam look with simple tools. Use nail stickers, a dotting tool or toothpick, and a makeup sponge for gradient effects. Start with a base color, then layer mini stickers for holiday nail designs that look polished. Practice on a spare nail first, keep the palette to 2-3 seasonal shades, and finish with a protective top coat for lasting shine. This approach gives you a festive nail art vibe without needing professional equipment.
What are some safe, kid-friendly Xmas nails designs for the holidays?
Think cute and safe: snowflakes, candy canes, and tiny reindeer noses using decals rather than freehand painting. Choose peel-off or water-based polishes to make removal easy, and avoid tiny rhinestones or embellishments that could pose a choking hazard. Keep the designs flat and smooth to protect little nails and hands. These ideas are perfect for a cute Christmas nails vibe while staying gentle and kid-friendly for the season.
How long do festive nail art designs last on kids, and how can I prevent chipping?
With kid-friendly polishes and decals, you can expect about 3-5 days of wear with careful handling. Maximize wear by starting with clean, dry nails, applying a thin base coat, layering 1-2 coats of color, and sealing with a top coat. Reapply a light top coat every 2-3 days, and avoid prolonged water exposure right after application. Use gentle removers when you’re ready to switch designs. This helps your xmas nails stay neat through parties and photos.
Which colors and finishes are trending for seasonal nails this year?
Seasonal trends mix classic reds and greens with metallics like gold or silver, plus a touch of glitter for glam holiday manicure. Try matte finishes on a bold red or green base with a shiny accent nail for contrast, or pair a shimmering metallic with simple decals for a playful seasonal nail trends look. For a kid-friendly twist, keep embellishments minimal and use safe stickers to achieve a chic xmas nails vibe that’s both on-trend and easy to wear.
Related Topics
xmas nails
holiday nail designs
festive nail art
cute Christmas nails
glam holiday manicure
seasonal nail trends
kids nail art
easy nail designs
beginner friendly
DIY holiday nails
sparkly nails
winter nail ideas