Nail art has taken the beauty world by storm, becoming a popular way to express personal style. If you’re anything like me, you find yourself craving fresh and clean designs that elevate your everyday look. Whether it’s a special event or just a simple trip to the grocery store, your nails can make a statement. That’s why I’ve put together this guide filled with 18 Simple Nail Art Ideas. These designs are easy to recreate, and they add that perfect touch of elegance to any outfit.
This post is for anyone who loves to keep their nails looking stylish without spending hours at the salon. If you’re a busy bee, a minimalist at heart, or someone who appreciates simple yet eye-catching aesthetics, you’re in the right place. You’ll find a variety of creative nail art ideas that won’t overwhelm you. These designs are straightforward, fun, and perfect for any occasion, whether you’re staying in or heading out.
In this guide, you will discover simple nail art techniques that you can easily try at home. Each idea is crafted to be clean and chic, allowing your nails to shine without any fuss. From subtle ombre to minimalist dot patterns, you’ll have plenty of inspiration at your fingertips. Plus, you’ll gain tips for DIY nail art that will make your nail game on point.
Key Takeaways
– Versatile Designs: This guide features 18 simple nail art ideas that allow for flexibility in style and occasion.
– Easy Techniques: Each nail art design comes with straightforward directions, perfect for beginners and busy individuals alike.
– Minimalist Focus: The emphasis is on minimalist nail art, making it easy to achieve an elegant look without over-complicating things.
– DIY Friendly: You’ll find tips on how to successfully recreate these styles at home, saving you time and money.
– Creative Exploration: From soft floral accents to geometric nail art, this collection encourages you to express your creativity through nail art.
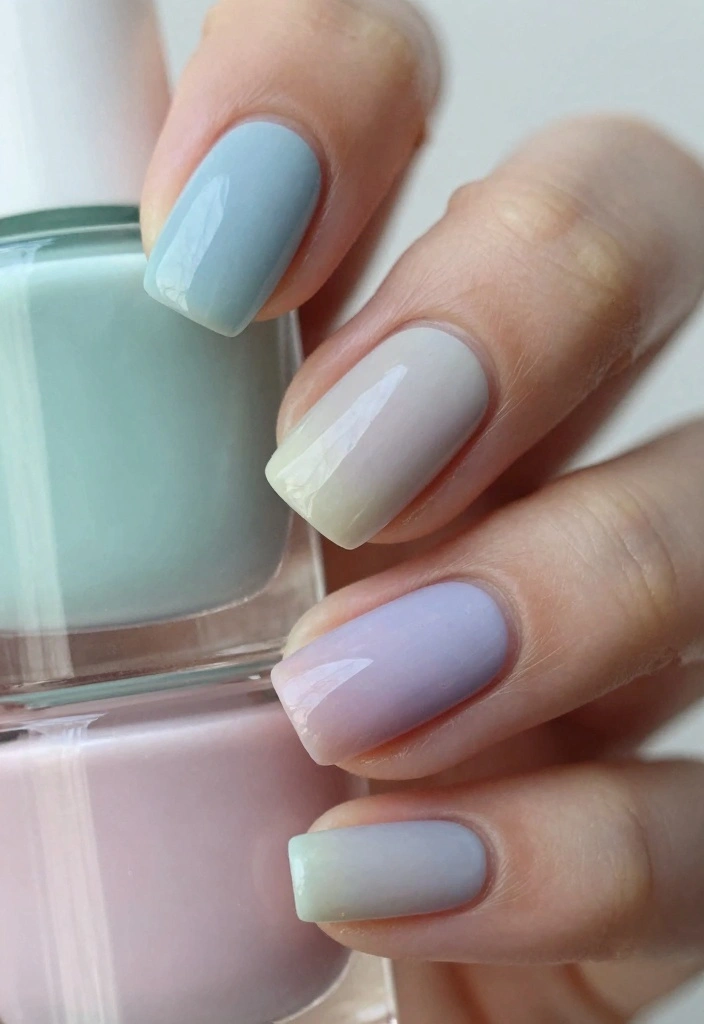
1. Subtle Ombre
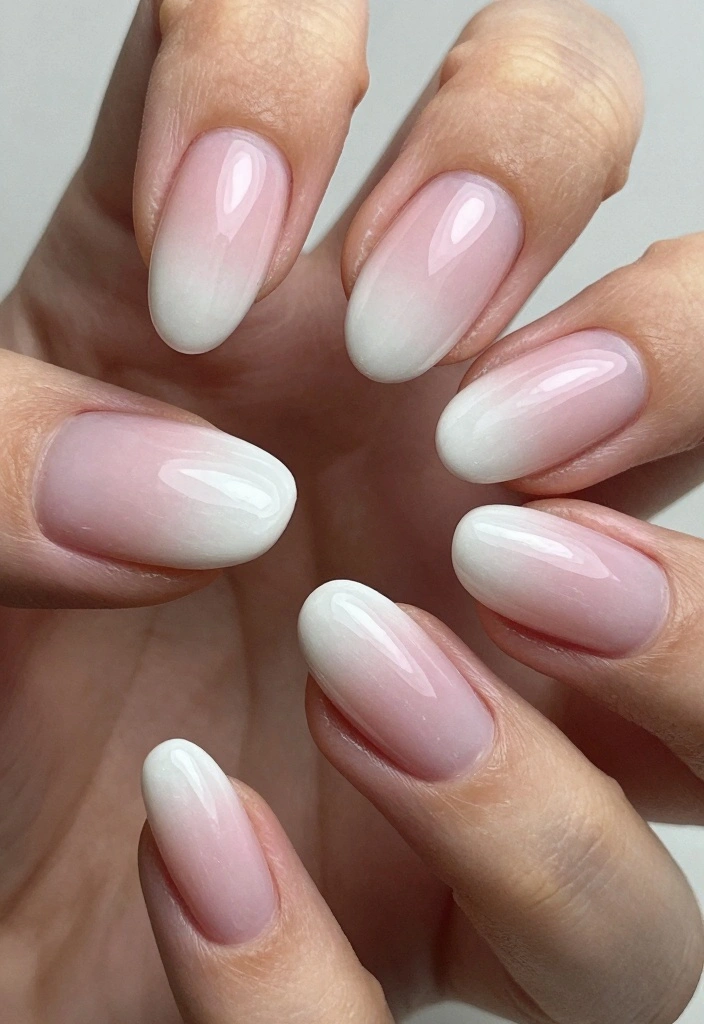
If you’re looking for a chic yet understated nail design, subtle ombre is the way to go. This technique creates a gorgeous gradient effect that feels both trendy and timeless. Choose two complementary shades, like soft pink fading into white or a light beige transitioning to pastel lavender, for a stunning look that catches the light beautifully.
To achieve this gradient, start with a base coat in the lighter color. Then, use a makeup sponge to dab the darker shade onto the tips, blending gently for a seamless transition. This design is perfect for any occasion, allowing you to express your style effortlessly.
Key steps to create your ombre nails:
– Gather your supplies: base coat, top coat, and two nail polish shades
– Apply a base coat and let it dry thoroughly
– Use a makeup sponge to blend the darker color onto the tips
– Finish with a top coat for added shine
With this technique, your nails will look effortlessly elegant, and you’ll enjoy a fresh twist on traditional designs.


2. Negative Space Nail Art
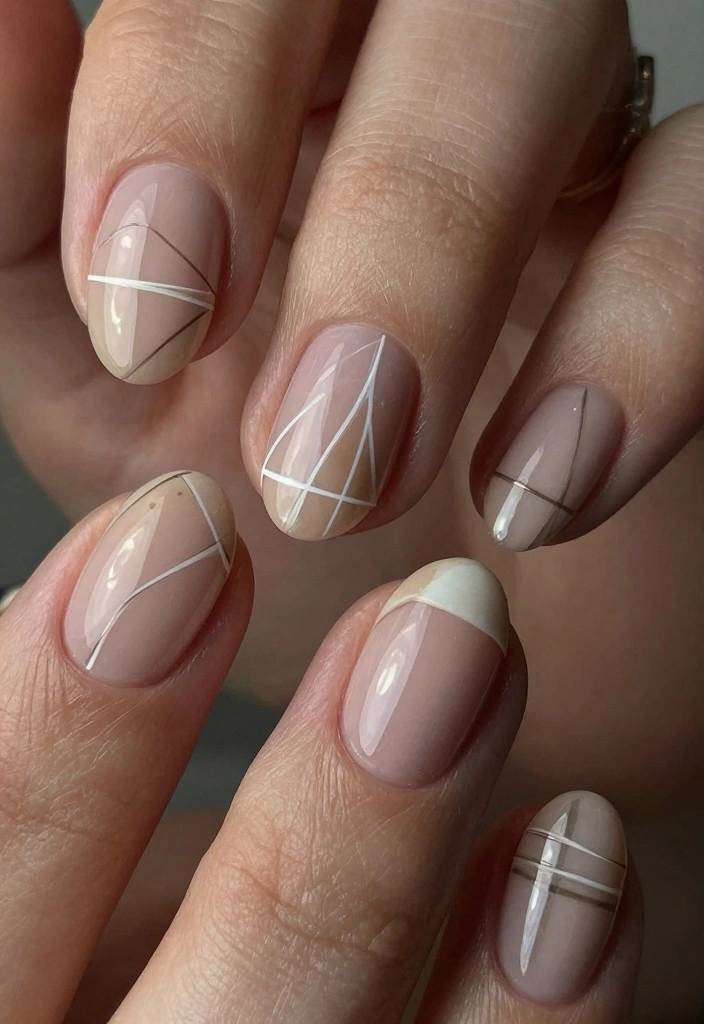
Negative space nail art is a fantastic way to showcase your natural nails while making a stylish statement. This design incorporates the bare nail into the artwork, resulting in a clean and modern appearance. Think geometric shapes or simple lines that leave parts of the nail exposed, making it an ideal choice for minimalists.
For a quick and easy twist, try painting a diagonal stripe across your nail using a soft shade like light gray or nude, leaving the rest clear. This look is not only easy to replicate but also perfect for those who appreciate subtle elegance.
Steps to achieve negative space nails:
– Gather your materials: base coat, polish in a soft shade, and a top coat
– Apply a base coat and let it dry
– Use tape to create your desired shape, exposing part of the nail
– Paint over the tape with your chosen color
– Remove the tape while the polish is wet for clean lines
This style allows you to experiment with different shapes and patterns—get creative!
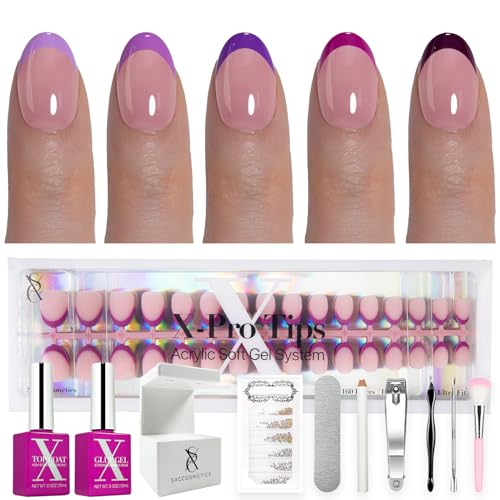
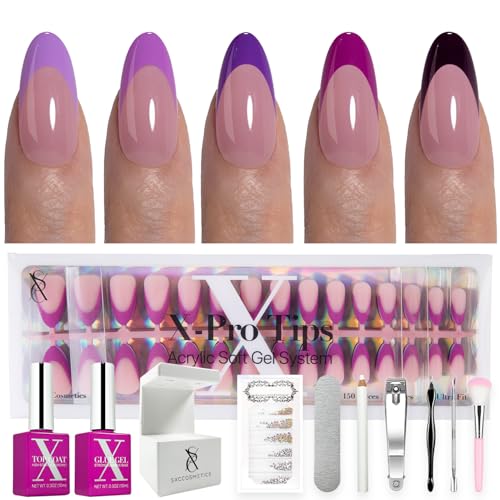
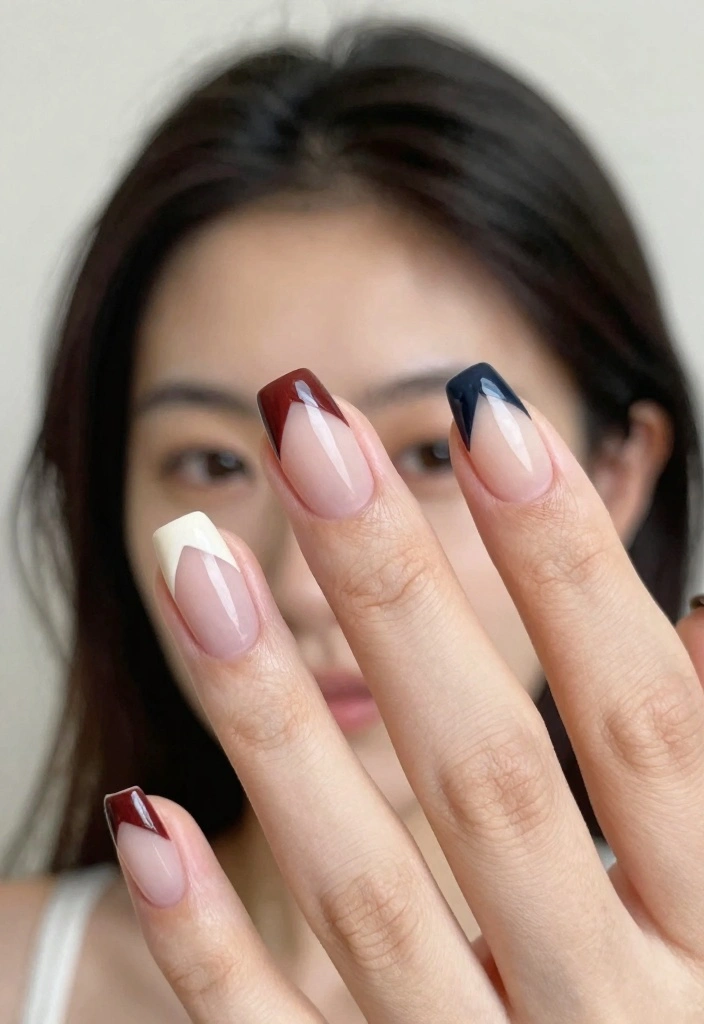
3. Classic French Twist
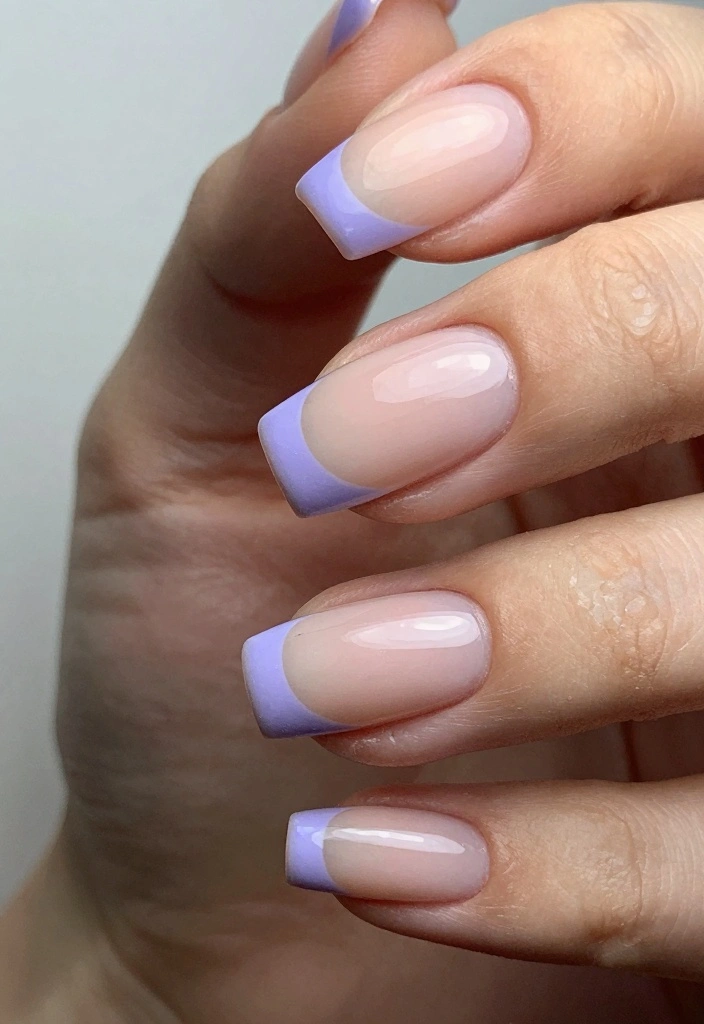
The classic French manicure gets a modern makeover with a splash of color. Forget the traditional white tips—instead, opt for soft pastels or even metallics to keep your look fresh and playful. This design offers a classy vibe while adding a contemporary touch that works for any occasion.
Begin with a nude base coat, then carefully paint the tips in your chosen shade, like soft lavender or chic gold. This twist on a classic is perfect for those who want to elevate their nail game without going overboard.
Steps for your French twist:
– Prepare with a base coat and your nude polish
– Once dry, use a thin brush to paint the tips with your selected color
– Seal the design with a top coat for longevity
If you need clean lines, nail tape can help achieve precision. Enjoy this stylish yet simple approach to nail art!


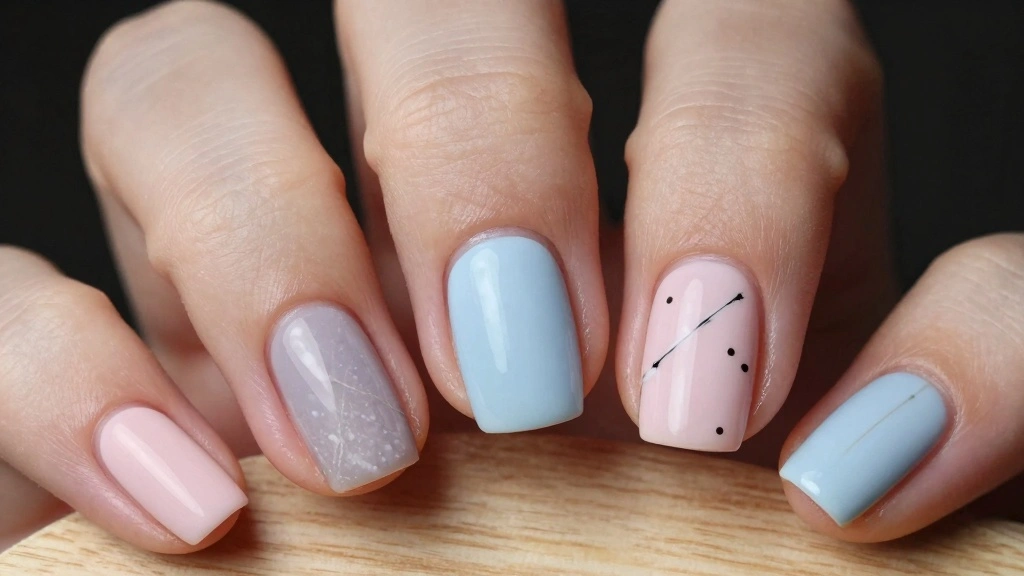
4. Minimalist Dot Patterns
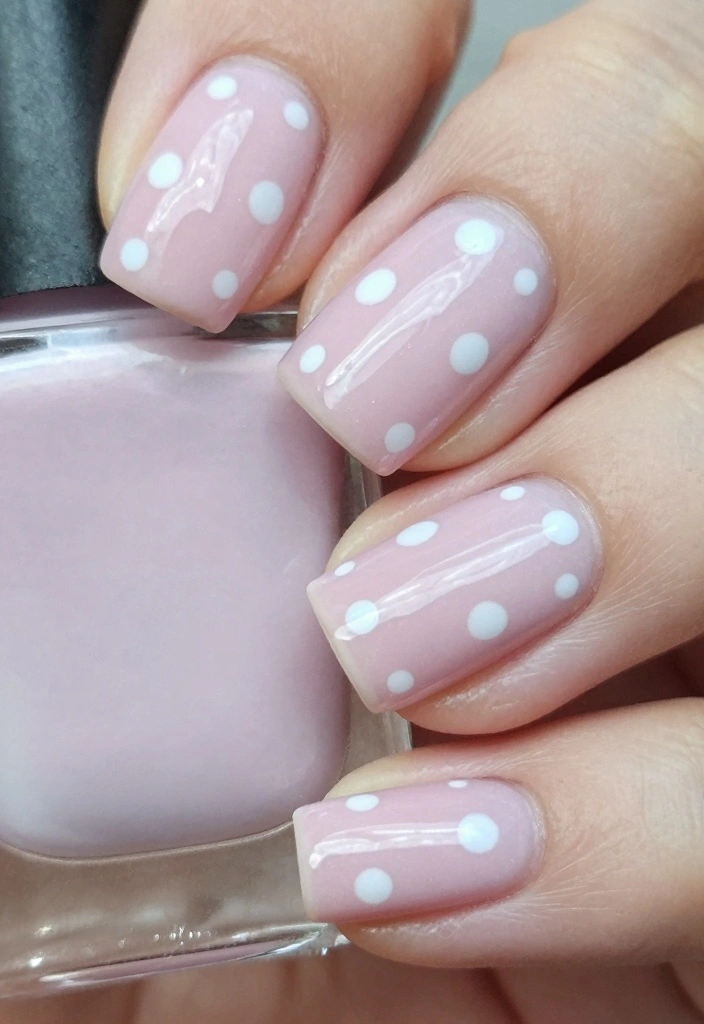
If you want a fun yet sophisticated nail design, minimalist dot patterns are a perfect choice. This delightful technique allows you to create playful designs using dots in colors that resonate with you—think monochromatic dots on a pale backdrop or vibrant contrasting colors for a pop.
Using a dotting tool or a bobby pin, you can easily create evenly spaced dots along your cuticle or in random arrangements across your nails. This design is quick to execute, making it ideal for beginners who want to try their hand at nail art.
Steps to create dot patterns:
– Prepare your tools: base coat, two contrasting polishes, and a top coat
– Apply a base coat and let it dry
– Use a dotting tool to create dots on your nails
– You can follow a specific pattern or let your creativity flow
– Finish with a top coat for protection
Feel free to experiment with various colors and sizes for a unique, eye-catching look.
5. Simple Stripes
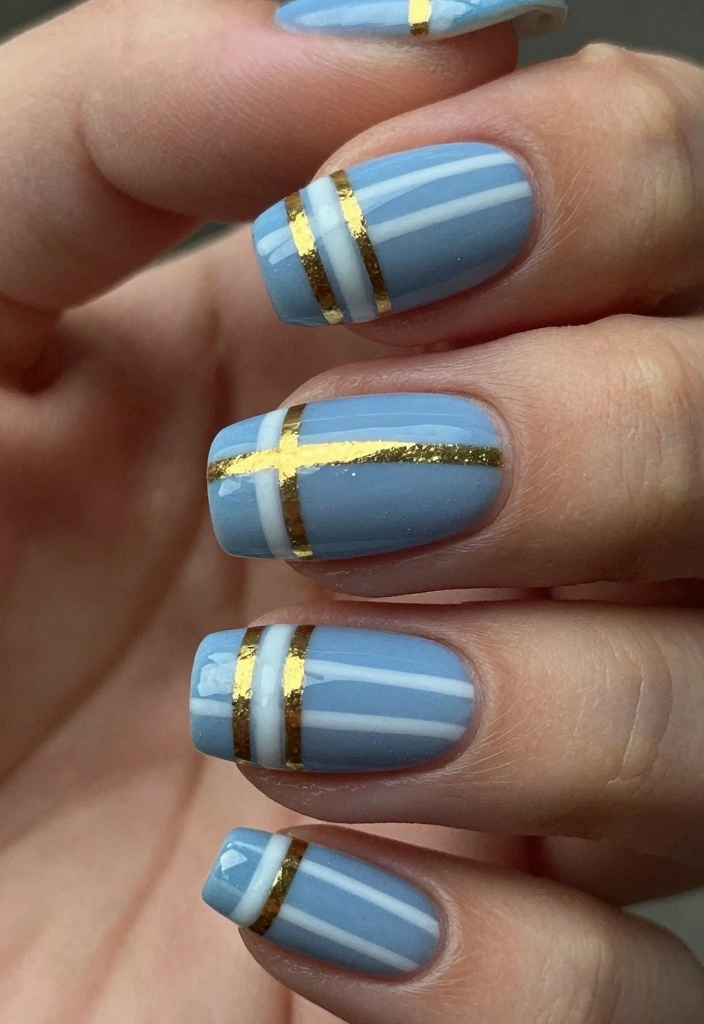
Stripes are a timeless design that never goes out of style, and they are incredibly easy to create! By using striping tape, you can form sleek lines across your nails in various directions or widths, adding a touch of sophistication to your look.
For a minimalist vibe, try thin white and gold stripes over a soft blue base. This design is perfect for those who want to elevate their everyday nails without much fuss.
Steps to master simple stripes:
– Gather your essentials: base coat, nail polish, striping tape, and top coat
– Apply a base coat followed by your chosen base color
– Once dry, use striping tape to create your desired stripe pattern
– Paint over the tape with a contrasting color
– Remove the tape while the polish is wet for crisp lines
Feel free to switch up the colors to match your mood or outfit—get creative with your stripes!


How To Choose Simple Nail Art Designs
When selecting simple nail art designs for your next manicure, it’s essential to consider a few key factors. Each choice can enhance your overall look while reflecting your personality. Here’s a guide to help you pick the perfect nail art for your style and needs.
1. Style Preference
Think about the styles that resonate with you. Do you prefer minimalist designs, like simple dots and lines, or something more vibrant and colorful? Consider your daily wardrobe and lifestyle. If you often dress in neutral tones, subtle designs might complement your look better. Conversely, bold patterns can add a pop of creativity to a more subdued outfit.
2. Occasion
Your nail art choice can vary based on the occasion. For everyday wear, opt for clean and simple designs like the classic French twist or minimalist dot patterns. If you’re preparing for a special event, you might want to explore more intricate designs like soft floral accents or a colorful half-moon. Always align your nail art with the event’s vibe.
3. Skill Level
Evaluate your nail art skills. If you’re a beginner, start with easy nail art tutorials that require minimal tools and techniques, such as simple stripes or polka dots. More complex designs, like geometric art or watercolor effects, might require practice and patience. Choose designs that match your current skill level to avoid frustration.
4. Nail Length and Shape
The length and shape of your nails play a crucial role in determining what designs will look best. Long, almond-shaped nails can showcase intricate designs like geometric patterns beautifully. For shorter nails, stick to simpler designs such as minimalist dot patterns or classic red with a twist. Keeping your nail shape and length in mind will guide you in choosing suitable designs.
5. Color Choices
Colors can dramatically impact the overall feel of your nail art. Consider the color palette you’re comfortable with. Pastels might look great in spring, while deeper tones can feel more appropriate for fall or winter. Don’t hesitate to mix and match colors, but keep in mind that simpler designs often benefit from a limited color scheme to maintain their minimalist appeal.
6. Time Commitment
How much time are you willing to dedicate to your nail art? Some designs, like simple sparkles or accented ring fingers, can be done quickly, while others, like intricate watercolor effects or color-blocked designs, may take longer. Assess your schedule and choose designs that fit within your timeframe, especially if you’re doing your nails before an event.
Pro Tip: Start by experimenting with a few different simple nail art designs to discover your favorites. Try using nail stickers or stencils for easy application. This way, you can enjoy various looks without the stress of perfecting freehand designs.
6. Geometric Nail Art
Geometric nail art is a stylish way to add some edge to your manicure while keeping it simple. Using tape, you can create various shapes like triangles or rectangles, combining a neutral base with bold colors for a polished look.
This design allows for a lot of creativity while still maintaining a minimalist feel, making it perfect for both casual and formal settings.
Steps for geometric nail art:
– Gather materials: base coat, neutral nail polish, bold polish for shapes, and a top coat
– Apply a base coat and let it dry
– Use tape to outline your desired geometric shapes
– Paint over the tape with a bold color
– Remove the tape while the polish is still wet for clean edges
Keeping shapes simple will help maintain that minimalist vibe while expressing your creativity.


7. Metallic Minimalism
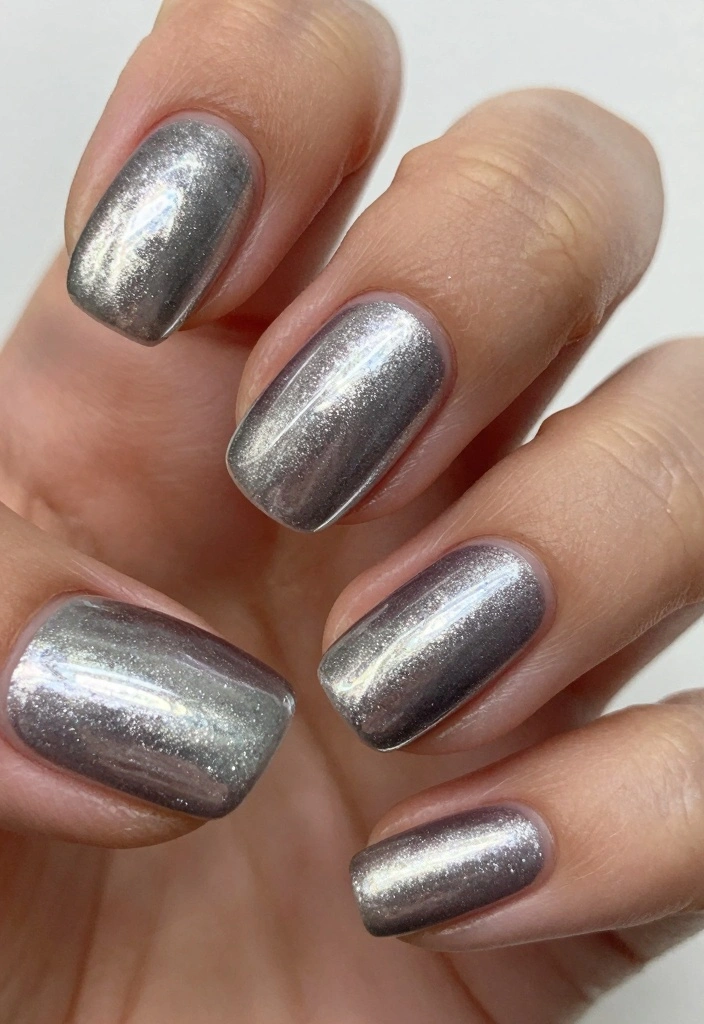
Metallic shades can elevate your nail design while adhering to a minimalist aesthetic. A single coat of metallic silver or gold on all your nails creates a chic and modern look that glows with elegance.
The glossy finish and shimmering effect make even the simplest designs stand out. If you’re feeling adventurous, alternate between metallic and matte finishes for added interest.
Steps for metallic minimalism:
– Prepare with a base coat and metallic polish
– Apply the metallic polish evenly across all nails
– For variation, apply a matte top coat to some nails
This design looks great on both short and long nails, making it versatile for any occasion.
Fun fact: metallic nail art packs a punch with just one coat, giving a chic glow in minutes. Pair a glossy finish with a matte contrast for instant minimalist drama—perfect for everyday elegance.
8. Colorful Half-Moons
Half-moon nails bring a playful twist to a classic design while remaining simple. You can paint the base of your nails in a contrasting color to the main body or choose a tone-on-tone effect for a softer look.
This design is easy to achieve and adds a fun pop to your manicure, making it perfect for those who enjoy a bit of flair.
Steps to create half-moon nails:
– Gather materials: base coat, two polish colors, and a top coat
– Apply a base coat and let it dry
– Paint your nails a solid color and allow it to dry
– Use a dotting tool or half-moon sticker to create the half-moon shape near the cuticle
– Paint the half-moon with your second color
– Seal with a top coat
This style offers endless possibilities with different color combinations!
9. Soft Floral Accents
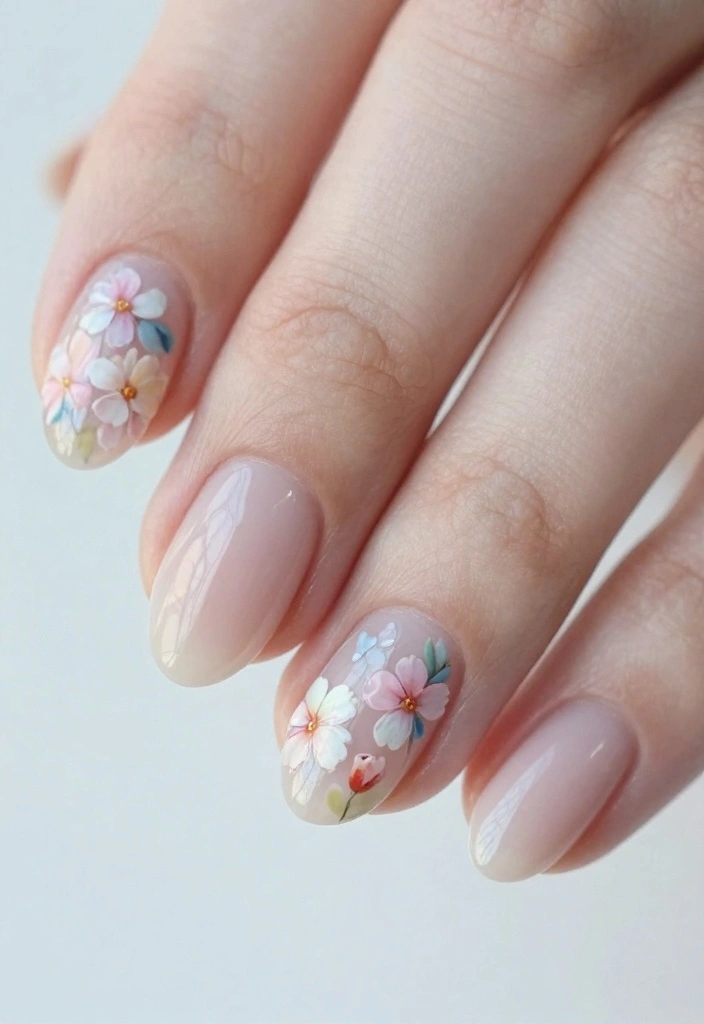
Floral designs can be beautiful without being overwhelming. Adding small floral accents on just one or two nails can elevate your manicure while keeping it minimalist and elegant.
Choose soft colors for the flowers on a neutral base to maintain a clean look that feels fresh and chic.
Steps for soft floral accents:
– Gather your essentials: base coat, neutral polish, floral nail art pen or fine brush, and a top coat
– Apply a base coat followed by your neutral polish
– Once dry, use a fine brush or nail art pen to create small flower designs on one or two nails
– Finish with a top coat for protection
Keep the flowers small and simple for a delicate yet impactful design.
10. Classic Red with a Twist

Red nails are a classic choice, but adding a simple twist can make them feel fresh and exciting. Consider painting the tips in a contrasting color or adding a sprinkle of glitter at the base for a fun flair.
This design retains the timeless elegance of red while injecting a hint of personality, perfect for any occasion.
Steps for your classic red twist:
– Prepare with a base coat and classic red polish
– Paint your nails with red polish
– For a twist, add a contrasting color at the tips or a small glitter dot at the base
– Seal with a top coat
Red nails can shine on their own, but this design adds just the right amount of playful fun!
11. Watercolor Effect
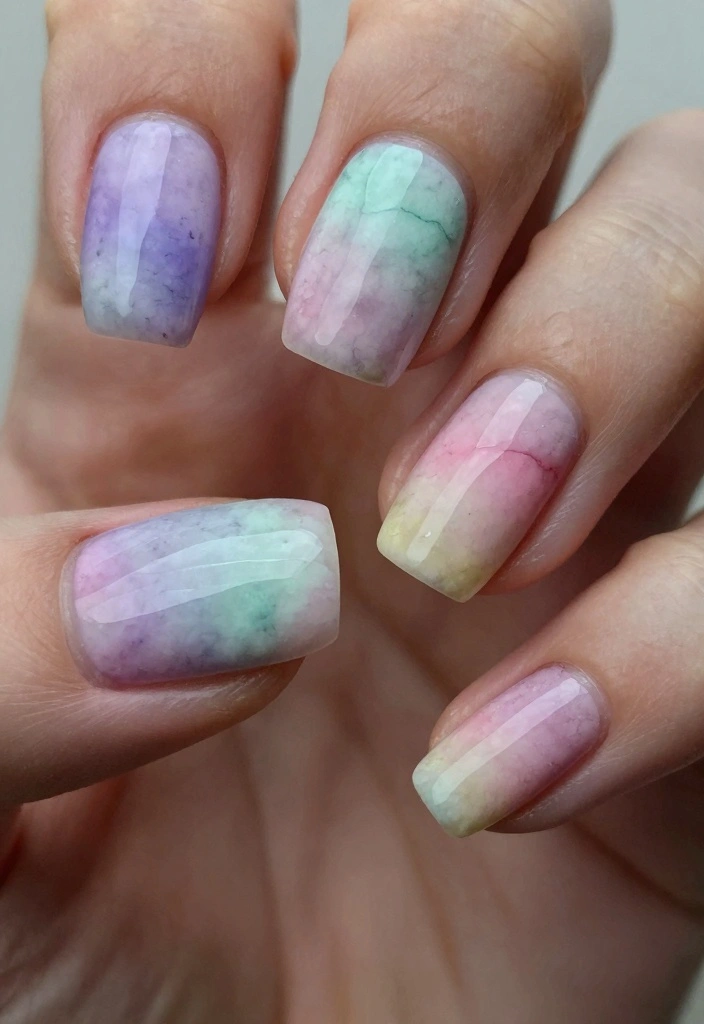
Create a dreamy watercolor effect on your nails for a soft, artistic look. Choose 2-3 complementary colors and use a sponge to dab them onto your nails, blending them gently for a beautiful finish.
This design is perfect for spring and summer, offering a fresh vibe without being too bold.
Steps for your watercolor effect:
– Gather your materials: base coat, 2-3 pastel polishes, and a top coat
– Apply a base coat and let it dry
– Use a sponge to dab on the different colors, blending them softly
– Seal with a top coat to protect your design
Experiment with various color combinations to find your favorite look!


12. Accented Ring Finger
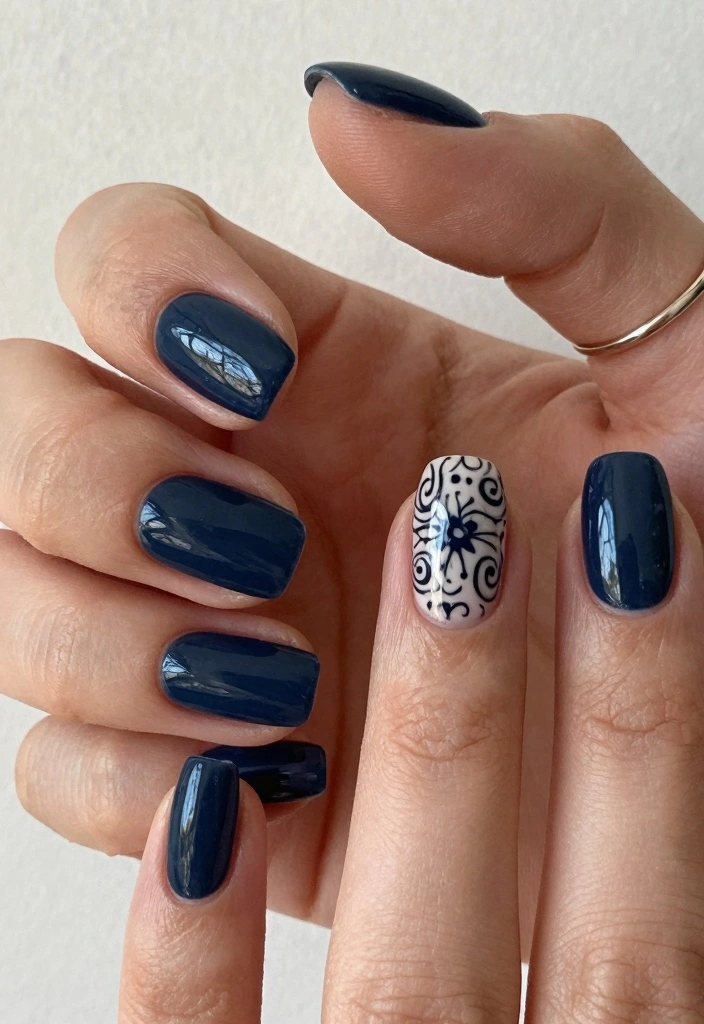
Highlighting one finger, often the ring finger, can add a touch of sophistication to your manicure. Paint it in a contrasting color or add a simple design while keeping the rest of your nails a solid hue.
This minimalist approach is perfect for those wanting a hint of flair without overwhelming their overall look.
Steps for your accented ring finger:
– Start with a base coat and paint four fingers one solid color
– For the ring finger, use a contrasting color or a simple design
– Finish with a top coat
Consider using glitter or a matte finish on the accented finger for added intrigue!


13. Monochrome Mani

Monochrome nails exude a sleek and chic vibe. Select a single color and play with different shades and finishes (matte, glossy, etc.) on each nail for a bold statement.
This design emphasizes simplicity while still making an impact, showcasing your style beautifully.
Steps for your monochrome mani:
– Start with a base coat
– Use various shades of the same color on each nail, varying finishes
– Seal with a top coat for a polished look
This style works wonderfully with colors like gray, nude, or soft pink for a clean and sophisticated appearance.
14. Simple Sparkle

A touch of glitter can add a fun twist to any minimalist design. Apply a glitter top coat on just a couple of nails or at the tips for a subtle shine that beautifully catches the light.
This approach keeps your look elegant while allowing for a hint of glam, perfect for special occasions.
Steps for your simple sparkle:
– Prepare with a base coat and a solid color on all nails
– Apply a glitter top coat to the tips or select nails
– Finish with a top coat to secure the glitter
Opt for fine glitter for a more sophisticated sparkle that won’t overpower your design.


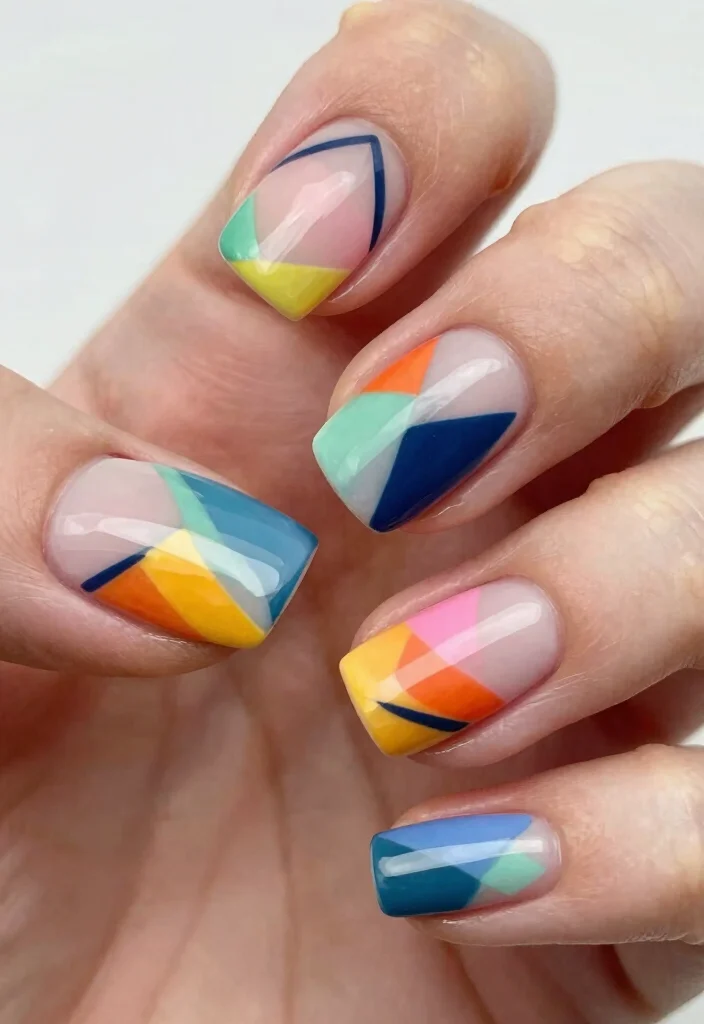
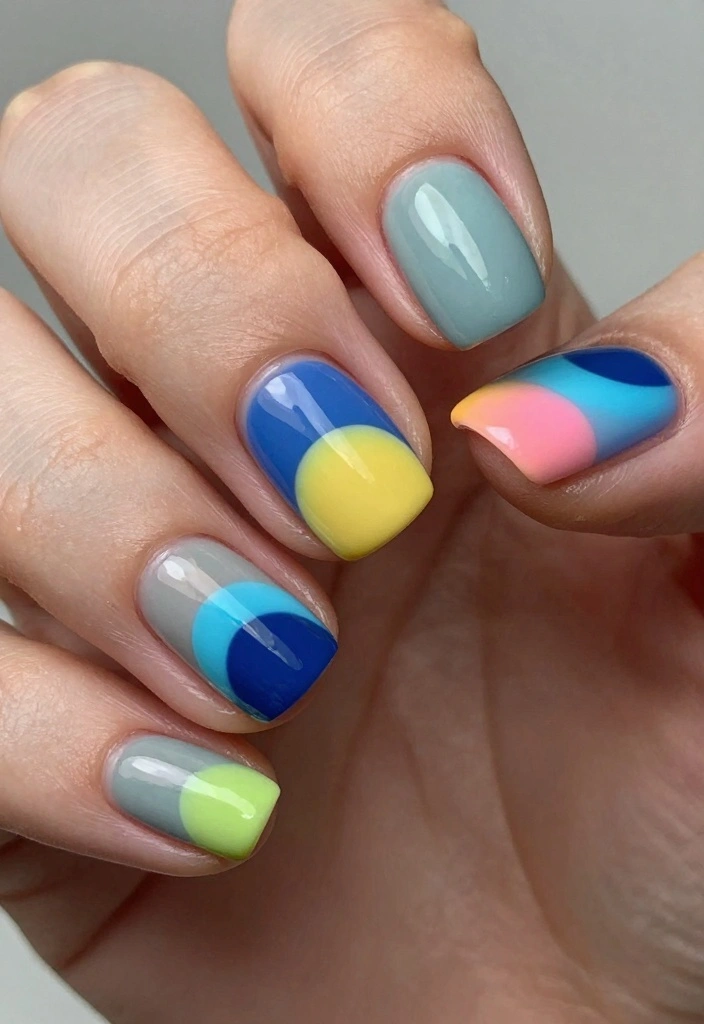
15. Color Blocked Designs
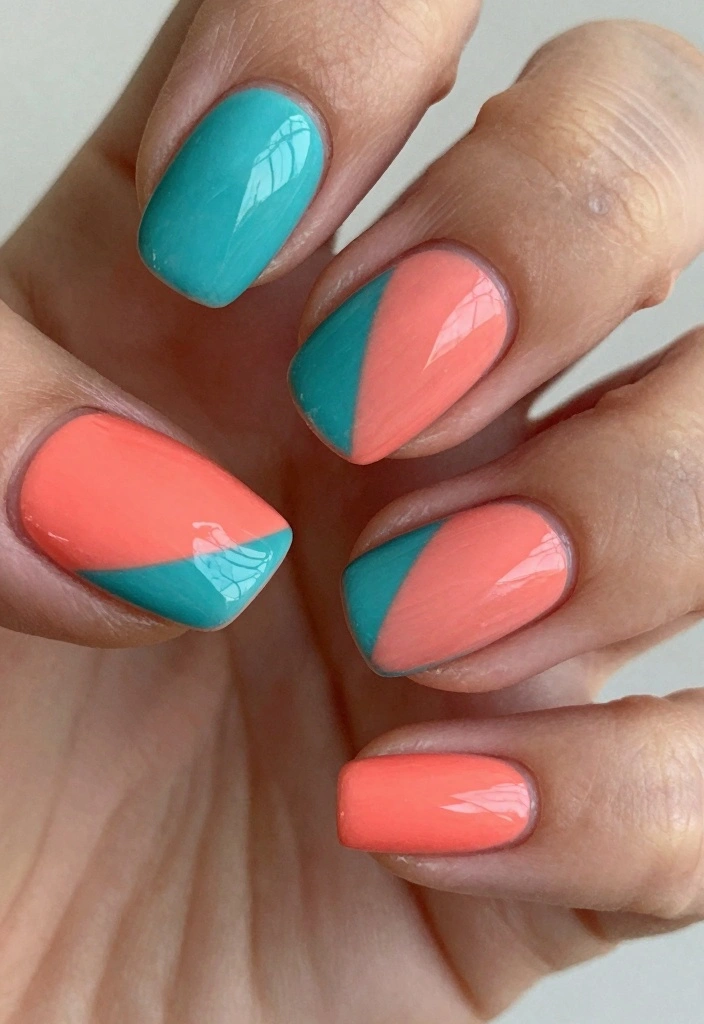
Color blocking is a stylish way to combine different hues while keeping it simple. Use tape to section off parts of your nails and paint them in contrasting colors for a bold visual effect.
This design is fun yet sophisticated, perfect for those wanting to express their creativity without going overboard.
Steps for creating color blocked nails:
– Gather your tools: base coat, contrasting polishes, and a top coat
– Apply a base coat
– Use tape to create sections on your nails
– Paint each section with a different color
– Remove the tape while wet for sharp lines, then finish with a top coat
Choose colors that complement each other for a cohesive and eye-catching look.
Color blocking proves you don’t need dozens of shades to make a statement on nails. A little tape, two contrasting colors, and a confident finish—easy, chic, and perfectly polished.
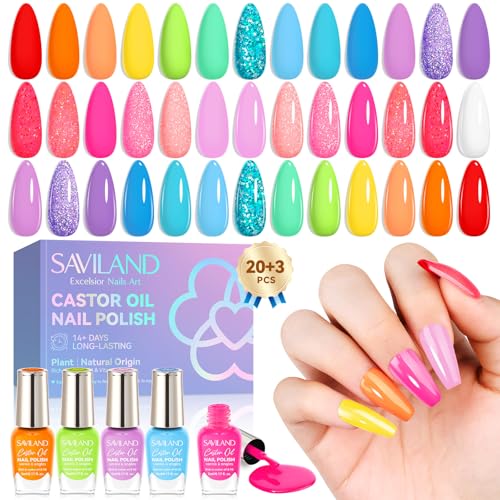
16. Sweet Pastels
Pastel colors are ideal for those who favor a soft palette. Paint your nails in gentle hues like baby pink, mint green, or sky blue for a fresh, airy look.
This sweet and simple design is perfect for warmer months or whenever you want a soft, romantic vibe.
Steps for your sweet pastels:
– Start with a base coat
– Apply your chosen pastel colors to all nails
– Finish with a top coat for shine and protection
Mix and match different pastel colors for a playful yet serene look.
Fun fact: Pastel nails can look instantly polished with a 3-step, simple nail art routine—base coat, pastel color, top coat. Ready in about 15 minutes, they deliver a soft, elegant mani for everyday elegance.
17. Simple Triangle Tips
Elevate the classic French manicure with triangle tips for a modern twist. Instead of straight edges, create a triangular shape at the tips of your nails using a contrasting color.
This design adds contemporary flair while remaining elegant and chic, perfect for any occasion.
Steps for simple triangle tips:
– Prepare with a base coat
– Paint your nails a solid color and let it dry
– Use a thin brush to paint triangles at the tips in your contrasting color
– Seal with a top coat
This approach updates a timeless design and adds a fun twist!
18. Clean and Simple Clear Coat
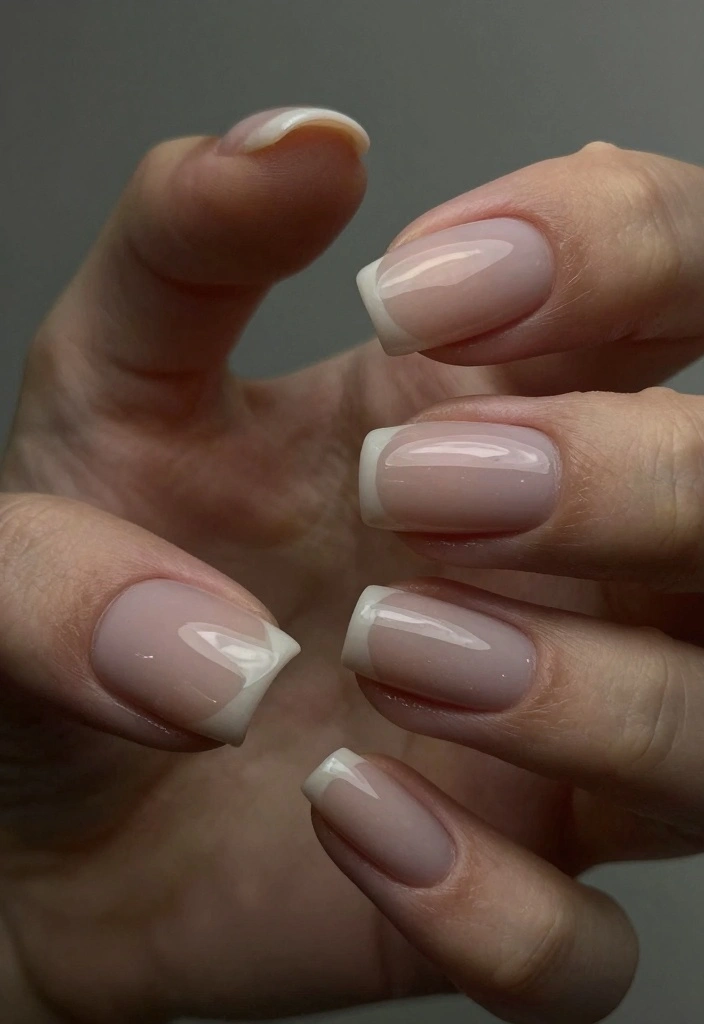
Sometimes, the best nail art is simply clean, well-groomed nails. A clear coat can enhance your nails’ natural beauty, providing a glossy finish that looks polished and fresh.
This option is perfect for those who prefer a minimalist approach while still wanting their nails to look beautiful.
Steps for your clean and simple clear coat:
– Buff your nails to a smooth finish
– Apply a clear coat evenly across all nails
– Let it dry for a gorgeous, natural look
This design is ideal for days when you want a no-polish look but still desire a polished appearance.
Conclusion
Minimalist nail art is all about expressing who you are while keeping things elegant and simple. With these 18 easy designs, there’s no need to sacrifice style for simplicity. Whether you prefer a classic look or something a bit more modern, there’s a design here for everyone.
So, gather your favorite polishes, get creative, and remember—sometimes, less truly is more!
Frequently Asked Questions
What exactly is simple nail art and how can I start with clean, everyday designs?
Simple nail art means clean, understated designs that feel polished for everyday wear.
To start, pick a neutral base color and apply two coats for solid coverage, then add one small detail like a dot, a single stripe, or a negative-space tip.
Look for easy nail art tutorials and practice on an accent nail before committing. Use striping tape or a thin brush for precise lines, and finish with a durable top coat.
With a little practice, you can create nail art designs that look chic and effortless every day. Focus on minimalist nail art to keep it refined.
What are some easy nail art tutorials I can do at home without fancy tools?
You can master several DIY nail art ideas with items you already have. For example, a simple dot manicure using a dotting tool or a bobby pin, negative-space tips using striping tape, and minimalist line art with a thin brush or striping brush.
Start with a clean base, apply your main color, then add the design in one accent nail. Finish with a top coat for a smooth, long-lasting finish.
These easy nail art tutorials are perfect for creating nail art designs fast at home.
How can I achieve minimalist nail art that still looks unique and chic?
Minimalist nail art shines with restraint.
Choose a two to three color palette, keep lines ultra-thin, and use negative space to create modern shapes like a single stripe, a small dot, or a tiny chevron.
Tape can help you place clean lines, while a matte top coat adds an everyday elegant vibe.
Experiment with one accent nail and keep the rest plain to achieve creative nail designs without overwhelming the look. This approach keeps simple nail art at the forefront of everyday elegance.
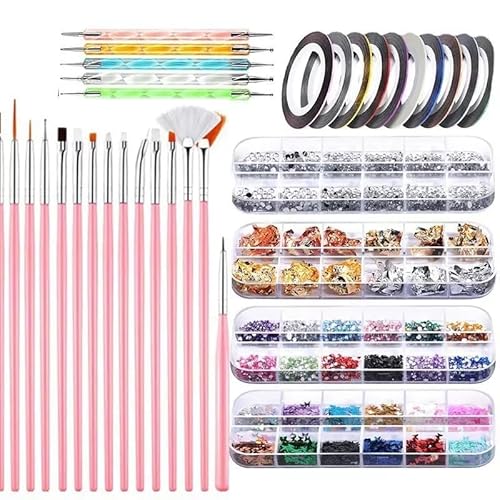
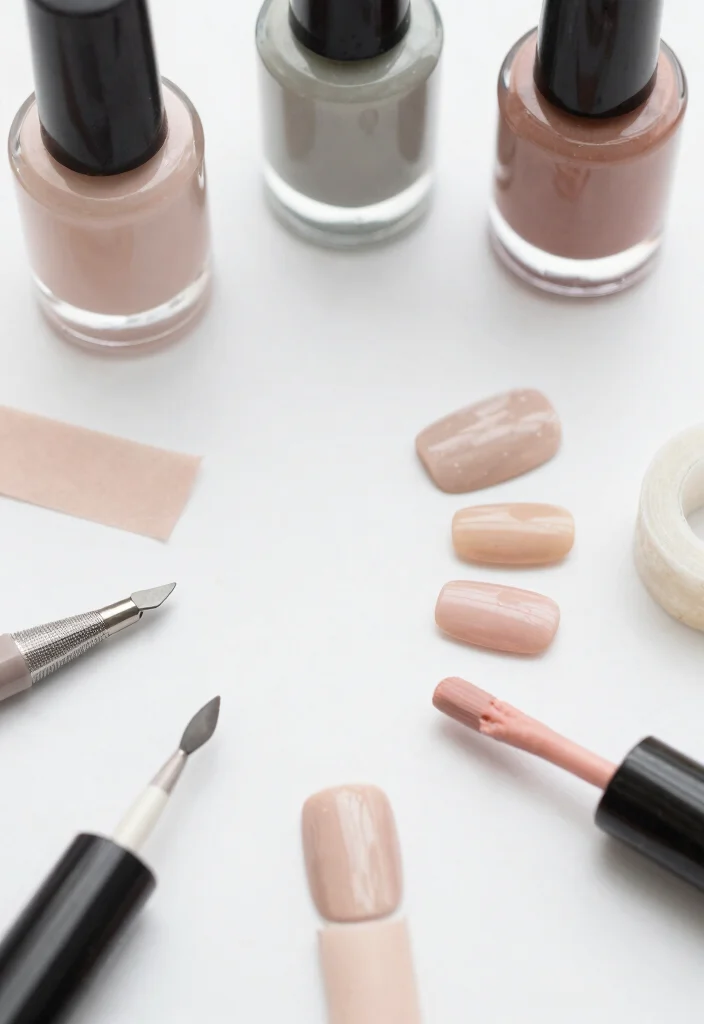
What supplies should I have for quick, clean nail art at home?
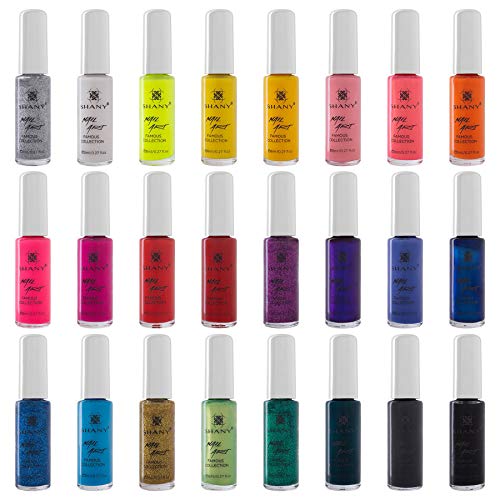
Build a small, versatile kit: a base coat, a couple of neutral or soft color polishes, a top coat, striping tape, a dotting tool or bobby pin, a thin nail art brush, remover and cotton swabs for cleanups, and a quick-dry top coat or drops.
These essentials make DIY nail art easy and let you replicate many nail art designs with minimal tools.
Keep it organized so you can jump into DIY nail art anytime.
How do I fix common mistakes in DIY nail art and make designs last longer?
If a line is wobbly, wait a moment for the layer to set, then go over with a steadier hand or a fresh strip of tape.
To prevent smudges, apply polish in thin layers and let each layer dry fully, then seal with a top coat.
For longer wear, reapply a quick-dry top coat every couple of days and avoid water exposure right after painting.
If you mess up the edge, dip a small brush in remover and tidy the outline, then re-seal with top coat. With these tips, your simple nail art, nail art designs, and minimalist nail art will last longer and look sharper.
Related Topics
simple nail art
minimalist design
easy nail art
DIY nail art
creative nail designs
everyday elegance
beginner friendly
quick tutorials
nail art trends
clean designs
minimalist nail art
affordable beauty