Halloween always brings a special kind of excitement, doesn’t it? The crisp autumn air, the anticipation of costumes, and the thrill of spooky decorations have everyone craving a hint of festivity. For those of us who adore the spirit of the season but want to keep it subtle, finding the perfect way to express that vibe can be a challenge. That’s why I created this post—to help you tap into the festive energy while maintaining that polished, office-friendly look.
If you love beauty and nail art but don’t want to go overboard with ghoulish designs, then this one’s for you. These minimalist Halloween nail ideas will let you celebrate the season without diving into the cliché. I’ve pulled together 17 simple Halloween nails that are chic, easy to accomplish, and perfect for any occasion, whether it’s a workday or an evening out. Each design offers a touch of spooky charm while keeping your nails looking sophisticated and stylish.
In this guide, you’ll find a variety of ideas that cater to different tastes and skill levels. From subtle ghostly hues to tiny pumpkin accents, there’s something here for everyone! Get ready to transform your nails into a canvas that reflects the spirit of Halloween without being too loud or flashy.
Key Takeaways
– Explore 17 simple Halloween nails that blend minimalist design with spooky elements, perfect for an office-friendly aesthetic.
– Find inspiration in designs like delicate spider webs and tiny pumpkin accents that keep your look festive yet understated.
– Learn how to easily recreate these nail art ideas, making them accessible for any skill level without the need for advanced techniques.
– Each design is versatile, allowing you to mix and match according to your mood or outfit while still celebrating the Halloween spirit.
– Use this guide as a reference for festive nail trends that can carry you through the season, ensuring your nails stay chic and stylish.
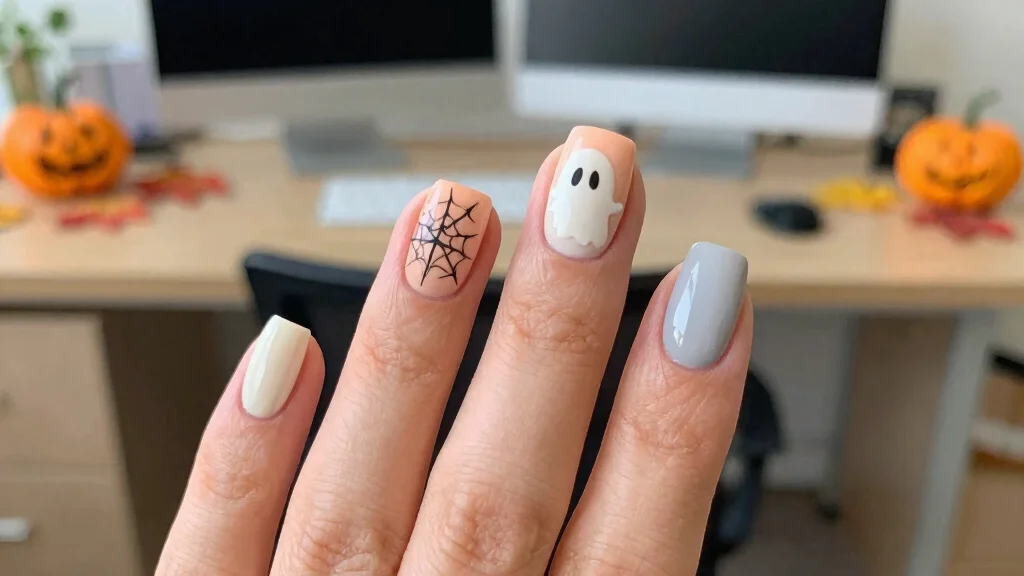
1. Subtle Ghostly Hues
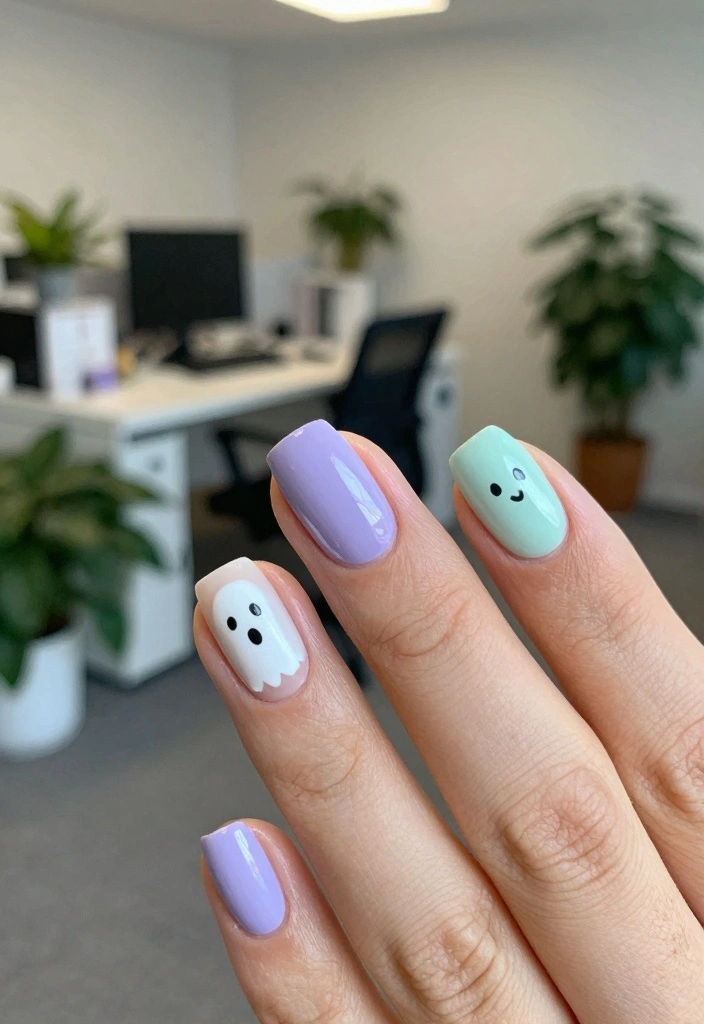
If you want to embrace Halloween without going overboard, these subtle ghostly hues might be just what you need. Imagine a soft pastel base adorned with tiny ghost designs that blend whimsy with professionalism. A light lavender or mint backdrop serves as the perfect canvas for these delicate white ghosts, creating a gentle yet spooky vibe suitable for any setting. This design allows you to express your Halloween spirit in a stylish, understated way without drawing too much attention.
Start by selecting a light pastel polish and ensure you keep the ghost designs minimal—just small dots for eyes and a simple curve for a smile will do. The key is to maintain the subtlety while achieving a playful effect that doesn’t overwhelm.
Key steps to get started:
– Select a light pastel base color
– Use a fine brush for precise detailing
– Apply a matte top coat for a sophisticated finish
This design strikes a perfect balance between fun and professionalism, making it ideal for any occasion where you want a hint of Halloween spirit.
2. Tiny Pumpkin Accent
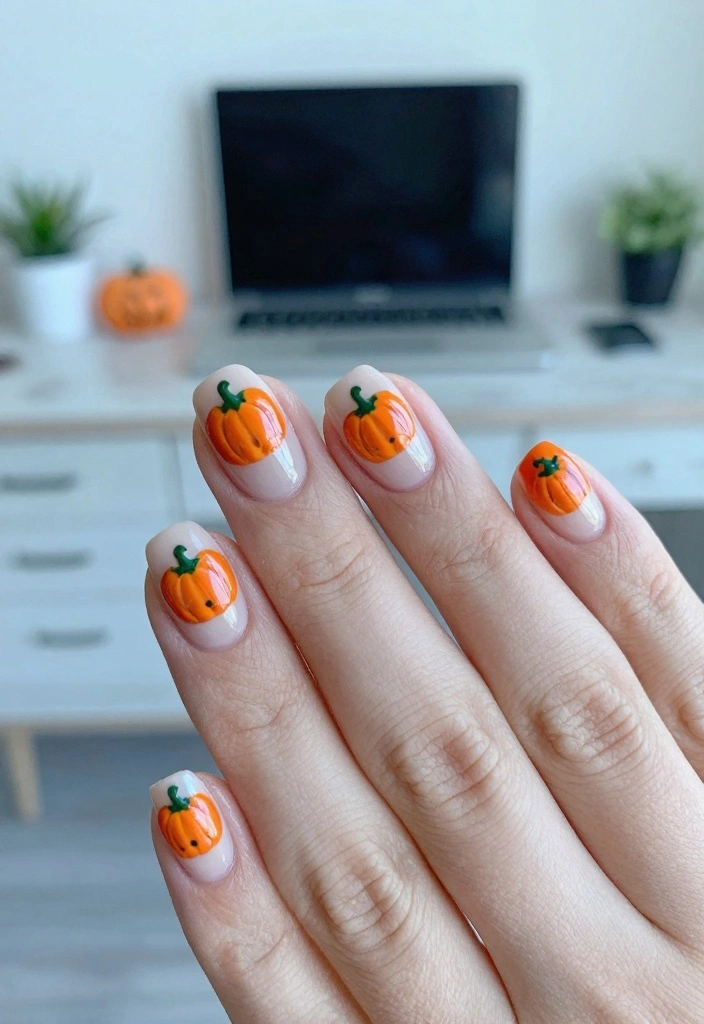
Celebrate Halloween in a chic way with a tiny pumpkin accent on a neutral base. By choosing a nude or light beige polish, you create a sophisticated backdrop for miniature pumpkins that can be painted on one or two accent nails. This design strikes the perfect balance between festive and elegant, making it suitable for the office or any gathering.
Keep the pumpkin designs small to avoid cluttering your nails. Use a thin brush or toothpick for detailed work, ensuring that each pumpkin is just the right size to add interest without overwhelming the design.
Key steps to get started:
– Apply a protective base coat
– Paint two coats of nude or light beige polish
– Create small pumpkins on accent nails with a thin brush
– Seal with a glossy top coat for lasting shine
This tiny pumpkin accent is a delightful way to embrace the holiday spirit while remaining understated and stylish.
3. Delicate Spider Webs
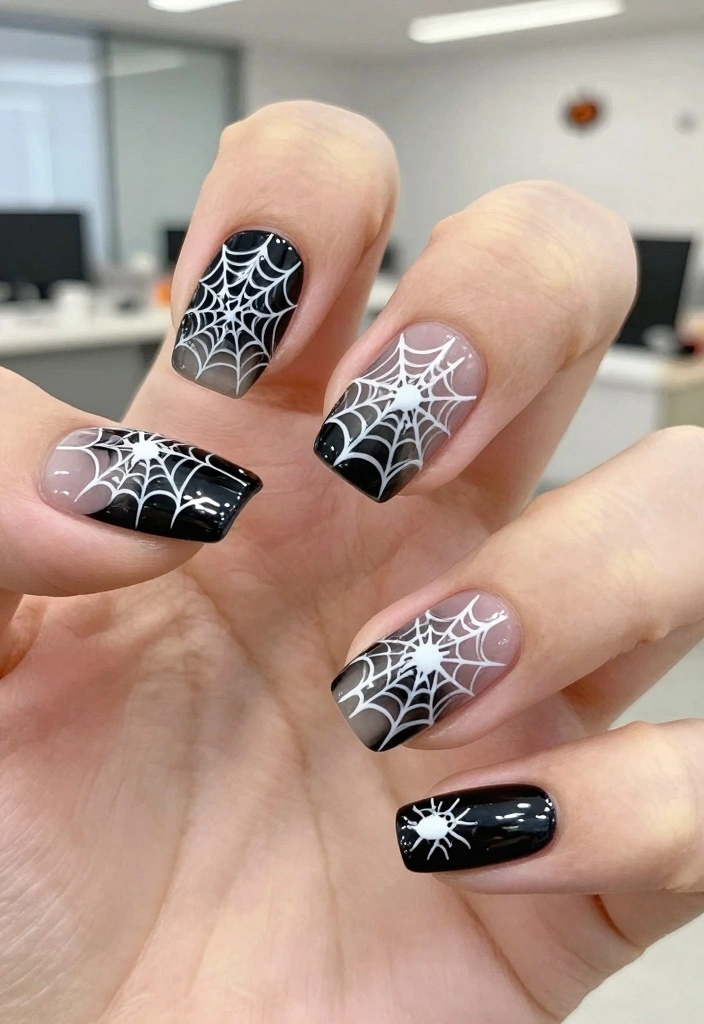
Add a touch of elegance to your Halloween nails with delicate spider webs! Start with a sheer black or dark purple base, and use white or silver polish to create intricate web designs on a couple of your nails. This design is simple yet impactful, providing a spooky feel while still being appropriate for any environment.
To elevate the design, consider adding a tiny spider on the edge of the web. Keeping the web patterns fine and minimal ensures that the look remains sophisticated rather than overwhelming.
Key steps to get started:
– Start with a base coat for protection
– Apply two coats of your chosen sheer polish
– Create web patterns using a striping brush
– Optionally add a tiny spider for flair
Delicate spider webs create a haunting yet refined Halloween vibe that can easily transition from day to night.
4. Witchy Crescent Moons
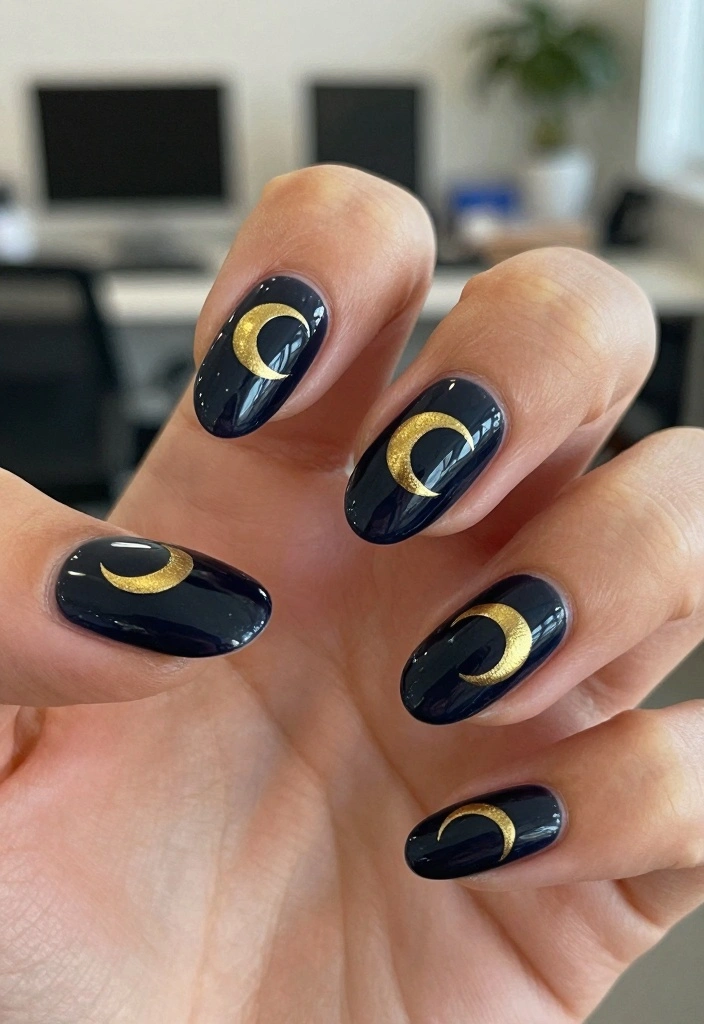
For a minimalist Halloween theme, consider witchy crescent moons on your nails. Using a dark blue or black base, paint crescent moons in gold or silver on alternating nails to evoke a celestial spirit. This design captures the enchanting essence of Halloween while keeping a sophisticated appearance.
The crescent shapes can be easily achieved with a dotting tool, allowing you to create perfectly formed moons that add a touch of magic to your everyday look. This design is subtle enough to wear at work yet festive enough for Halloween celebrations.
Key steps to get started:
– Apply a protective base coat
– Paint two coats of dark polish
– Use a dotting tool to create crescent shapes
– Seal with a glossy top coat for shine
These crescent moons provide a whimsical touch while remaining understated and elegant.
5. Classic Black and White Stripes
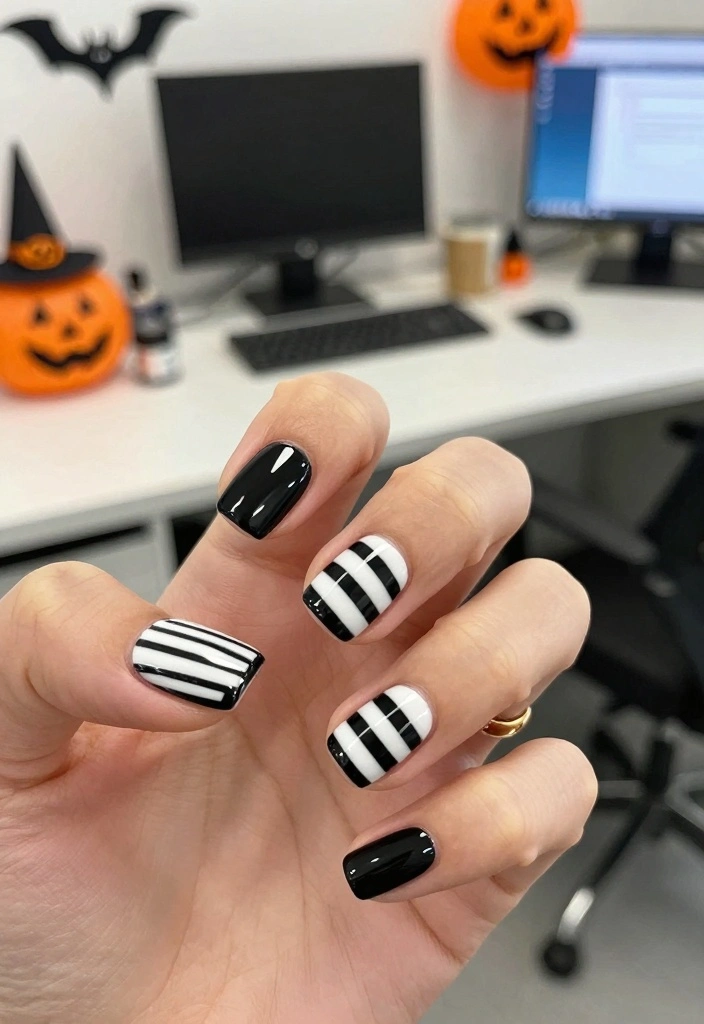
Stripes are a timeless design that can easily be adapted for Halloween. Start with a sleek black base and add thin white stripes for a modern and chic look. This design is impactful yet subtle, giving off just the right hint of Halloween spirit without overwhelming your style.
You can vary the thickness of the stripes or add tiny bats or pumpkins on accent nails to keep things interesting. Using tape can help ensure that your lines are crisp and clean.
Key steps to get started:
– Start with a base coat for protection
– Apply two coats of black polish
– Use tape to create straight lines for white polish
– Finish with a top coat for durability
Stripes are a classic choice that can be easily dressed up for the Halloween season while remaining sophisticated.
How To Choose Minimalist Halloween Nail Art
When selecting simple Halloween nails, you want designs that reflect the festive spirit while remaining office-friendly. Here’s a guide to help you pick the perfect minimalist Halloween nail art:
1. Consider Your Base Color
Choosing the right base color sets the mood for your Halloween nails. Neutral shades like beige, soft pink, or classic black allow for versatility with spooky designs. A clear or light base also makes it easier to incorporate tiny details without overwhelming your look.
2. Assess Your Style
Think about your personal style and how bold you want your designs to be. If you prefer understated elegance, opt for designs like delicate spider webs or tiny pumpkin accents. For those who enjoy a bit more flair, simple bat silhouettes or sweet skull designs can add a fun touch without being too loud.
3. Evaluate Time and Skill Level
Next, consider how much time you have and your level of skill in nail art. If you’re short on time or a beginner, simple designs like classic black and white stripes or minimalist candy corn may be best. Easy Halloween nail art can be achieved in minutes using nail stickers or stamps.
4. Think About Your Nail Length
Your nail length can influence which designs will work best for you. Short nails often look great with small designs like tiny ghosts or subtle Halloween symbols. If you have longer nails, you can play with more intricate designs, like geometric pumpkin patterns or an enchanted forest scene.
5. Factor in the Occasion
Consider where you’ll be showcasing your nail art. For an office setting, choose designs that are festive yet professional, such as pumpkin spice swirls or simple candy stripes. If you have a Halloween party, feel free to go bolder with festive glitter tips or an array of spooky nail designs.
6. Choose Quality Products
Invest in good-quality nail polish that offers longevity and a smooth finish. Look for brands that provide vibrant colors, quick-drying formulas, and easy application. This will ensure your Halloween manicure lasts throughout the season without chips or fading.
Pro Tip: Test out your designs on a piece of paper or a practice nail before applying them to your fingers. This way, you can fine-tune your technique and make adjustments to achieve the desired look without stress.
Taking the time to choose the right minimalist Halloween nail designs will help you express your festive spirit while keeping a polished appearance. With these tips in mind, you’re set to create nail art that’s simple, chic, and perfectly spooky!
6. Minimalist Candy Corn
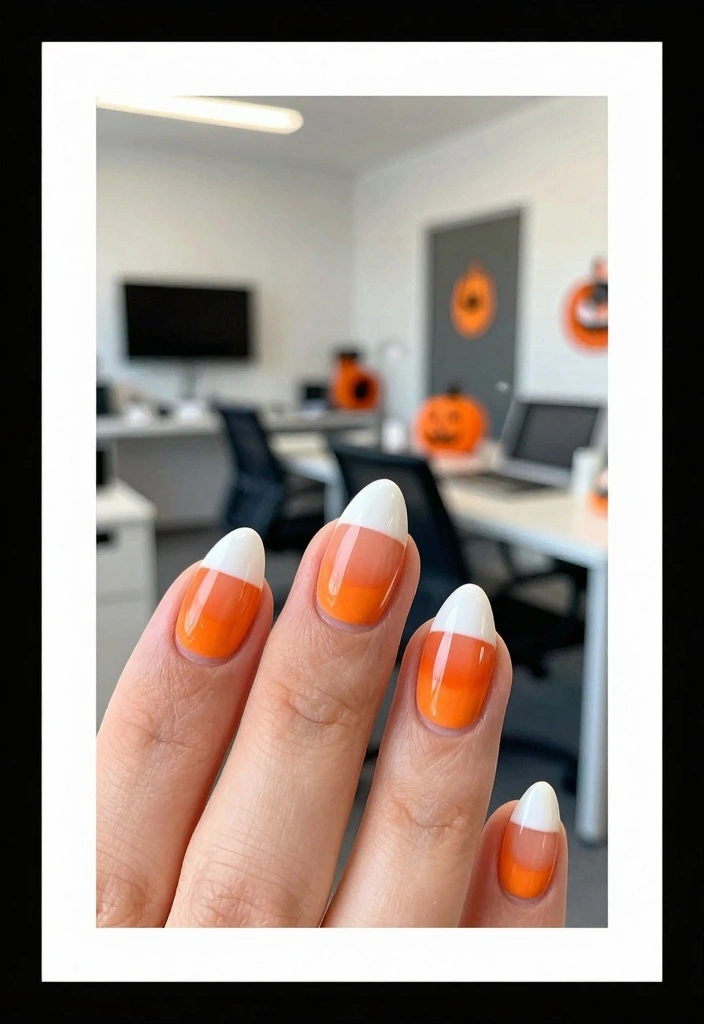
Incorporate the spirit of Halloween with minimalist candy corn nails! Begin with a soft orange base and create triangular tips using white polish to mimic the iconic candy. This design is playful yet subtle, making it a great choice for those who want to celebrate the holiday with style.
Ensure that the triangular tips are small enough to keep the look sleek and office-appropriate. A triangular nail art brush can help you achieve the perfect shape without much fuss.
Key steps to get started:
– Start with a base coat for protection
– Paint two coats of soft orange polish
– Use a small brush to create white triangles at the tips
– Seal with a top coat for shine
These minimalist candy corn nails offer a fun way to embrace Halloween without being over the top.
7. Haunted Forest
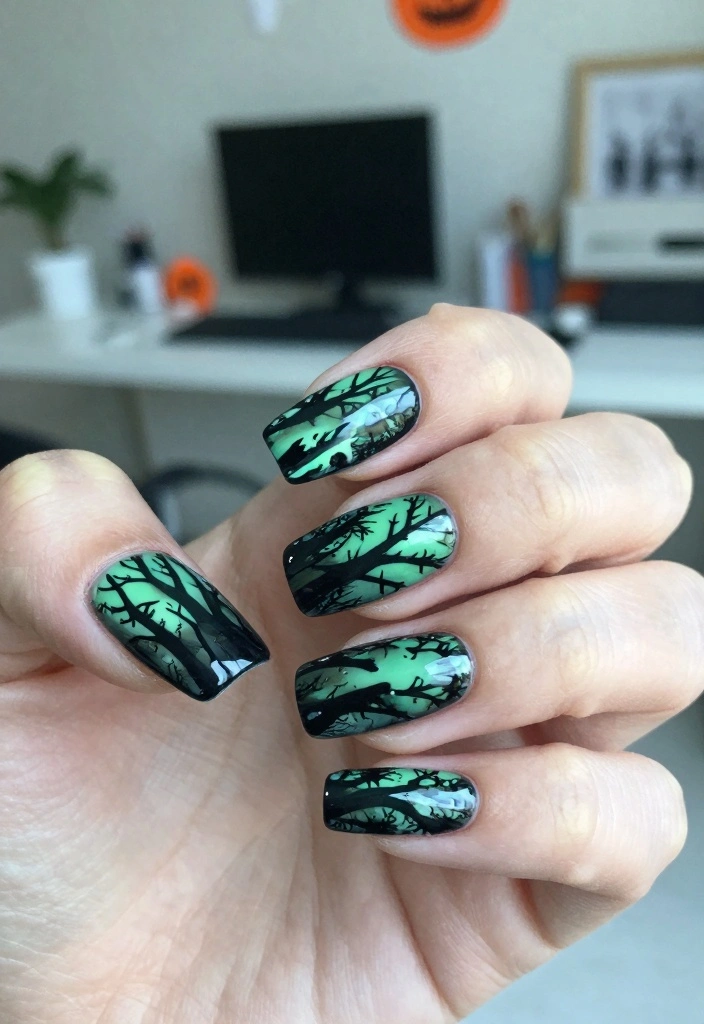
Bring the eerie allure of a haunted forest to your nails with this simple design. Using a dark green or black base, create faint tree silhouettes with a lighter green or white polish. This design is perfect for nature lovers who want to incorporate a spooky touch for Halloween.
Keep the tree designs subtle and avoid overcrowding your nails with too many details to maintain a polished look. A fine brush can help you achieve the delicate tree outlines you desire.
Key steps to get started:
– Start with a base coat for protection
– Apply two coats of dark polish
– Use a fine brush to paint tree silhouettes
– Seal with a top coat for durability
This haunted forest design offers a chic, nature-inspired way to celebrate Halloween.
Fun fact: 70% of people notice nail details in under 5 seconds, so a subtle Haunted Forest makes a big impact. Use a dark base and a single fine brush to craft tree silhouettes—simple, office-friendly, and perfect for simple halloween nails.
8. Pumpkin Spice Swirls
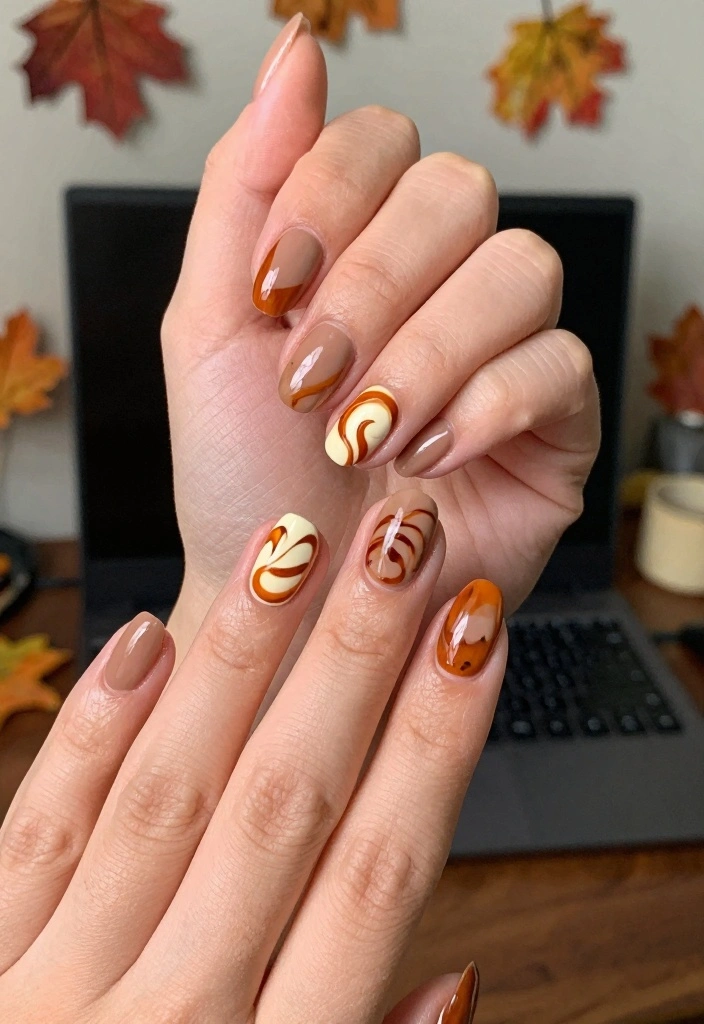
Celebrate the flavors of fall with a pumpkin spice swirl design! Start with a warm taupe base and add swirls of burnt orange and cream to create a delightful effect reminiscent of your favorite seasonal treat. This nail art is stylish and seasonal without being overly dramatic, making it ideal for office wear.
Mixing the colors in swirling patterns allows for a unique expression while keeping the overall look minimalistic. A thin brush will help you achieve those clean swirls with ease.
Key steps to get started:
– Start with a base coat for protection
– Paint two coats of warm taupe polish
– Use a thin brush to create swirls with burnt orange and cream
– Finish with a top coat for shine
These pumpkin spice swirls are a deliciously subtle way to celebrate the season.
9. Simple Bat Silhouettes
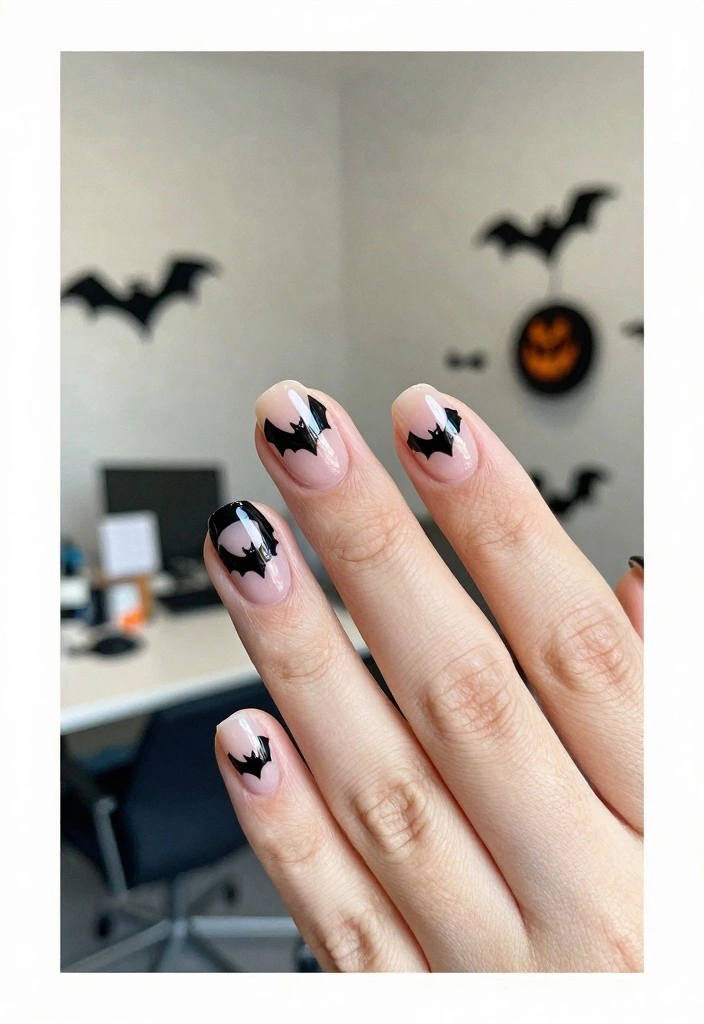
Bats are classic Halloween symbols that look fantastic in minimalist nail art. Choose a dark base and add tiny bat silhouettes in black or white, depending on your base color. This design delivers an engaging Halloween look that remains understated enough for any setting.
To keep the appearance clean, ensure the bats are small and spaced out evenly. Practicing your bat design on paper before applying it to your nails can help you achieve the perfect look.
Key steps to get started:
– Start with a base coat for protection
– Apply two coats of dark polish
– Use a fine brush to paint tiny bat silhouettes
– Seal with a top coat for durability
Simple bat silhouettes add a whimsical touch of Halloween while remaining polished and professional.
10. Sweet Skull Designs
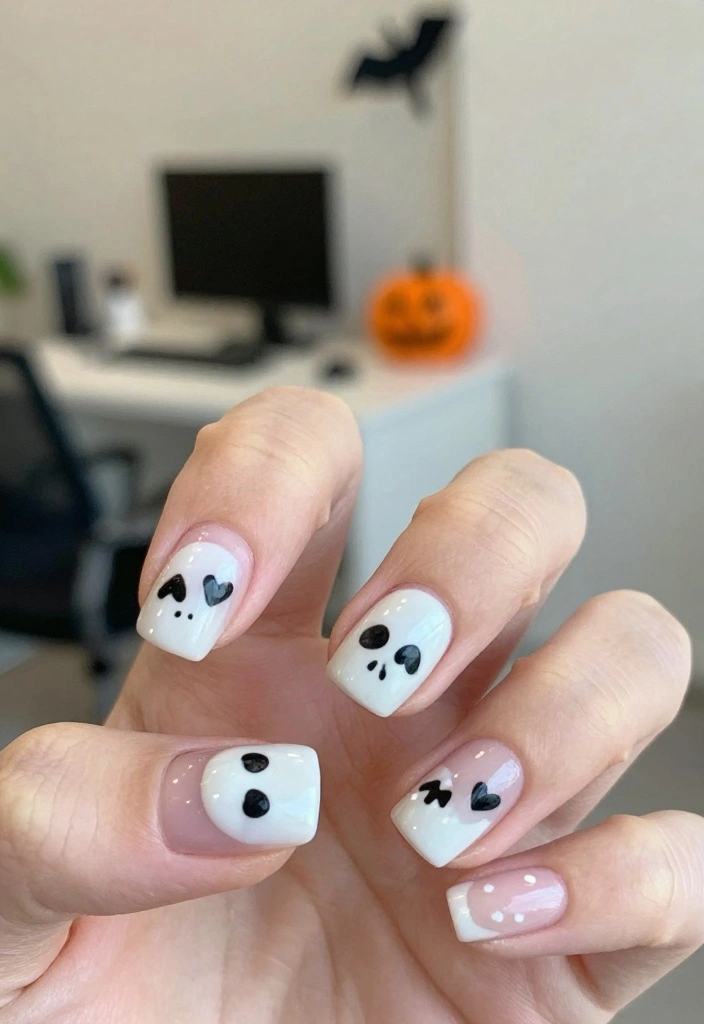
For a playful twist on Halloween themes, sweet skull designs can add a fun edge to your nails. Use a soft white or pastel base and paint small, adorable skulls on one or two accent nails. These cute skulls can feature smiling faces or hearts for eyes, keeping the look light-hearted and trendy.
This design is perfect for the office while still capturing the fun of Halloween. Keeping the skulls small ensures a minimalist appeal that won’t overwhelm your style.
Key steps to get started:
– Start with a base coat for protection
– Paint two coats of soft white or pastel polish
– Use a thin brush to create small skull designs
– Add cute features like hearts for eyes
– Finish with a top coat for shine
These sweet skull designs bring a delightful twist to Halloween without being too overwhelming.
11. Mummy Wraps

Mummy wraps can make for a fun and cute design choice for Halloween. Start with a light beige or white base and add thin strips of black or brown polish to create a wrapped effect. This design nods to the Halloween season while remaining chic and sophisticated for work.
To maintain a minimalist look, keep the mummy wraps to one or two strips on each nail. Tape can help you create clean lines for the mummy wraps, ensuring a polished finish.
Key steps to get started:
– Start with a base coat for protection
– Paint two coats of light beige or white polish
– Use a thin brush or tape to create strip designs
– Seal with a top coat for durability
Mummy wraps are a playful way to embrace the Halloween spirit without going overboard.
Fun fact: 2 slim strips of black or brown can turn a simple mummy wrap into an office-friendly twist on simple halloween nails. Start with a light beige base and keep the wrap to one per nail for a chic, minimalist look you can wear to work.
12. Enchanted Forest Nails
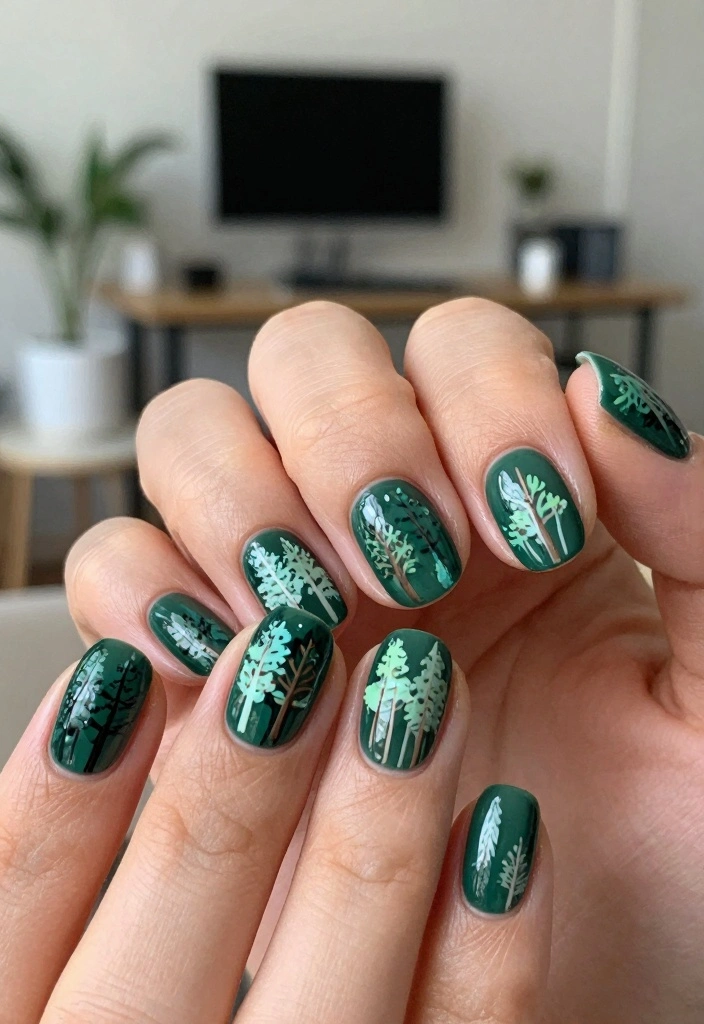
Bring the magic of an enchanted forest to your nails with this lush design. Choose a deep green base and create tiny tree designs with a lighter green or white polish. This nail art is perfect for nature lovers, offering a subtle nod to Halloween without being too obvious.
By keeping the tree designs small and well-spaced, you can maintain a sleek and sophisticated appearance. A dotting tool can be helpful in creating those tiny tree shapes.
Key steps to get started:
– Start with a protective base coat
– Apply two coats of deep green polish
– Use a fine brush or dotting tool to create tiny tree designs
– Seal with a glossy top coat for shine
Enchanted forest nails deliver a whimsical yet chic Halloween look that celebrates nature.
13. Geometric Pumpkin Patterns
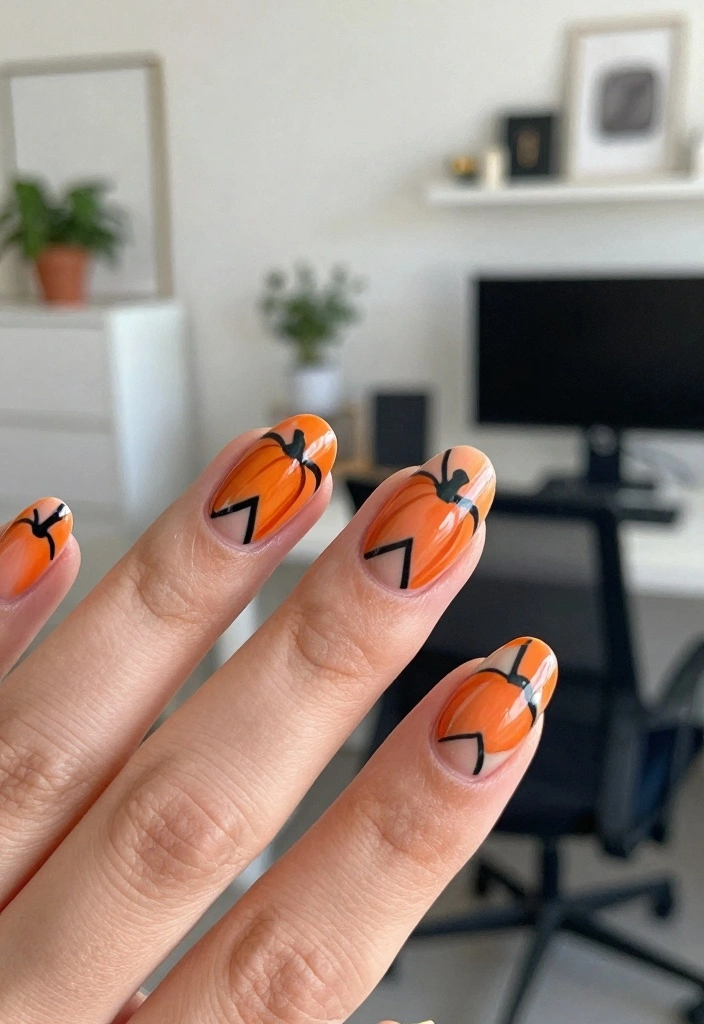
For a modern twist on Halloween, try geometric pumpkin patterns! Start with a soft orange base and paint angular shapes and lines with black or white polish to create a mesmerizing geometric effect. This design is not only festive but also on-trend, perfect for someone who enjoys chic nail art throughout the holiday.
Using a thin striping brush will be essential for achieving clean geometric lines that make this design pop. This look allows for individuality while remaining stylish and contemporary.
Key steps to get started:
– Start with a protective base coat
– Apply two coats of soft orange polish
– Use a striping brush to create angular shapes
– Finish with a top coat for added shine
Geometric pumpkin patterns offer a stylish approach to Halloween nail art that stands out while remaining tasteful.
14. Moonlit Night Sky
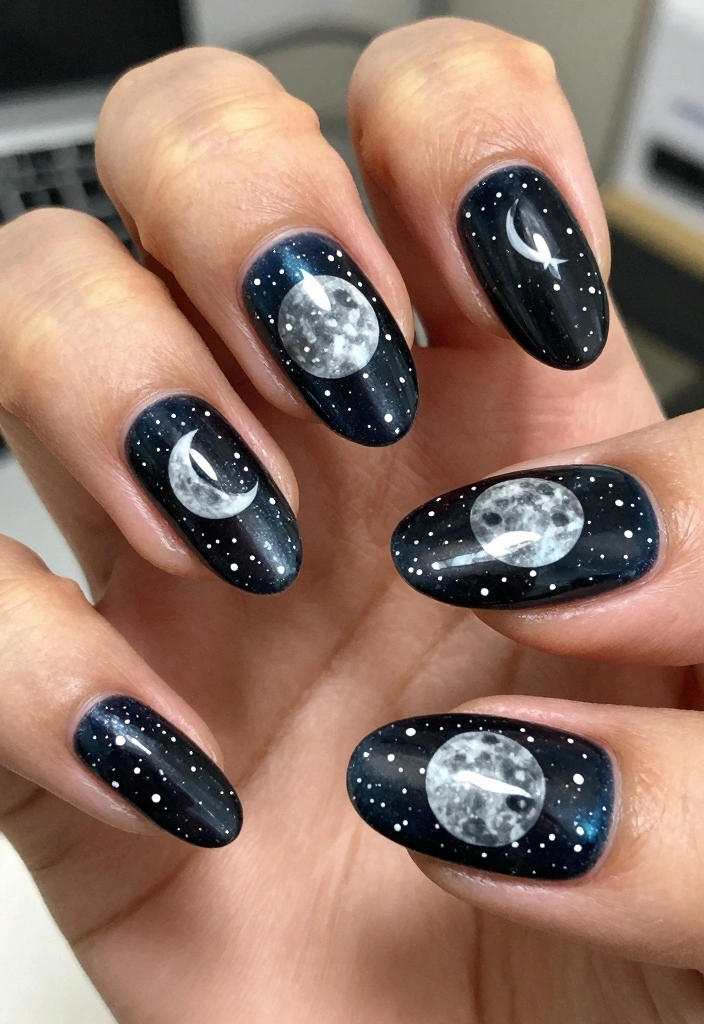
Capture the beauty of a moonlit night sky with this simple yet enchanting nail art design. Using a deep navy or dark purple base, create small white dots and moons for a celestial feel. This design is subtle yet captivating, making it perfect for Halloween while still being appropriate for the office.
The scattered dots represent stars, while the moons add a whimsical touch. A dotting tool can help you create perfectly spaced dots that enhance the overall effect.
Key steps to get started:
– Start with a protective base coat
– Apply two coats of dark navy or purple polish
– Use a dotting tool to create dots and moons
– Seal with a top coat for shine
Moonlit night sky nails provide a chic and enchanting option for celebrating Halloween.
15. Simple Candy Stripe
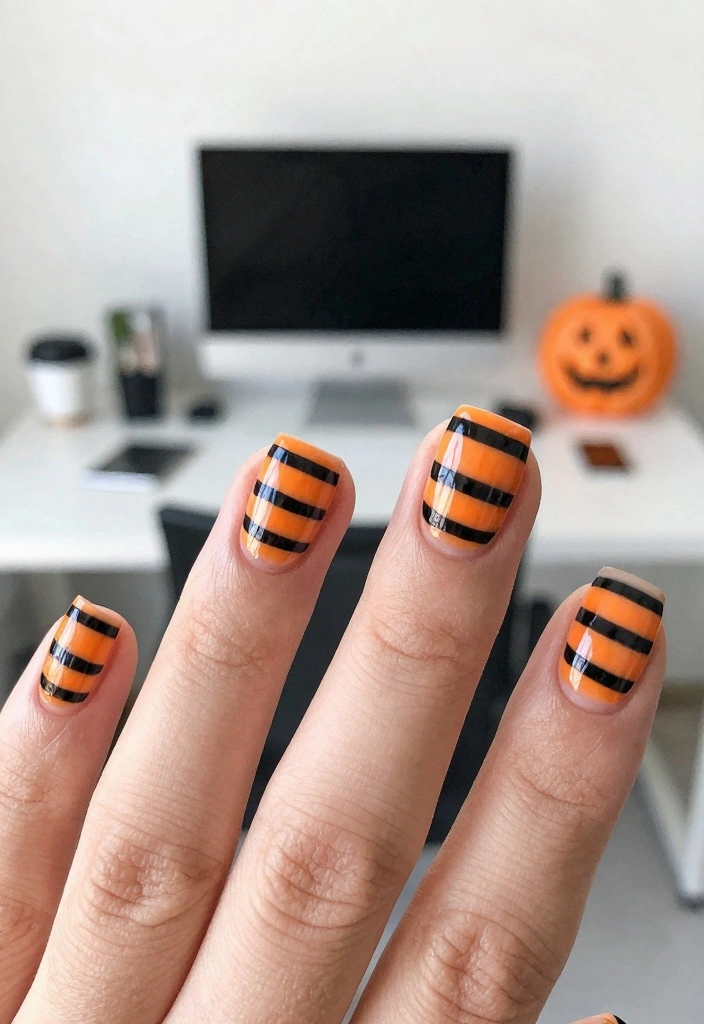
Candy stripes are a fun and festive way to embrace the Halloween spirit without overwhelming your style. Choose a neutral base and add thin stripes in orange and black for a playful yet sophisticated touch. This design allows you to celebrate Halloween while maintaining a minimalist approach that works well in any office setting.
Keep the stripes evenly spaced and thin to achieve a sleek look. Using tape can help ensure that your lines are straight and crisp.
Key steps to get started:
– Start with a protective base coat
– Apply two coats of your chosen neutral polish
– Use tape to create thin stripes with orange and black polish
– Finish with a shiny top coat for durability
Simple candy stripes add a festive touch to your nails while remaining understated and chic.
16. Subtle Halloween Symbols
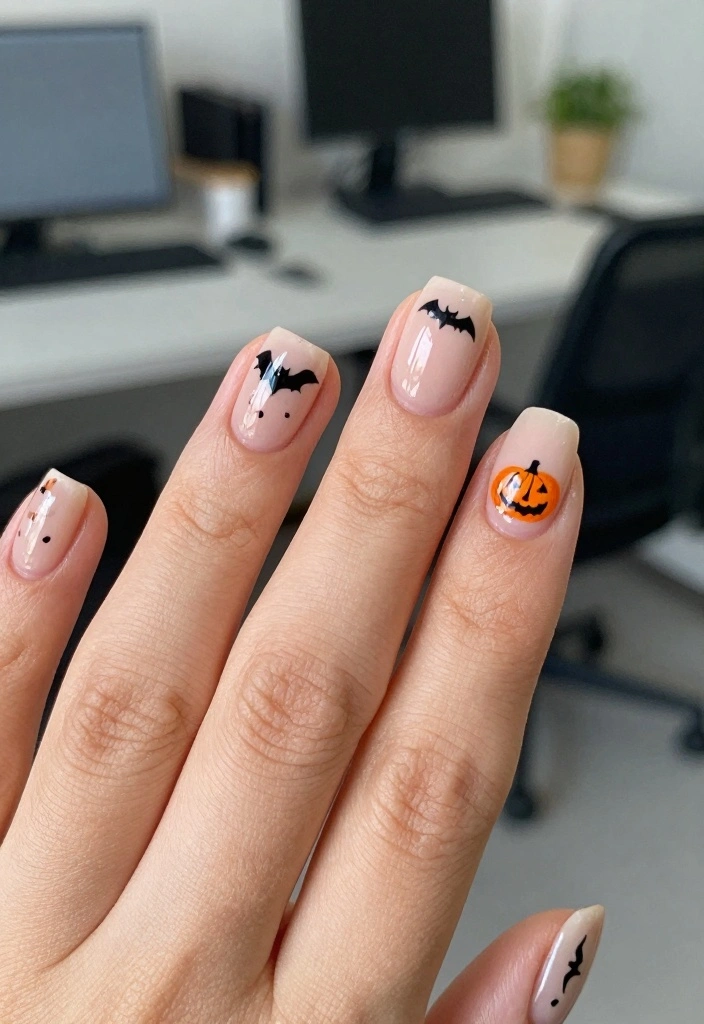
Incorporate subtle Halloween symbols like bats, pumpkins, or ghosts on a nude or light-colored base for a stylish nod to the holiday. These designs maintain a professional look while allowing you to celebrate Halloween. Keep the symbols small and minimalistic, ensuring that just a hint of festive spirit shines through.
Mixing and matching symbols can create a unique touch, as long as they remain understated. A fine brush will be your best friend for achieving those delicate details.
Key steps to get started:
– Start with a base coat for protection
– Paint two coats of nude or light polish
– Use a fine brush to paint small symbols on select nails
– Seal with a top coat for shine
Subtle Halloween symbols provide a delicate way to celebrate the season while keeping your look polished.
With simple halloween nails, tiny bats, pumpkins, or ghosts on a nude base keep your look office-friendly and festive. When you mix small symbols with a fine brush, you’ll celebrate Halloween without shouting.
17. Festive Glitter Tips
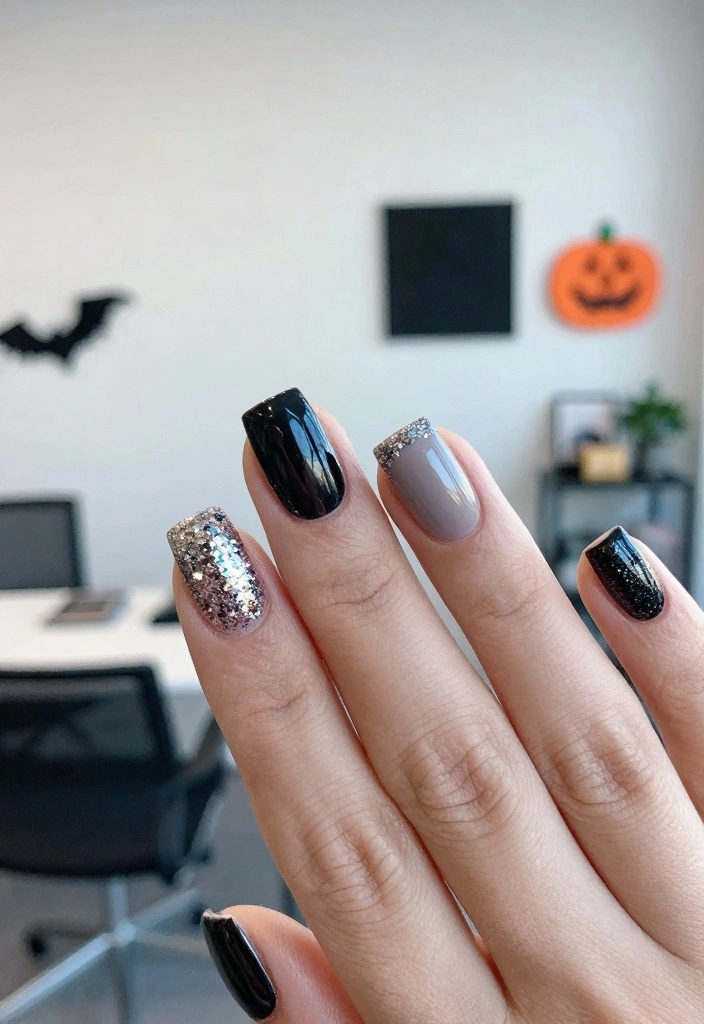
Finish off your Halloween nails with festive glitter tips for a chic look that sparkles without being too flashy. Using a dark or neutral base, apply glitter at the tips to add just the right amount of festive flair. This design is perfect for the office, allowing you to celebrate the season with style.
Keep the glitter application minimal, focusing on the tips to maintain a balanced and elegant look. A clear top coat with glitter can enhance the overall polish of your nails.
Key steps to get started:
– Start with a base coat for protection
– Apply two coats of your chosen base color
– Apply glitter polish to the tips of each nail
– Seal with a glossy top coat for shine
Festive glitter tips offer a charming way to add sparkle to your Halloween nails while keeping it sophisticated.
Conclusion
These minimalist Halloween nail designs offer a perfect balance of festive spirit and professional style.
With simple ideas ranging from subtle ghosts to elegant stripes, you can embrace the Halloween season without compromising your office-friendly look.
Try these trendy designs and showcase your creativity while keeping it chic and polished!
Frequently Asked Questions
What are the easiest ways to achieve simple halloween nails that stay office-appropriate?
To achieve simple halloween nails that stay office-appropriate, start with a neutral base (nude, taupe, or sheer pink). Then pick one nail to feature a tiny spooky motif using a fine brush or sticker—think a mini ghost, bat, or pumpkin. Keep the palette to two colors for a minimalist Halloween nails look. Finish with a durable top coat and let each layer dry. These techniques align with easy Halloween nail art and Halloween manicure ideas while staying professional.
Pro tip: choose a matte or glossy finish based on your workplace vibe to keep it chic and festive.
Which minimalist Halloween nail designs work best for a professional setting?
Great options include negative-space designs with thin black lines or tiny icons, a subtle French tip in orange or black, a single nail with a tiny decal (ghost, bat, or pumpkin), or a sheer base with a slim stripe or dot pattern. Keep it to one accent nail and limit the palette to two colors for minimalist Halloween nails. Finish with a smooth top coat for a polished look that still nods to spooky nail designs without shouting Halloween.
What supplies should I have to recreate these simple Halloween manicure ideas at home?
Essentials include a solid base coat, a neutral base color, a dark accent color (black or charcoal), a good top coat, a fine brush or dotting tool, nail stickers or decals, and striping tape for clean lines. Optional items like foil, tiny gems, or a quick-dry top coat can elevate the look. These basics cover easy Halloween nail art and help you stay on trend with festive nail trends without a salon visit.
How can I make simple halloween nails last all week without chipping?
Prep is key: file and buff nails, push back cuticles, and apply a ridge-filling base. Use two thin coats of your base color, letting each layer dry completely. Seal with a high-quality top coat and cap the free edges. For extra longevity, reapply the top coat on Day 4 and consider a gel top coat if you want maximum wear. These tips help your simple halloween nails stay fresh during a busy workweek and fit Halloween manicure ideas that are practical and long-lasting.
How can I adapt minimalist Halloween nails for different nail lengths and shapes?
Absolutely—minimalist designs can scale with length and shape. On short nails, use tiny decals on one or two nails or a subtle negative-space motif. On longer nails, you can expand the design with a delicate stripe, a small ghost, or a tiny cluster of decals on an accent nail. Stick to a two-color palette and sparse accents to keep the look minimalist Halloween nails and office-friendly across shapes like square, almond, or oval.
Related Topics
simple halloween nails
minimalist design
spooky nail designs
easy halloween nail art
office-friendly nails
quick manicure
festive nail trends
beginner friendly
seasonal nail art
subtle spooky style
nail art inspiration
minimalist halloween nails