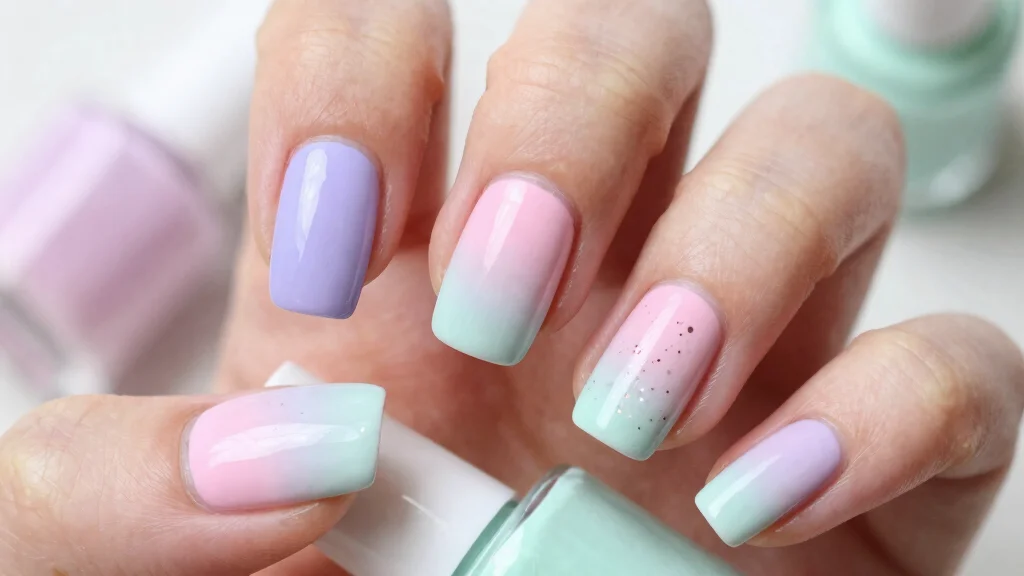
Are you ready to take your nail game to the next level? Lately, I’ve been obsessing over chic and stylish ombre nail designs, especially those pastel blends that feel like a breath of fresh air. There’s something so captivating about how colors melt into one another, creating stunning gradients that can elevate any outfit. Whether it’s for a special occasion or just to pamper yourself, ombre nails are a trend that never goes out of style.
If you’re someone who loves to experiment with nail art, this post is for you. You’ll find a range of 18 delightful ombre nail design ideas that are not only trendy but also super easy to achieve. From soft lavender fading into baby pink to a vibrant pastel rainbow blend, there’s something here for every mood and personality. I’ve gathered these designs to help you make your nails a statement piece that reflects who you are.
In this guide, you’ll discover not just the designs but also techniques and tips on how to create these fashionable looks yourself. Get ready to dive into the world of ombre nail art with ideas that are gorgeous, chic, and perfect for your next manicure!
Key Takeaways
– Diverse Designs: Explore 18 unique ombre nail designs, ranging from soft pastels to vibrant blends, ensuring there’s a style for everyone.
– Easy Techniques: Learn simple techniques for achieving beautiful gradients, making your nail art experience enjoyable and accessible.
– Current Trends: Stay updated with the latest nail design trends, which often highlight the versatility of ombre styles.
– Color Combinations: Discover various color blend techniques that can be mixed and matched to create your signature ombre look.
– Stylish Inspirations: Get inspired with stylish nail ideas, helping you create eye-catching nails that will turn heads wherever you go.
1. Soft Lavender to Baby Pink
Looking for a romantic nail design? This charming ombre from soft lavender to baby pink is just what you need. It perfectly captures the essence of spring and summer, giving your nails a fresh and sweet vibe. Start with a lavender base coat, then use a makeup sponge to blend in baby pink at the tips for a smooth and lovely transition.
To achieve a polished look, always apply a top coat to seal your design and enhance shine. For an extra touch, consider adding tiny silver or gold glitter dots at the base for some sparkle that catches the light.
Key steps to create this design:
– Apply a base coat and let it dry completely
– Paint your nails with lavender polish
– Use a sponge to dab baby pink polish on the tips
– Blend the colors where they meet
– Finish with a top coat for added gloss
2. Mint Green to Light Yellow
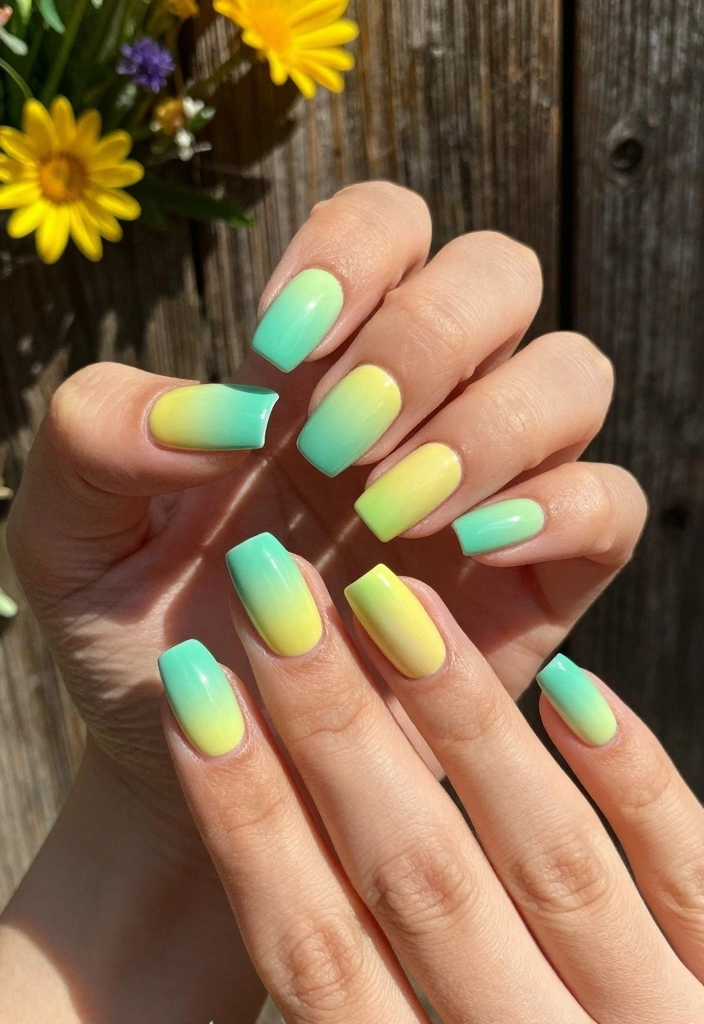
Brighten your nails with a fun mint green fading into light yellow ombre! This lively design is perfect for summer and radiates cheerful vibes. Start with a mint green base and use the sponge technique to apply light yellow at the tips, creating a flawless gradient that makes your nails pop.
For a unique twist, try applying a matte top coat instead of glossy, or add cute daisy or sunshine stickers to emphasize that summer theme.
Steps to get started:
– Apply your base coat and allow it to dry
– Paint your nails mint green and let dry
– Use a sponge to apply light yellow at the tips and blend
– Choose a top coat finish that suits your style
3. Peach to Coral
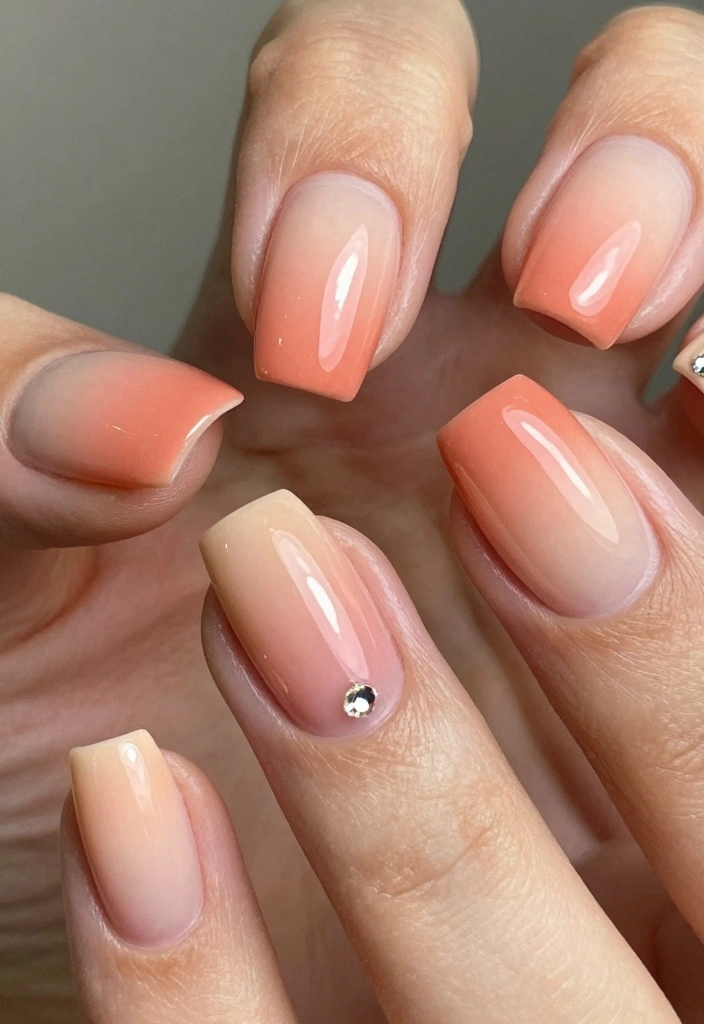
For a warm and inviting look, embrace this peach to coral ombre design. It’s perfect for any occasion and brings a vibrant touch to your nails. Begin with a peach base coat, then blend coral at the tips using a sponge for a gradient that is both captivating and flattering on all skin tones.
Add a small rhinestone on an accent nail for a touch of glam, or use gold striping tape for an extra detail that elevates your manicure.
Getting started is easy:
– Prepare your nails with a base coat
– Paint a peach base and let it dry
– Apply coral at the tips with a sponge and blend well
– Finish with a glossy top coat for shine
Fun fact: Peach to coral ombre nail designs quickly win hearts—43% of beauty enthusiasts report it looks flattering on most skin tones. A simple sponge blend and a rhinestone accent can elevate the look in minutes.


How To Choose the Perfect Ombre Nail Designs
Choosing the right ombre nail designs can enhance your style and express your personality. With various color combinations and techniques, you want to select a design that reflects your taste. Here’s how to make the best choice for your next manicure.
1. Consider Your Skin Tone
Your skin tone plays a significant role in how nail colors look on you. If you have a warm skin tone, colors like peach, coral, and golden shades typically complement you best. For cooler skin tones, opt for colors like blue, lavender, and silver. Test a few shades on your nails to see which ones you feel most confident wearing.
2. Think About the Occasion
Different occasions call for different nail designs. For formal events, you might want to choose subtle gradients like cream to soft gray or rose gold to champagne. For casual outings or summer parties, look for vibrant blends like pastel rainbow or sweet summer ombre. Tailor your choice to the event you’re attending to ensure your nails make the perfect statement.
3. Explore Color Combinations
Ombre nail designs can blend two or more colors for striking effects. Consider experimenting with color combinations like mint green to light yellow for a fresh summer look, or dark red to black for a bold statement. Use a color wheel to help visualize how colors blend and find combinations that work harmoniously together.
4. Select the Right Technique
There are several techniques to achieve ombre effects, including sponge application and brush blending. If you’re a DIY enthusiast, a sponge might be your best bet for a smoother gradient. For salon visits, discuss your preferred style with the nail technician to ensure you get the desired outcome. Knowing the technique can help in achieving the perfect ombre look.
5. Consider Nail Length and Shape
The length and shape of your nails can influence the design’s overall impact. Longer nails can showcase intricate designs, while shorter nails might benefit from simpler blends. Shapes like stiletto or almond can enhance the elegance of ombre styles, while square shapes can give a trendy and modern look. Assess your nail shape to choose a design that complements it perfectly.
6. Keep Up with Nail Design Trends
Nail design trends can help inspire your choices. Look out for trending ombre styles such as ombre glitter fades or earth tone blends. Following social media accounts of nail artists can provide fresh ideas and keep your style current. Explore trending hashtags to see what’s popular now and adapt those ideas to suit your taste.
Pro Tip: Always test a few colors before committing to a full design. You can paint a small swatch on a nail wheel or even on your nails to see how the colors look in natural light. This way, you ensure that you’ll love the final result!
With these guidelines in mind, you’re well-equipped to choose the perfect ombre nail design that complements your personal style and suits any occasion. Enjoy experimenting with different looks and have fun showing off your beautiful nails!
4. Blue to Purple
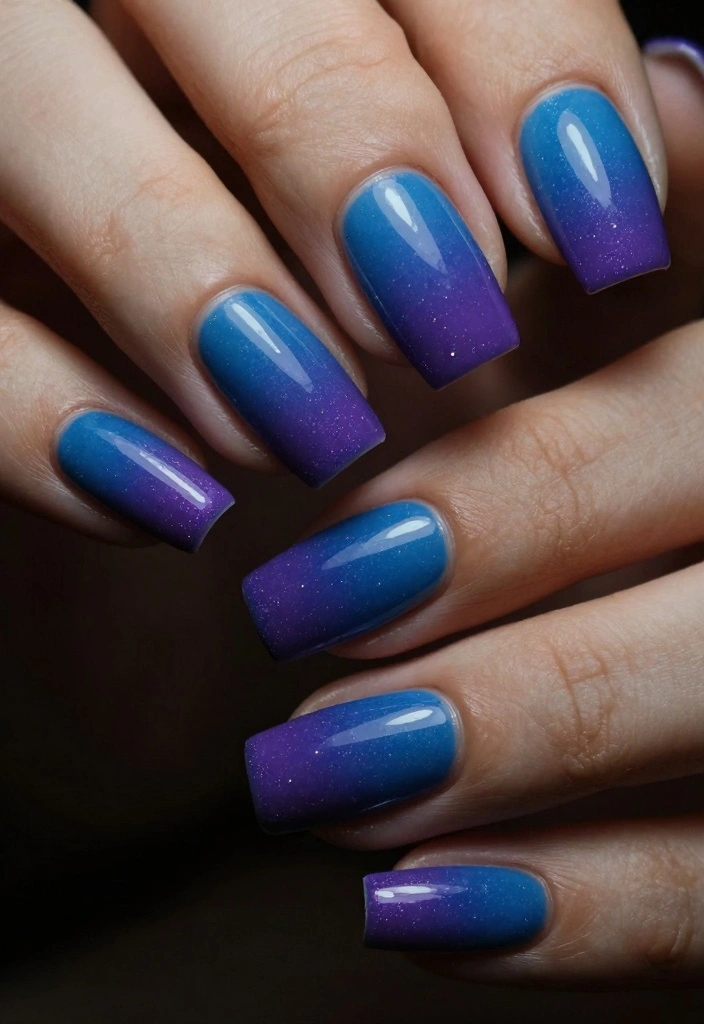
Make a bold statement with a stunning blue to purple ombre! This eye-catching design is perfect for nights out or special occasions. Start with a vibrant blue base, and then use a sponge to blend in deep purple at the tips for a dramatic and edgy look.
For a chic effect, add a matte top coat or keep it glossy for a sophisticated finish. Pair this design with a stylish outfit for a complete look that stands out.
Steps to create this look:
– Apply a base coat and allow it to dry
– Use bright blue polish for the base
– Sponge dark purple onto the tips
– Finish with your choice of top coat
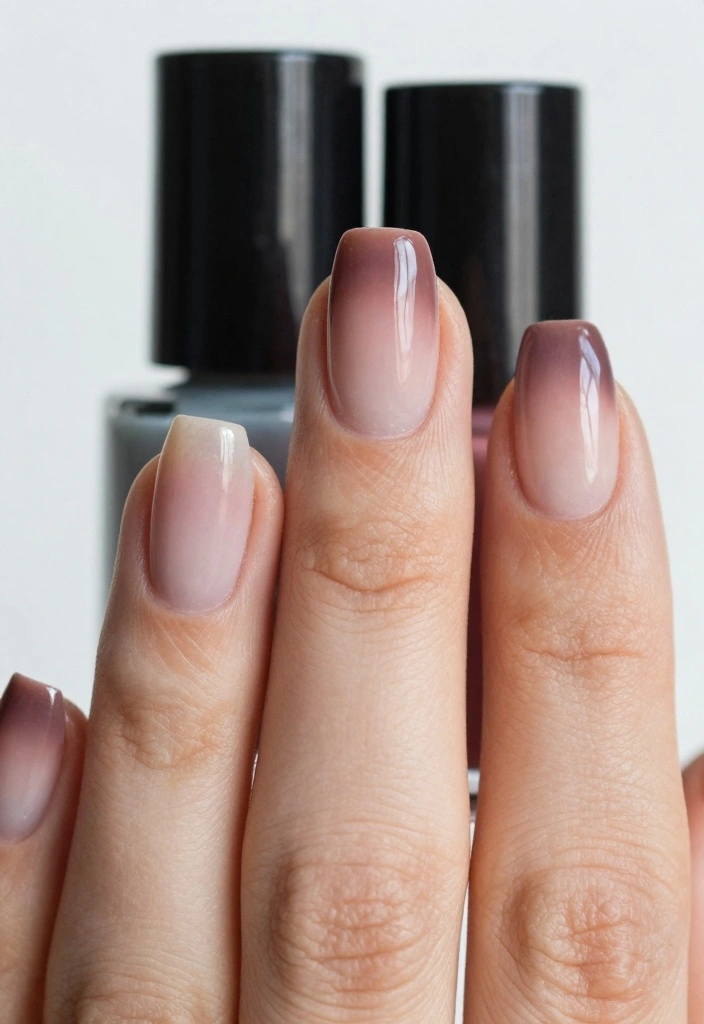
5. Cream to Soft Gray
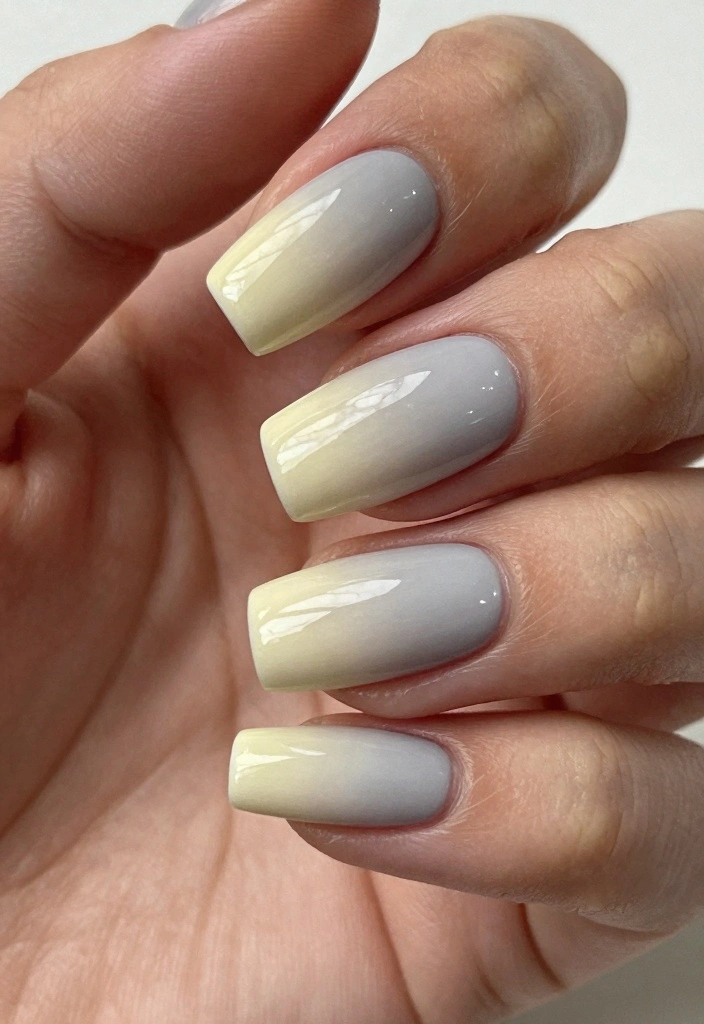
Achieve a sophisticated vibe with a cream to soft gray ombre design. This classy color combination perfectly balances elegance and versatility, making it suitable for both professional and casual settings. Start with a cream base coat, then blend soft gray at the tips using a sponge for a smooth transition.
A matte finish will add a chic touch, while a glossy top coat will make the colors pop. Consider incorporating minimalistic nail art for a unique touch that showcases your style!
Follow these steps:
– Apply a base coat and let dry
– Paint your nails in a cream shade
– Use a sponge to blend soft gray at the tips
– Seal with a top coat for your desired finish
Fun fact: a cream-to-soft-gray ombre reads as polished and versatile, making impulsive color changes feel almost effortless. With a matte finish or glossy top coat, you’ll master cozy elegance—perfect for workdays and weekends alike.
6. Light Pink to Lilac
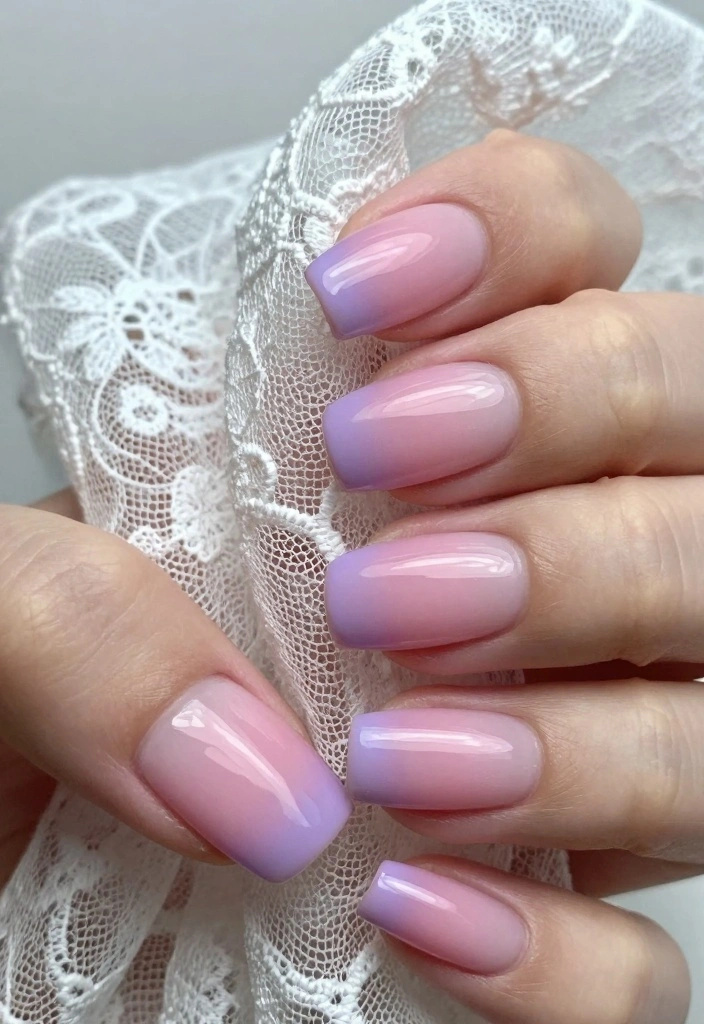
Soft and feminine, a light pink to lilac ombre is perfect for any romantic occasion. This gentle transition makes your nails look fresh and youthful. Start with a light pink base, then sponge in lilac at the tips for a dreamy effect that’s great for weddings or a lovely day out.
For added flair, consider delicate floral decals or a matte finish for a modern twist that enhances the overall look.
Steps to achieve this design:
– Apply a base coat and allow to dry
– Paint your nails with light pink polish
– Blend lilac at the tips using the sponge
– Seal with a top coat to complete the look
7. Dark Red to Black
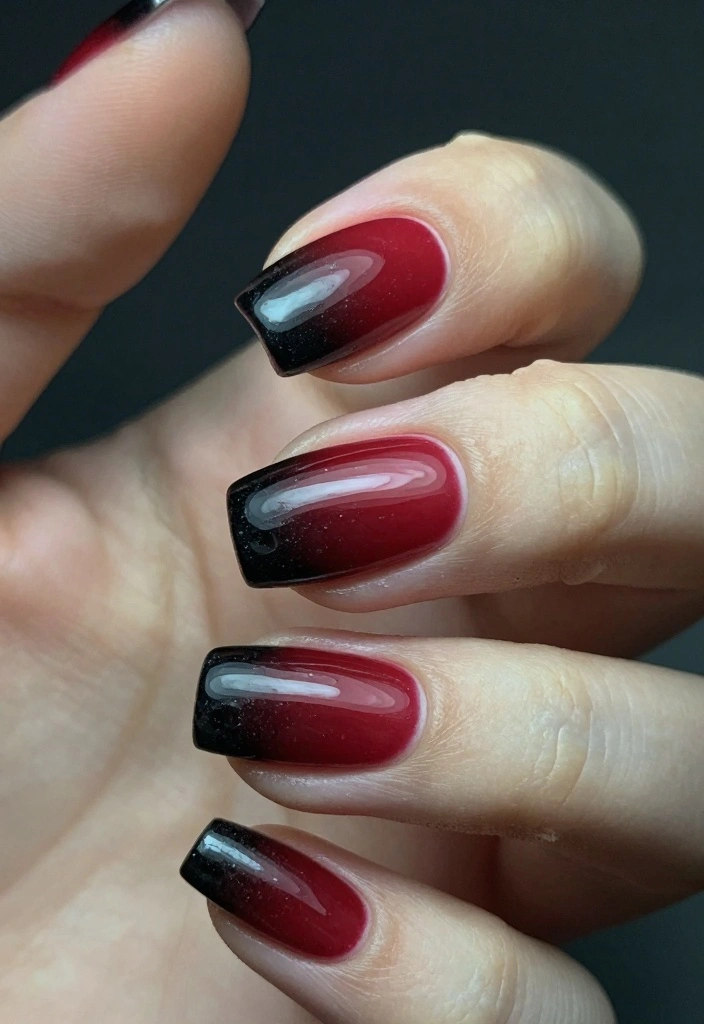
For a dramatic flair, the dark red to black ombre is a stunning choice. This bold design is striking and perfect for a night out or any event where you want to make an impression. Start with a deep red base, then use a sponge to apply black at the tips, creating an edgy yet elegant nail design.
Consider adding metallic studs or glitter for extra flair. A matte top coat works beautifully for a grunge vibe while still looking chic.
Follow these steps:
– Prepare your nails with a base coat
– Paint the base with dark red polish
– Sponge on black at the tips and blend
– Finish with your choice of top coat for the final touch
8. Light Blue to White

Brighten your look with a light blue to white ombre design! This fresh style is perfect for any season and pairs beautifully with any outfit. Begin with a light blue base coat, then blend pure white at the tips using a sponge technique for a soft and airy effect.
A glossy finish maximizes the airy appeal, or you can add tiny star decals for a whimsical touch that enhances the design.
Steps to create this look:
– Apply a base coat and let it dry
– Paint with light blue polish
– Use the sponge to blend white polish at the tips
– Seal with a top coat to protect the design
9. Pastel Rainbow Blend
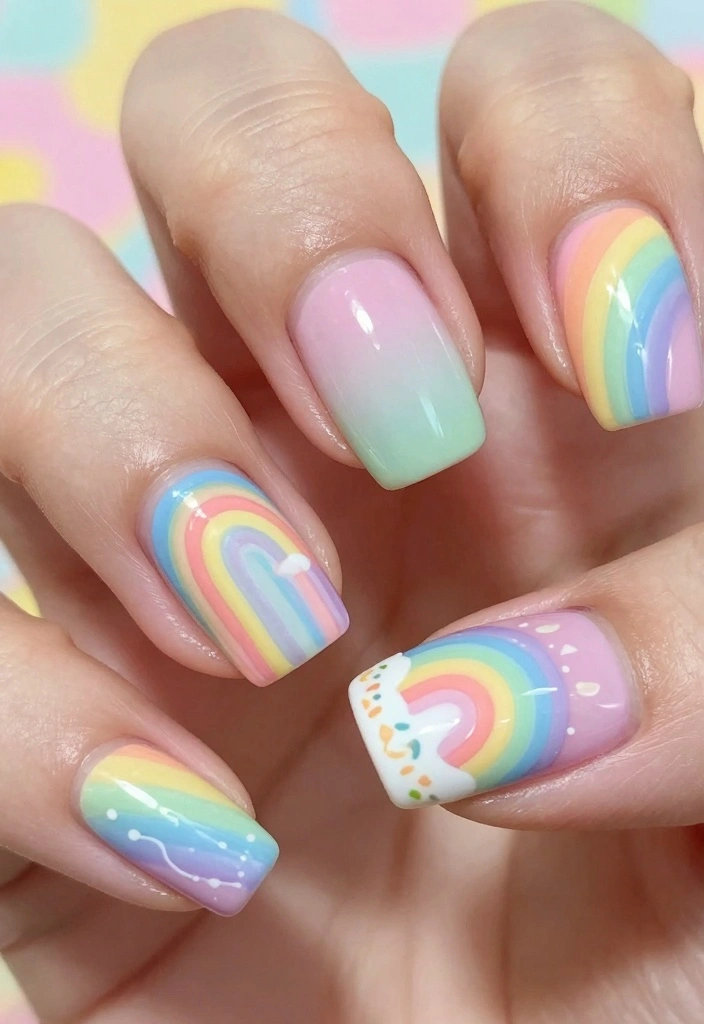
Embrace the joy of colors with a pastel rainbow ombre! This playful design blends soft hues into a whimsical gradient that’s perfect for any fun occasion. Start with a white base coat, then use a sponge to apply pastel pink, blue, lavender, and yellow for a vibrant and cheerful look.
A glossy top coat will keep the colors vibrant, and consider adding tiny hearts or stars to elevate the charm of your nails.
Key steps to achieve this design:
– Apply a base coat and allow to dry
– Use white polish as your base
– Blend pastel colors with a sponge
– Finish with a glossy top coat for shine
10. Gray to Neon Pink
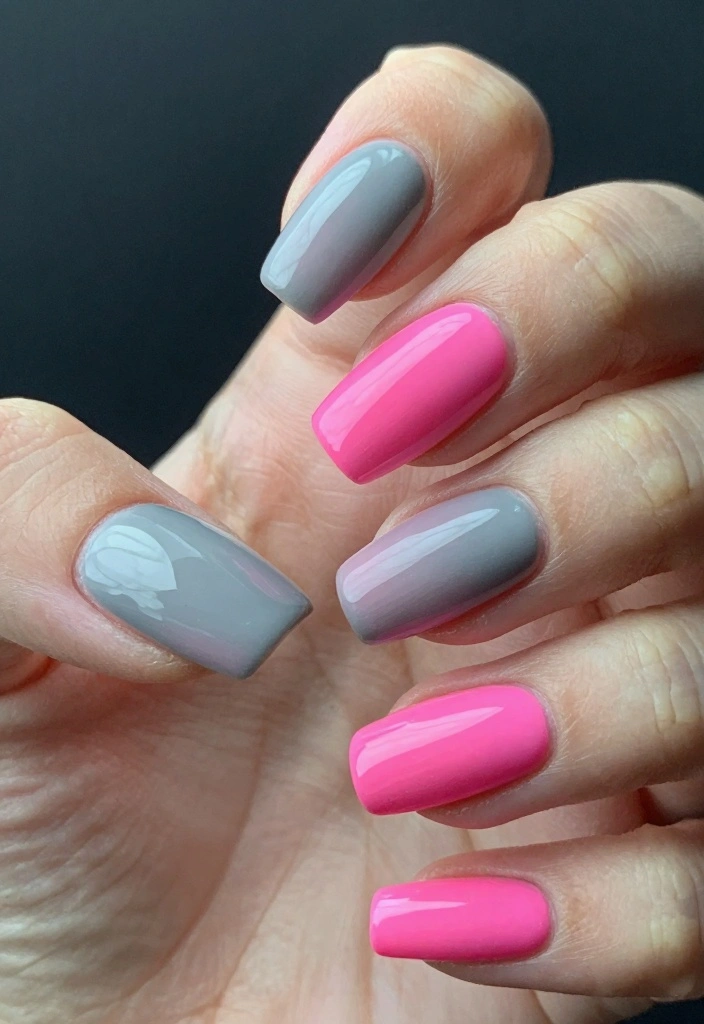
For a striking contrast, the gray to neon pink ombre is the way to go! This bold design is perfect for making a statement and catching everyone’s eye. Start with a light gray base, then blend neon pink at the tips for a dynamic look that stands out.
Enhance the neon effect with a glossy top coat, and consider pairing your nails with bold jewelry for a complete statement look.
Steps to create this design:
– Prepare your nails with a base coat
– Paint the nails with gray polish and let dry
– Apply neon pink at the tips with the sponge and blend
– Finish with a glossy top coat for a pop
11. Rose Gold to Champagne
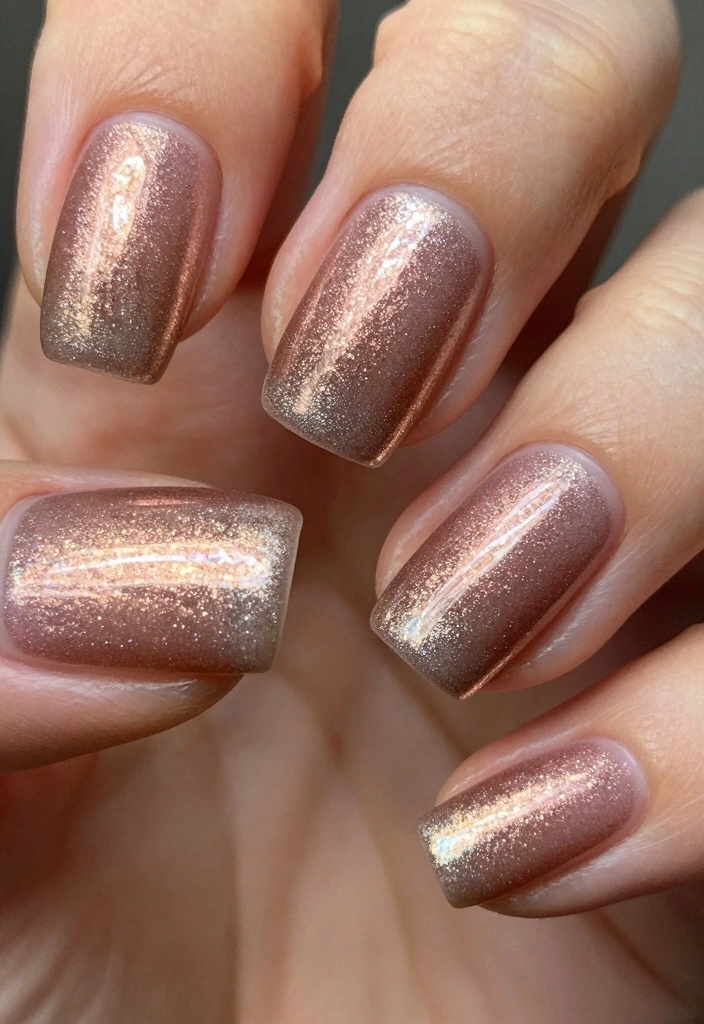
For an elegant and luxurious feel, the rose gold to champagne ombre is unbeatable. This combination embodies sophistication and is perfect for formal events or special occasions. Start with a rose gold base and seamlessly blend champagne at the tips using a sponge for an elegant transition.
Elevate the glam factor by adding fine glitter, and a glossy top coat will further enhance the shine of the design.
Steps to achieve this look:
– Apply a base coat and allow to dry
– Use rose gold polish for the base
– Blend champagne shade at the tips with a sponge
– Finalize with a glossy top coat for shine
12. Pastel Rainbow with Snowflakes
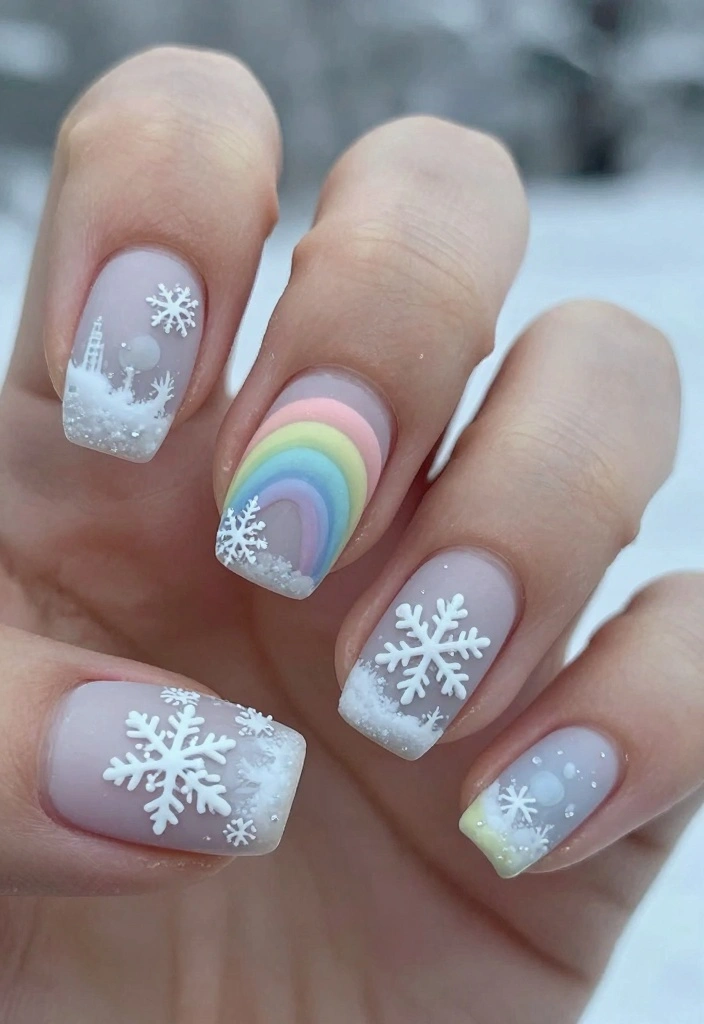
Get festive with a pastel rainbow ombre adorned with delicate snowflakes! This design is perfect for winter celebrations, embracing a fun yet seasonal touch. Start with a soft pastel gradient and use a fine brush to paint tiny snowflakes, creating a magical winter wonderland effect.
For a soft finish that complements the winter theme, use a matte top coat to seal your design and enhance its charm.
Follow these steps:
– Prepare your nails with a base coat
– Blend your favorite pastel colors together for an ombre effect
– Using a thin brush, add white snowflakes
– Seal with a matte top coat for the final touch
13. Earth Tones Ombre
For a more grounded look, try an earth tones ombre featuring shades like brown, tan, and olive green. This design embodies warmth and is perfect for fall. Start with a tan base and blend brown and green for a nature-inspired gradient that feels cozy.
A matte finish suits this design well, enhancing its earthy vibe and adding a touch of sophistication.
Steps to get started:
– Apply the base coat and let dry
– Paint your nails with tan polish
– Blend brown and olive green using a sponge
– Seal with a matte top coat to complete the look
14. Sunset Gradient
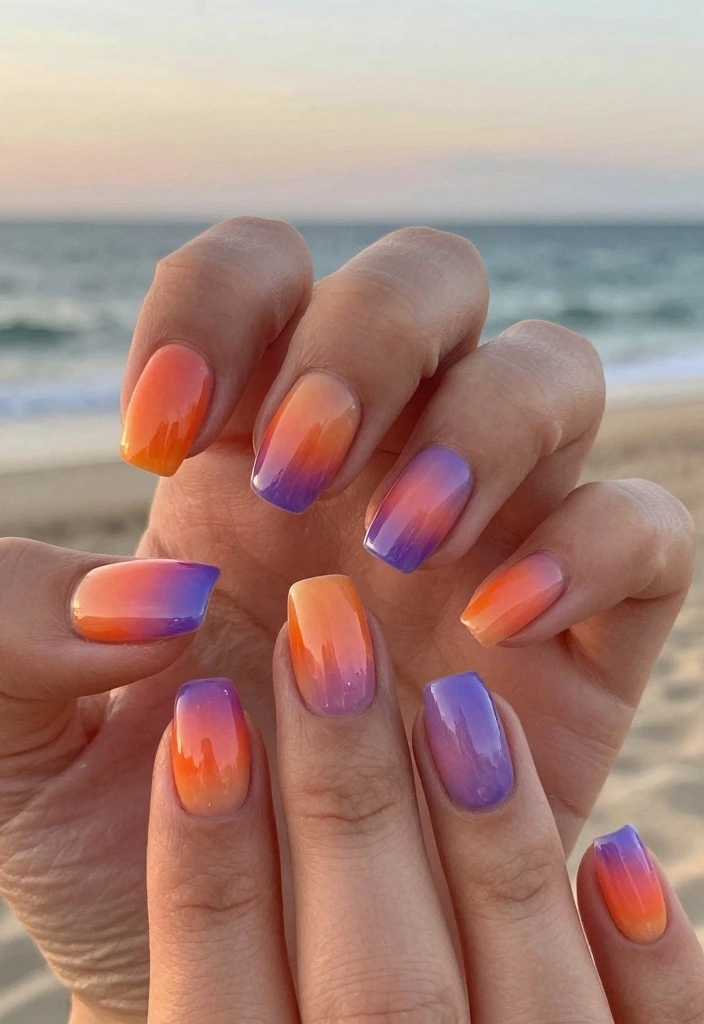
Capture the beauty of a sunset with this gradient ombre combining shades of orange, pink, and purple. It’s a vibrant, eye-catching design that brings a splash of color to any outfit. Start with an orange base coat, using a sponge to layer pink and purple for a stunning sunset effect that’s sure to impress.
Incorporate tiny star or sun decals for an added touch of fun, making your nails even more spectacular.
Steps to create this design:
– Apply a base coat and let dry
– Use orange polish for the base
– Blend pink and purple at the tips with a sponge
– Finish with a glossy top coat for that sunset shine


15. Black to Teal
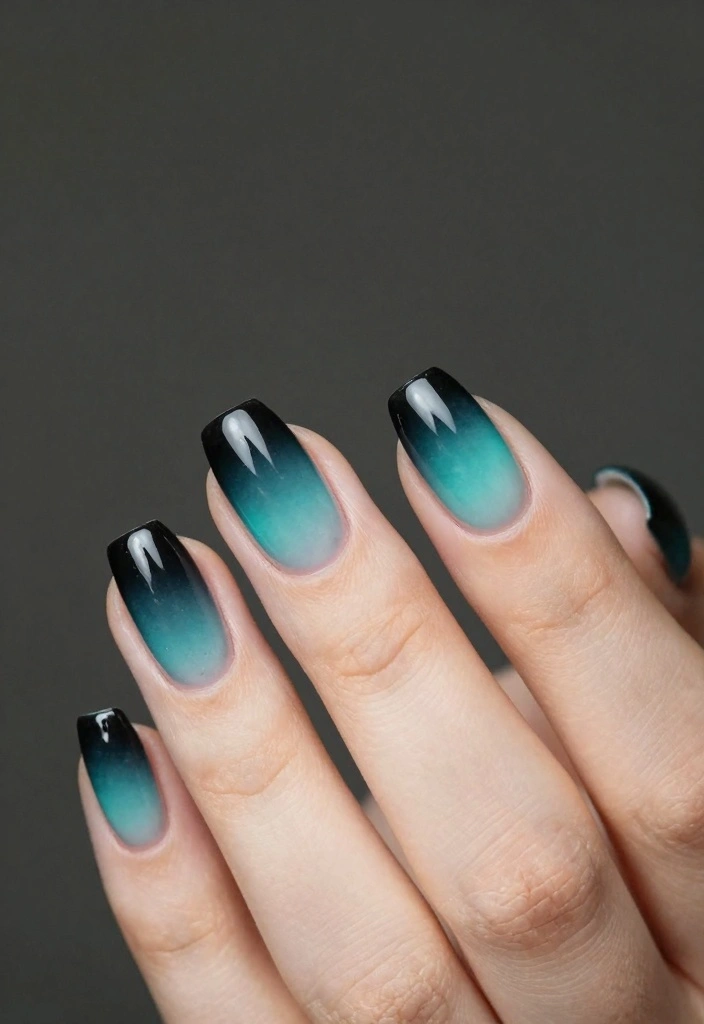
For a dramatic flair, a black to teal ombre is simply stunning. This design stands out and is perfect for making a bold statement. Start with a solid black base and use a sponge to blend teal at the tips for a fierce look that captures attention.
A clear or glossy top coat enhances the contrast between the colors, making them pop even more for a striking finish.
Follow these steps:
– Prepare nails with a base coat
– Paint with black polish and allow to dry
– Blend teal at the tips with the sponge
– Seal with a glossy top coat to complete your look
16. Ombre Glitter Fade
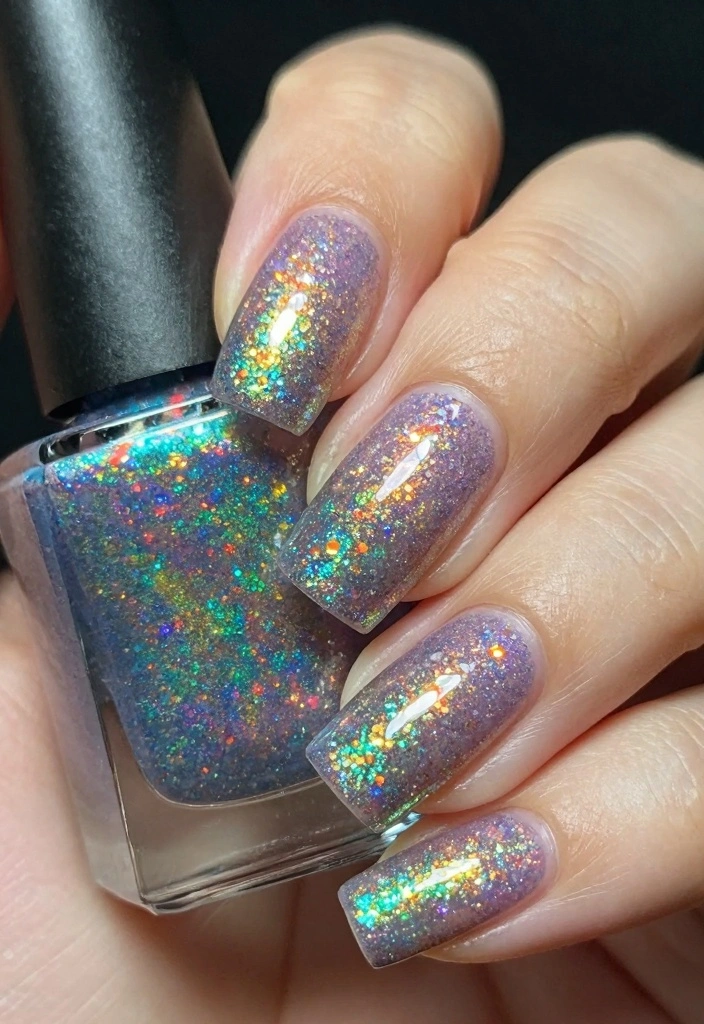
Add some sparkle to your nails with an ombre glitter fade! Starting with your favorite base color, such as soft pink or light blue, blend in glitter polish at the tips for that beautiful shimmer. This design adds glam to any nail art routine, making it perfect for parties or celebrations.
Experiment with different sizes of glitter for added dimension, and a glossy top coat will enhance the sparkle and make your nails shine.
Steps to achieve this look:
– Apply a base coat and let dry
– Paint with your chosen color polish
– Apply glitter polish gradually at the tips
– Finish with a glossy top coat for added shine
17. Sweet Summer Ombre
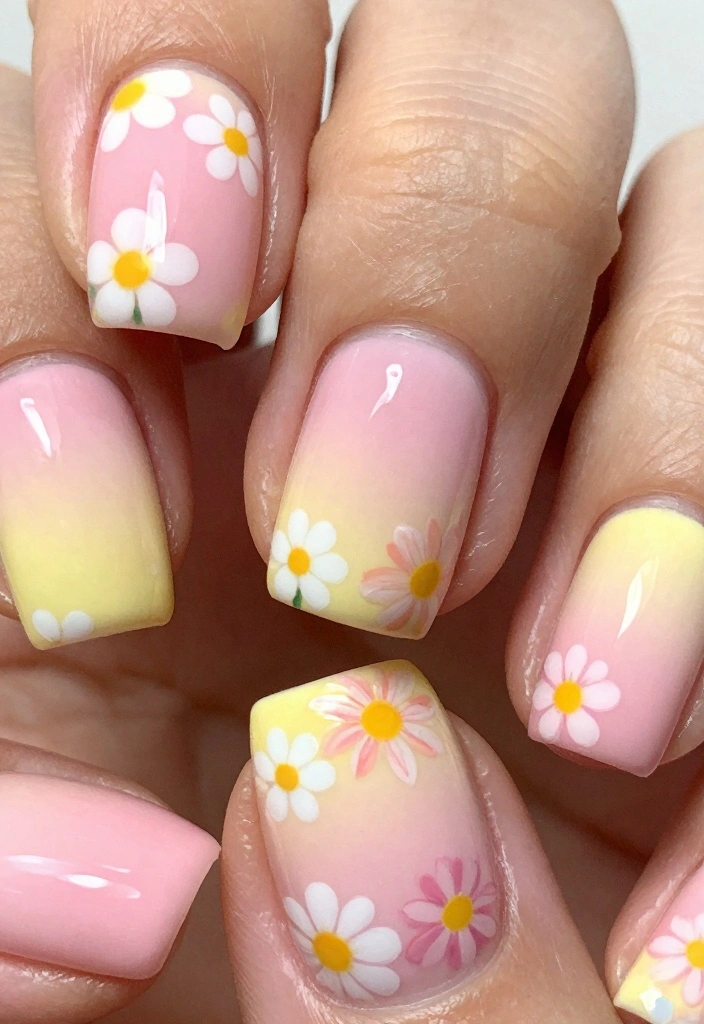
Sweeten up your summer look with a soft pink to pale yellow ombre. This delightful design resonates with sunny days and warm breezes. Start with a soft pink base, then gently blend in a pale yellow for a light and airy feel that captures the essence of summer.
Pair this with dainty floral nail stickers for that perfect summer vibe, adding a playful touch to your nails.
Key steps to create this design:
– Apply a base coat and let dry
– Paint with soft pink polish
– Blend pale yellow at the tips using a sponge
– Seal with a top coat for shine
18. Vibrant Ombre with Nail Art
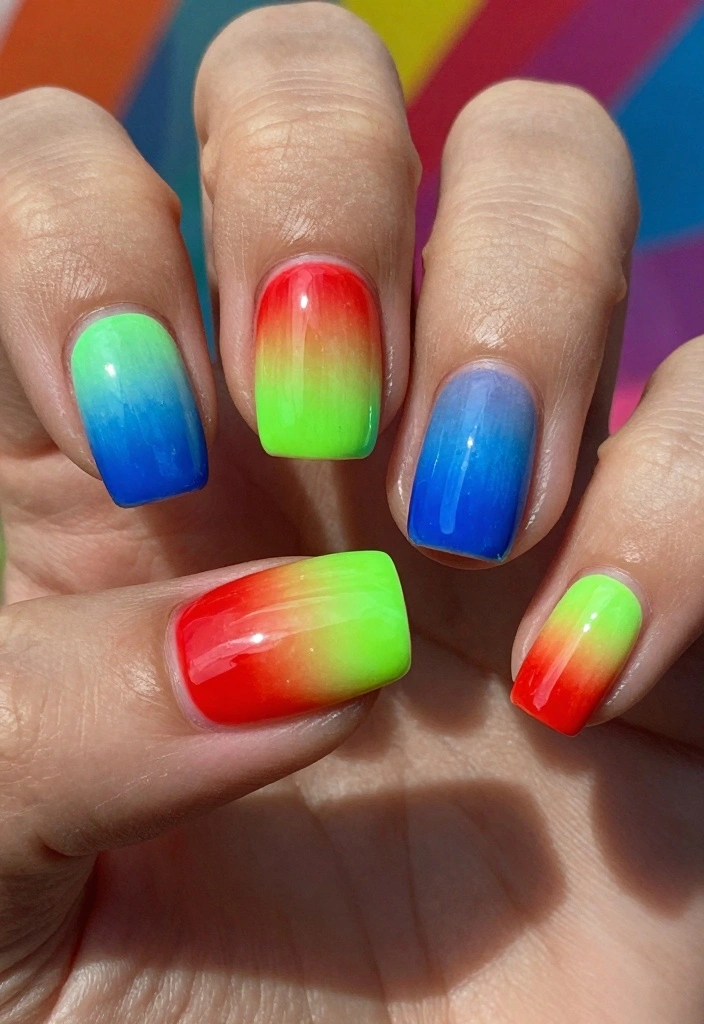
Finish strong with a vibrant ombre featuring colors like bright red, neon green, and electric blue. This design stands out with its bright gradient and can be accentuated with fun nail art for a unique personality. Use a sponge to create the gradient effect, and feel free to add artistic nail designs on top for an extra flair.
Experiment with nail striping tape to create geometric designs over the ombre base, allowing your creativity to shine.
Steps to get started:
– Prepare your nails with a base coat
– Paint with the chosen vibrant colors
– Blend the colors using the sponge for a smooth gradient
– Add any desired nail art and seal with a top coat
Color-block your mood with vibrant ombre nail designs—the secret is a quick sponge blend and a bold nail art layer on top. When the gradient pops, striping tape turns tips into tiny works of art you can wear daily.


Conclusion
Ombre nail designs offer a fantastic range of creative expressions through color blends. With 18 ideas showcased here, your nail artistry can reflect your mood, personality, and style. Whether you’re going for subtle pastel gradients or bold contrasting shades, there’s a perfect ombre design for you. Get inspired, try them out, and don’t forget to show off your beautiful creations!
Happy painting!
Frequently Asked Questions
What are ombre nail designs and how can I create smooth pastel blends at home?
Ombre nail designs are all about fading color from light to dark to create a soft, seamless transition. For pastel blends, start with a clean base and a good base coat to protect your nails.
Pick 2–3 pastel shades that blend well (for example, baby pink, lavender, and mint). Apply a thin layer of the lightest shade as the base. On a makeup sponge, dab the darker shade near the tip and the lightest shade toward the cuticle, then press to transfer the color and create the gradient.
Build up the blend with a couple of light dabs until the transition is smooth, then clean edges with a brush dipped in remover. Finish with a glossy top coat for ombre nail designs that look polished. If you’re using gel polish, cure between layers and seal with a thick top coat for long-lasting gradient nails.
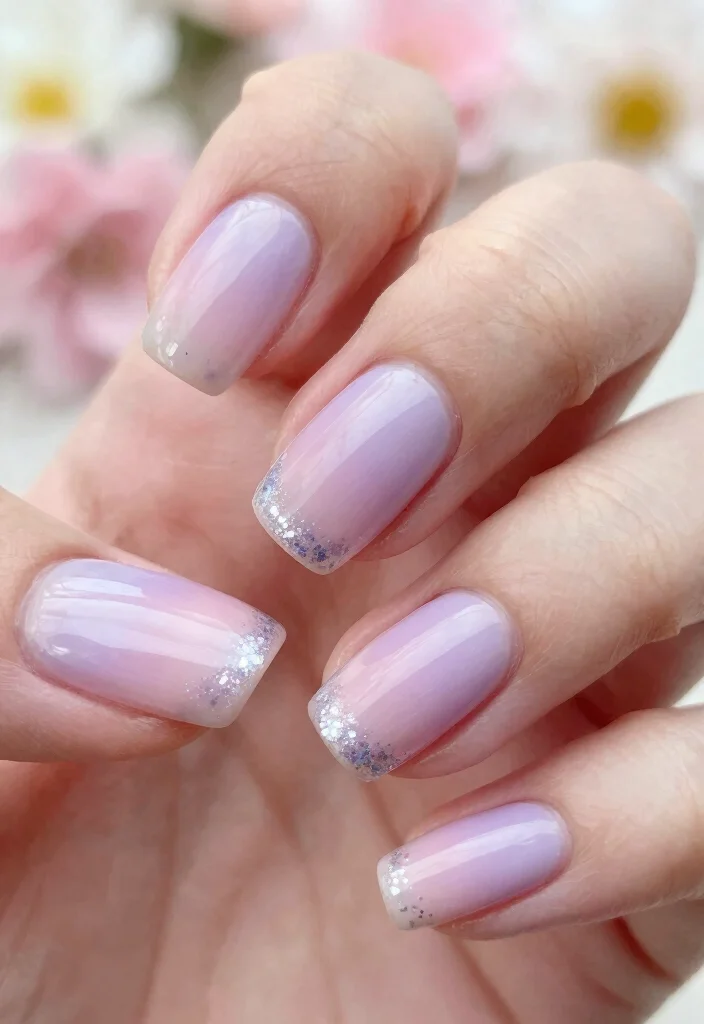
Which pastel color combinations work best for ombre nail designs and how do I pick shades?
Great pastel combos keep things soft and harmonious. Try pink to lavender, peach to pale coral, mint to teal, or lilac to baby blue for gentle gradients. When selecting shades, stick to colors that live in the same family (analogous colors) so the transition stays smooth.
Test swatches on a nail wheel or a fake nail before committing, and start with your lightest shade as the base to make the gradient pop. End with a clear top coat to lock in the color blend and keep your ombre nail designs looking fresh.
What nail design trends include pastel ombre nails and how can I style them creatively?
Pastel ombre pairs beautifully with many trends. Try a minimalist negative-space ombre for a chic look, add a subtle glitter fade for some sparkle, or finish with a matte top coat for a modern twist. You can also blend in tiny foil accents or a glossy jelly finish to keep the look stylish nail ideas while staying true to nail design trends.
To recreate, keep the gradient soft, choose a sheer base, and pick a complementary sheer glitter or foil that won’t overpower the pastel tones. This approach lets your ombre nail designs shine in everyday wear or special occasions.
What tools and techniques deliver flawless gradient nails for ombre nail designs?
For smooth, even gradients, assemble a few essentials: a good base and top coat, 2–3 pastel polishes, a soft makeup sponge, a small detail brush, and a polish remover pen for clean edges.
Technique tips: paint the lightest shade on the nail as a base, apply the darker shade on the sponge, then dab from cuticle to tip to build the gradient. Blend by gently pressing and lifting the sponge to avoid harsh lines. Cure or dry between layers, and seal with a thick top coat to protect the color blend and prolong wear. Your ombre nail designs will look polished and seamless with these color blend techniques.
How long do pastel ombre nails last and how can I keep them looking fresh?
Pastel ombre nails can easily last 1–3 weeks with proper care. Start with a solid base coat, and finish with a durable top coat. Reapply a fresh layer of top coat every 2–3 days to maintain shine and prevent chipping.
Protect your manicure by wearing gloves when cleaning, avoiding acetone removers, and keeping cuticles moisturized with oil. Gentle maintenance keeps your gradient nails vibrant and your ombre nail designs looking salon-new longer.
Related Topics
ombre nail designs
pastel ombre
gradient nails
nail art trends
color blend techniques
stylish nail ideas
beginner friendly
easy nail designs
trendy nail art
summer nails
DIY nail techniques
fashionable manicures